
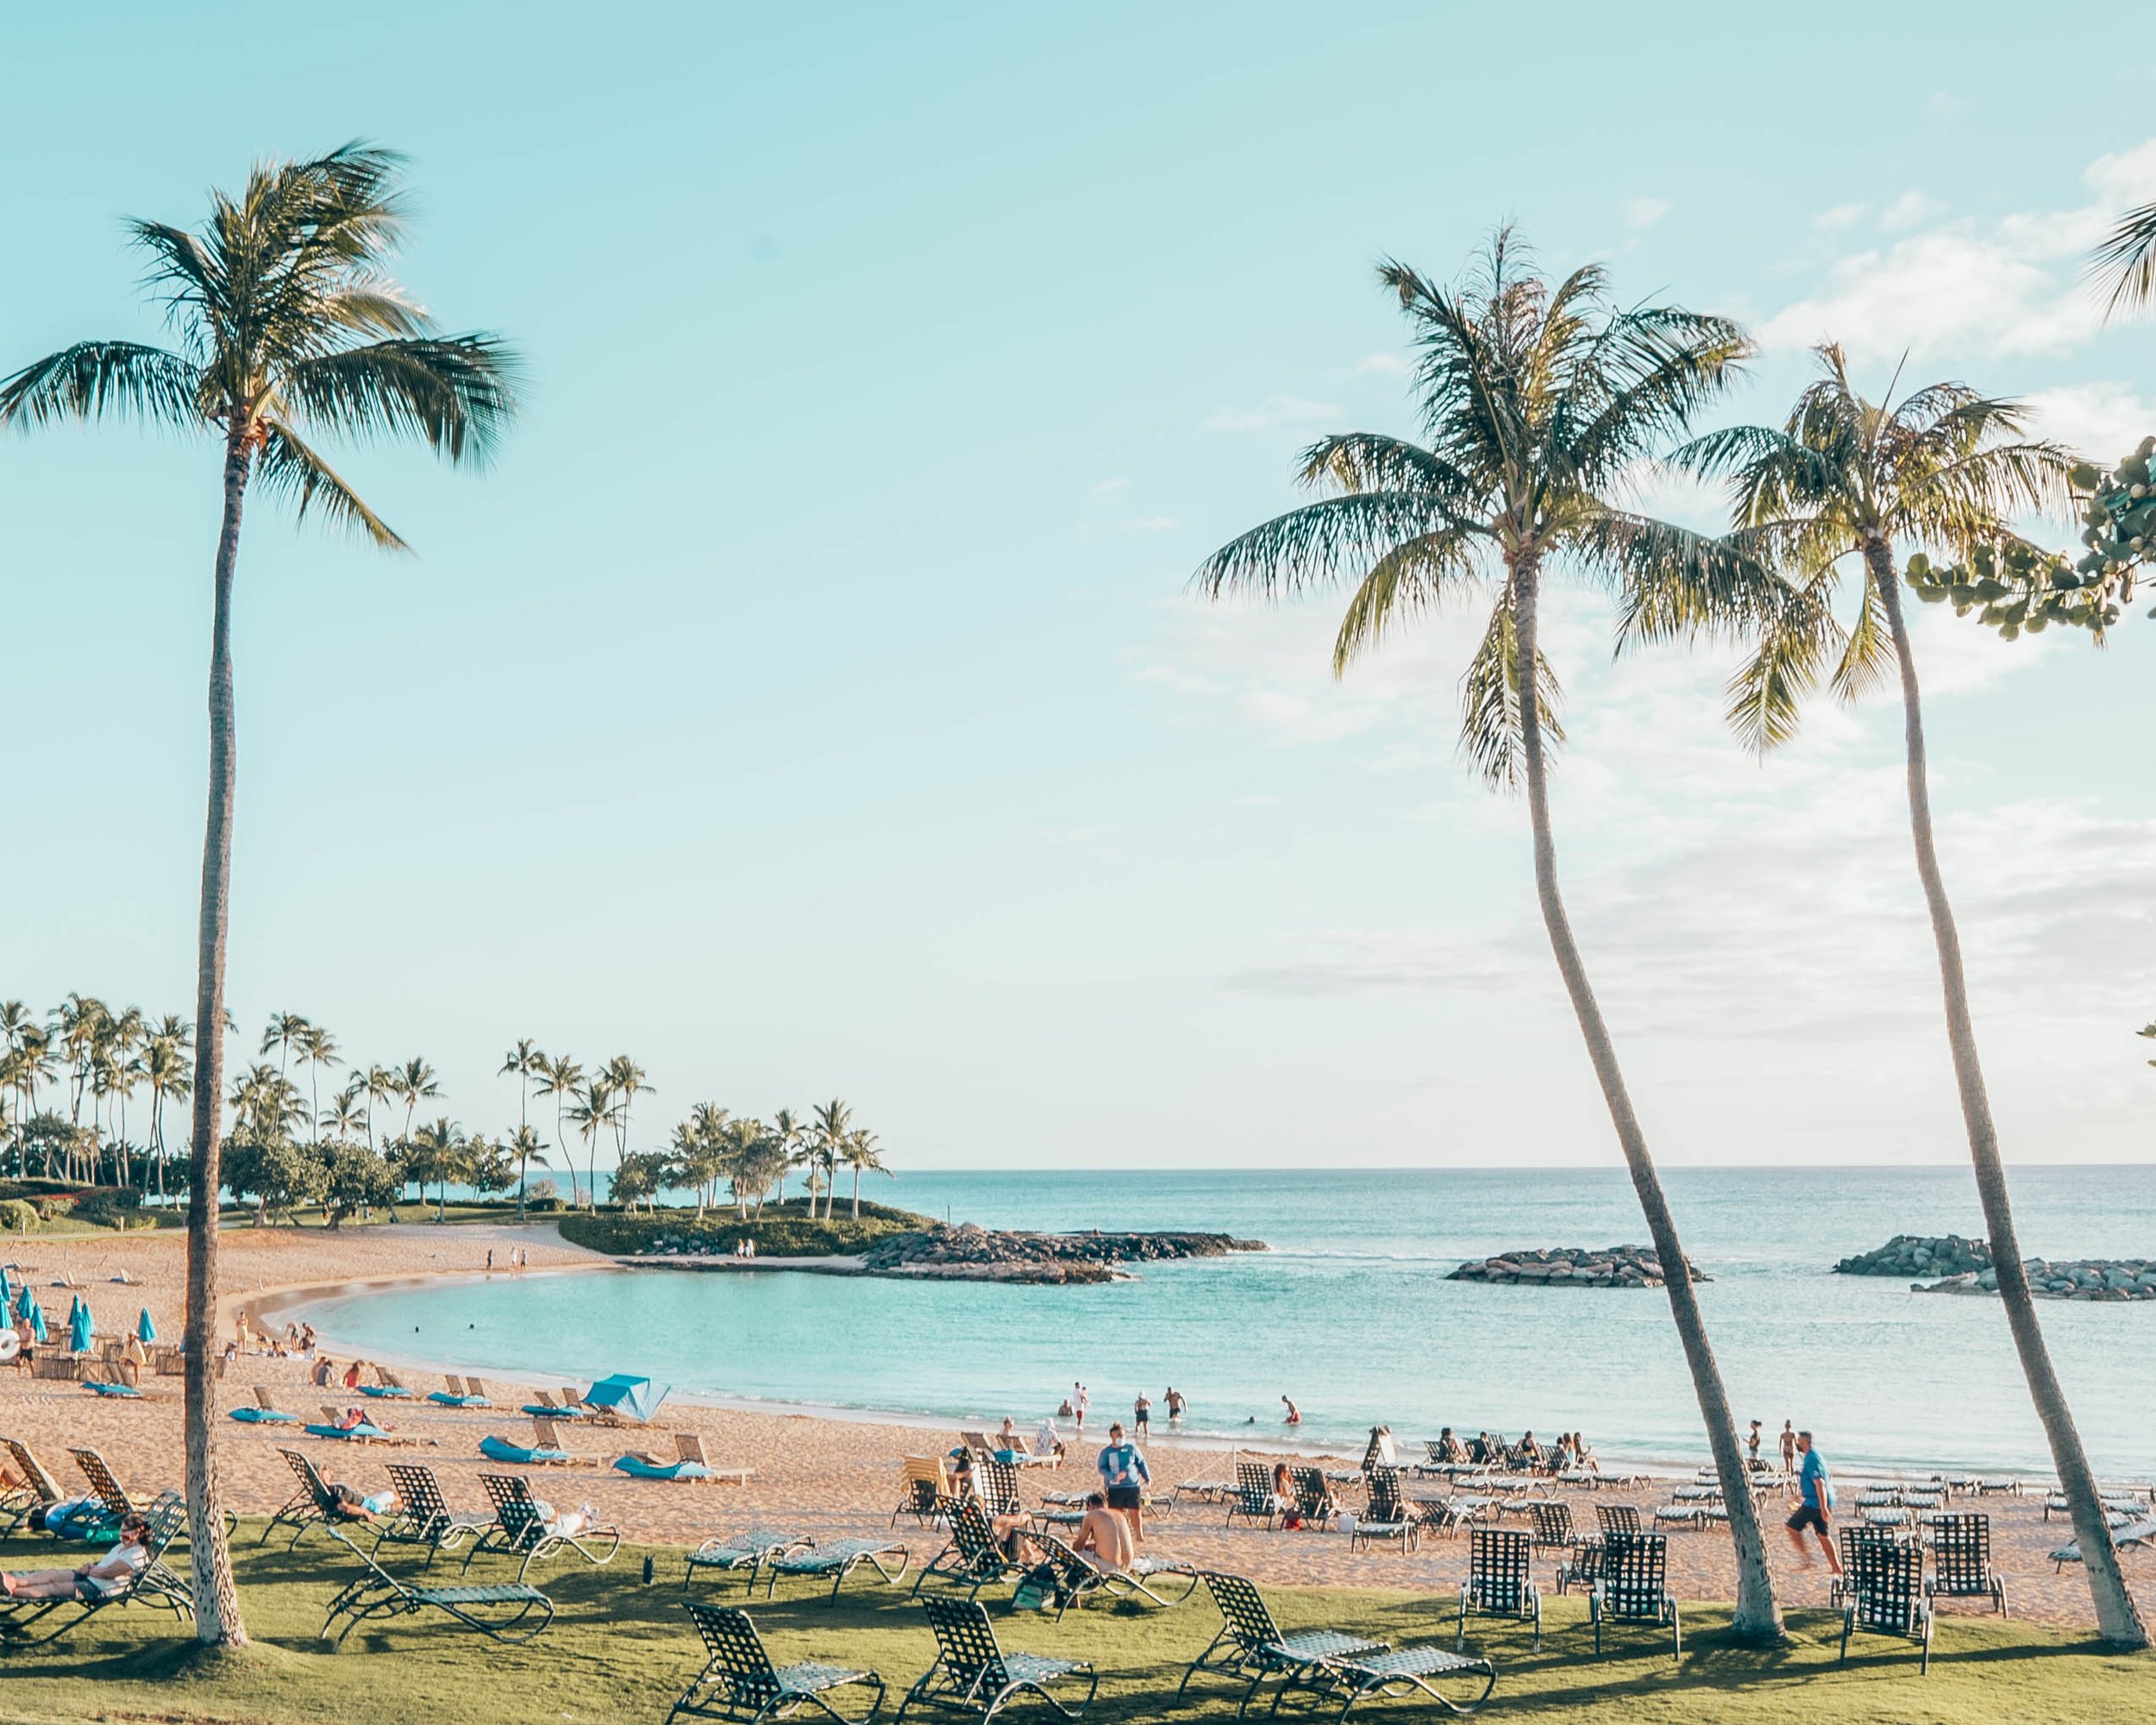
Oahu, Hawaii
1 Week Active Escape based out of Waikiki
Oahu, Hawaii Adventure!
If you ever wanted a jam-packed, active way to make the most of a sunny paradise, this is the itinerary for you! It combines amazing views of lush green forests and seemingly endless, brilliant blue coastlines with hiking, snorkeling, surfing, great food, sky bars, parasailing, and unbeatable sunset spots into an adventuresome seven days.

High-Level Itinerary
Day 1: South Oahu
Waikiki & Diamond Head | Hike, Beach, Surf, Shop, & Dine

Day 2: Southeast Oahu
Koko Head, Makapu’u Lighthouse, & Cockroach Cove | Hike, Beach, & Explore

Day 3: East Oahu
Lanikai Beach & the Mokes | Hike, Kayak, Beach, Burgers

Day 4: West Oahu
Ko Olina & Electric Beach | Snorkel, Luau, & Roasted Pig
Day 5: North Shore
North Shore & Sunrise Shack | Food Trucks, Snorkel, Sky Dive, Beach, Sunset

Day 6: Central Oahu
Lush Rainforests | Take Your Pick of Multiple Hike Options (Stairway to Heaven OR Three Peaks)

Day 7: Go back & explore more!
After having seen so much, today is the day to spend more time in your favorite spots or just relax.


Where to stay?
Top Recommendation - Waikiki Area: For this itinerary, I recommend staying in the Waikiki area, which is the most touristy part of Oahu. It is about 20 to 30 minutes from the airport (see the airport’s location on the map above) and almost all parts of the island are within a 1 to 2 hour drive from Waikiki.
Budget Considerations: If you have a bigger budget, I recommend staying at one of the hotels right on Waikiki beach. If you are looking for something that’s super affordable, there is a row of hostels right near the Waikiki Zoo that always seemed to have a young and active crowd around.
Transportation: Waikiki is a very walkable area with plenty of transport options: Ubers, Lyfts, Lime Bikes, electric scooters, etc. However, once you get outside of Waikiki, transportation can be harder to find: it is unlikely that you find electric scooters and bikes outside of Waikiki and Honolulu. As far as Ubers go, you can certainly Uber out to further destinations but good luck finding one to get back.
If you will be going outside of the main cities of Oahu, I highly recommend finding a car or taking a tour that comes with transportation. There is an app service called Hui that allows you to reserve a car through Hawaii’s largest car sharing networks. There are no lines, free parking in Hui spots, free gas, and you can unlock the car with your app. I used Hui whenever I wanted to venture out of Waikiki. Two words of caution: 1) Book in advance! When I booked three weeks to a month out, I had no problem booking the time I wanted. However, I could never find a car day of and sometimes even two to three days in advance was iffy. 2) Be careful where you go in your Hui. There are some spots on the island where cellular connectivity is very limited but Hui does require cellular connectivity in order to start the car. On the eastern side of the island, I had two instances when I stopped my car in areas where I then realized I had very little cell service and it was challenging to start the car. Just make sure that wherever you park the car, you are getting full bars.
Alternate Recommendation - Lanikai Area: If you are looking for a quieter and less touristy stay, I recommend staying in the Lanikai area, which is nestled right next to the absolutely gorgeous Lanikai Beach. It is about a 45 min drive from Waikiki but there’s plenty to do over there and it has a much more relaxed vibe.


Day 1: South Oahu
Diamond Head & Waikiki
8:00am Breakfast @ Sunrise Shack
8:30am Head to Diamond Head Crater Trailhead
9:00am Hike Diamond Head Crater (1.6 miles round trip)
10:30am Head back to Waikiki
11:00am Waikiki Beach Time! Floatchella, surf, read, relax…
12:30pm Poke @ Maguro Brothers
2:30pm Banan Bowl @ Banan
3:00pm Shower / Clean-up
4:00pm Put name on list at restaurant(s)
4:15pm Explore Waikiki Strip
6:30pm Watch the sunset from Waikiki Beach
7:00pm Dine in Waikiki
8:30pm Drinks @ SKY Bar
Getting There
If you’re staying in the Waikiki area, BOOM, you’re already here! Get ready for a fun day in the sun with all your activities within a short walk, Uber, or lime bike ride.
The map below is illustrative of the route you’ll take if you follow the itinerary. As you can see, the activities have you hopping around in the Waikiki area.
Sunrise Shack!
A glimpse of their menu.
Time: 8:00 to 8:30am
Time Needed: 15 minutes, order online, grab your food, then enjoy on the beach!
Details: Before starting the Diamond Head Hike, head over to Sunrise Shack for a delicious morning smoothie, bowl, or coffee. Located in the heart of Waikiki, the Sunrise Shack is tucked away in one of the buildings. It can be hard to find the first time. Once you’re across the street from the Tesla dealership, walk into the building, and you should see Sunrise Shack on the left as you walk in.
Time-saving Tip: The Sunrise Shack does usually have a line but, conveniently, they also have a great online ordering system. I recommend placing your order ahead of time so you don’t have to wait around.
Back Story: Founded in 2016, Sunrise Shack was created by a group of surfers raised on the Hawaiian Islands who wanted to create a delicious, healthy, uplifting, and sustainably-based food spot. Learn more here.
Alternate Option: If you are doing this days’ itinerary on a Saturday, I recommend grabbing breakfast at the KCC Farmers’ market, which occurs on Saturdays from 7:30 to 11:00am. This farmers market is located right across the street from the Diamond Head hike trailhead and has a ton of different food and beverage options. Though it is technically open until 11:00am, vendors usually starting packing up a little early. That being said, I recommend eating here or grabbing some items to eat before the hike (unless you’re an early riser).
Diamond Head Crater Hike
View from the top of the Diamond Head Trail Lookout.
Time: 9 to 10:30am
Time Needed: 1.5 hours to hike, enjoy a snack at the top, and take a few pictures!
Details: The trail is open from 6am to 4pm and there is a $5 fee for non-Hawaii residents. The hike is 1.6 miles out-and-back paved hike that is pretty easy and safe. Very family-friendly. However, you will be in direct sunlight for most of the hike so come prepared with sunscreen and water.

View of the Diamond Head Crater (what you’ll be climbing) from the Tantalus Lookout.
Relax @ Waikiki Beach

Time: 11am to 2pm
Time Needed: Honestly, you could easily spend all day here! So really, it’s up to you how much time you want to spend at the beach.
Details:
Waikiki beach is popular! Be prepared for a lot of people.
Waikiki is in a very dry spot where it rarely rains! Most days you can expect constant sunshine, 80 degree weather, and an epic sunset.
Activities: Waikiki Beach has something for everyone. Below are a few ideas for what to do at the beach.
Nothing. Just sit and relax. This is underrated!
People-watch
Read a book
Yoga
Take some cute beach photos
Catamaran Cruise (book in advance, they do tend to fill up)
Outrigger Canoe
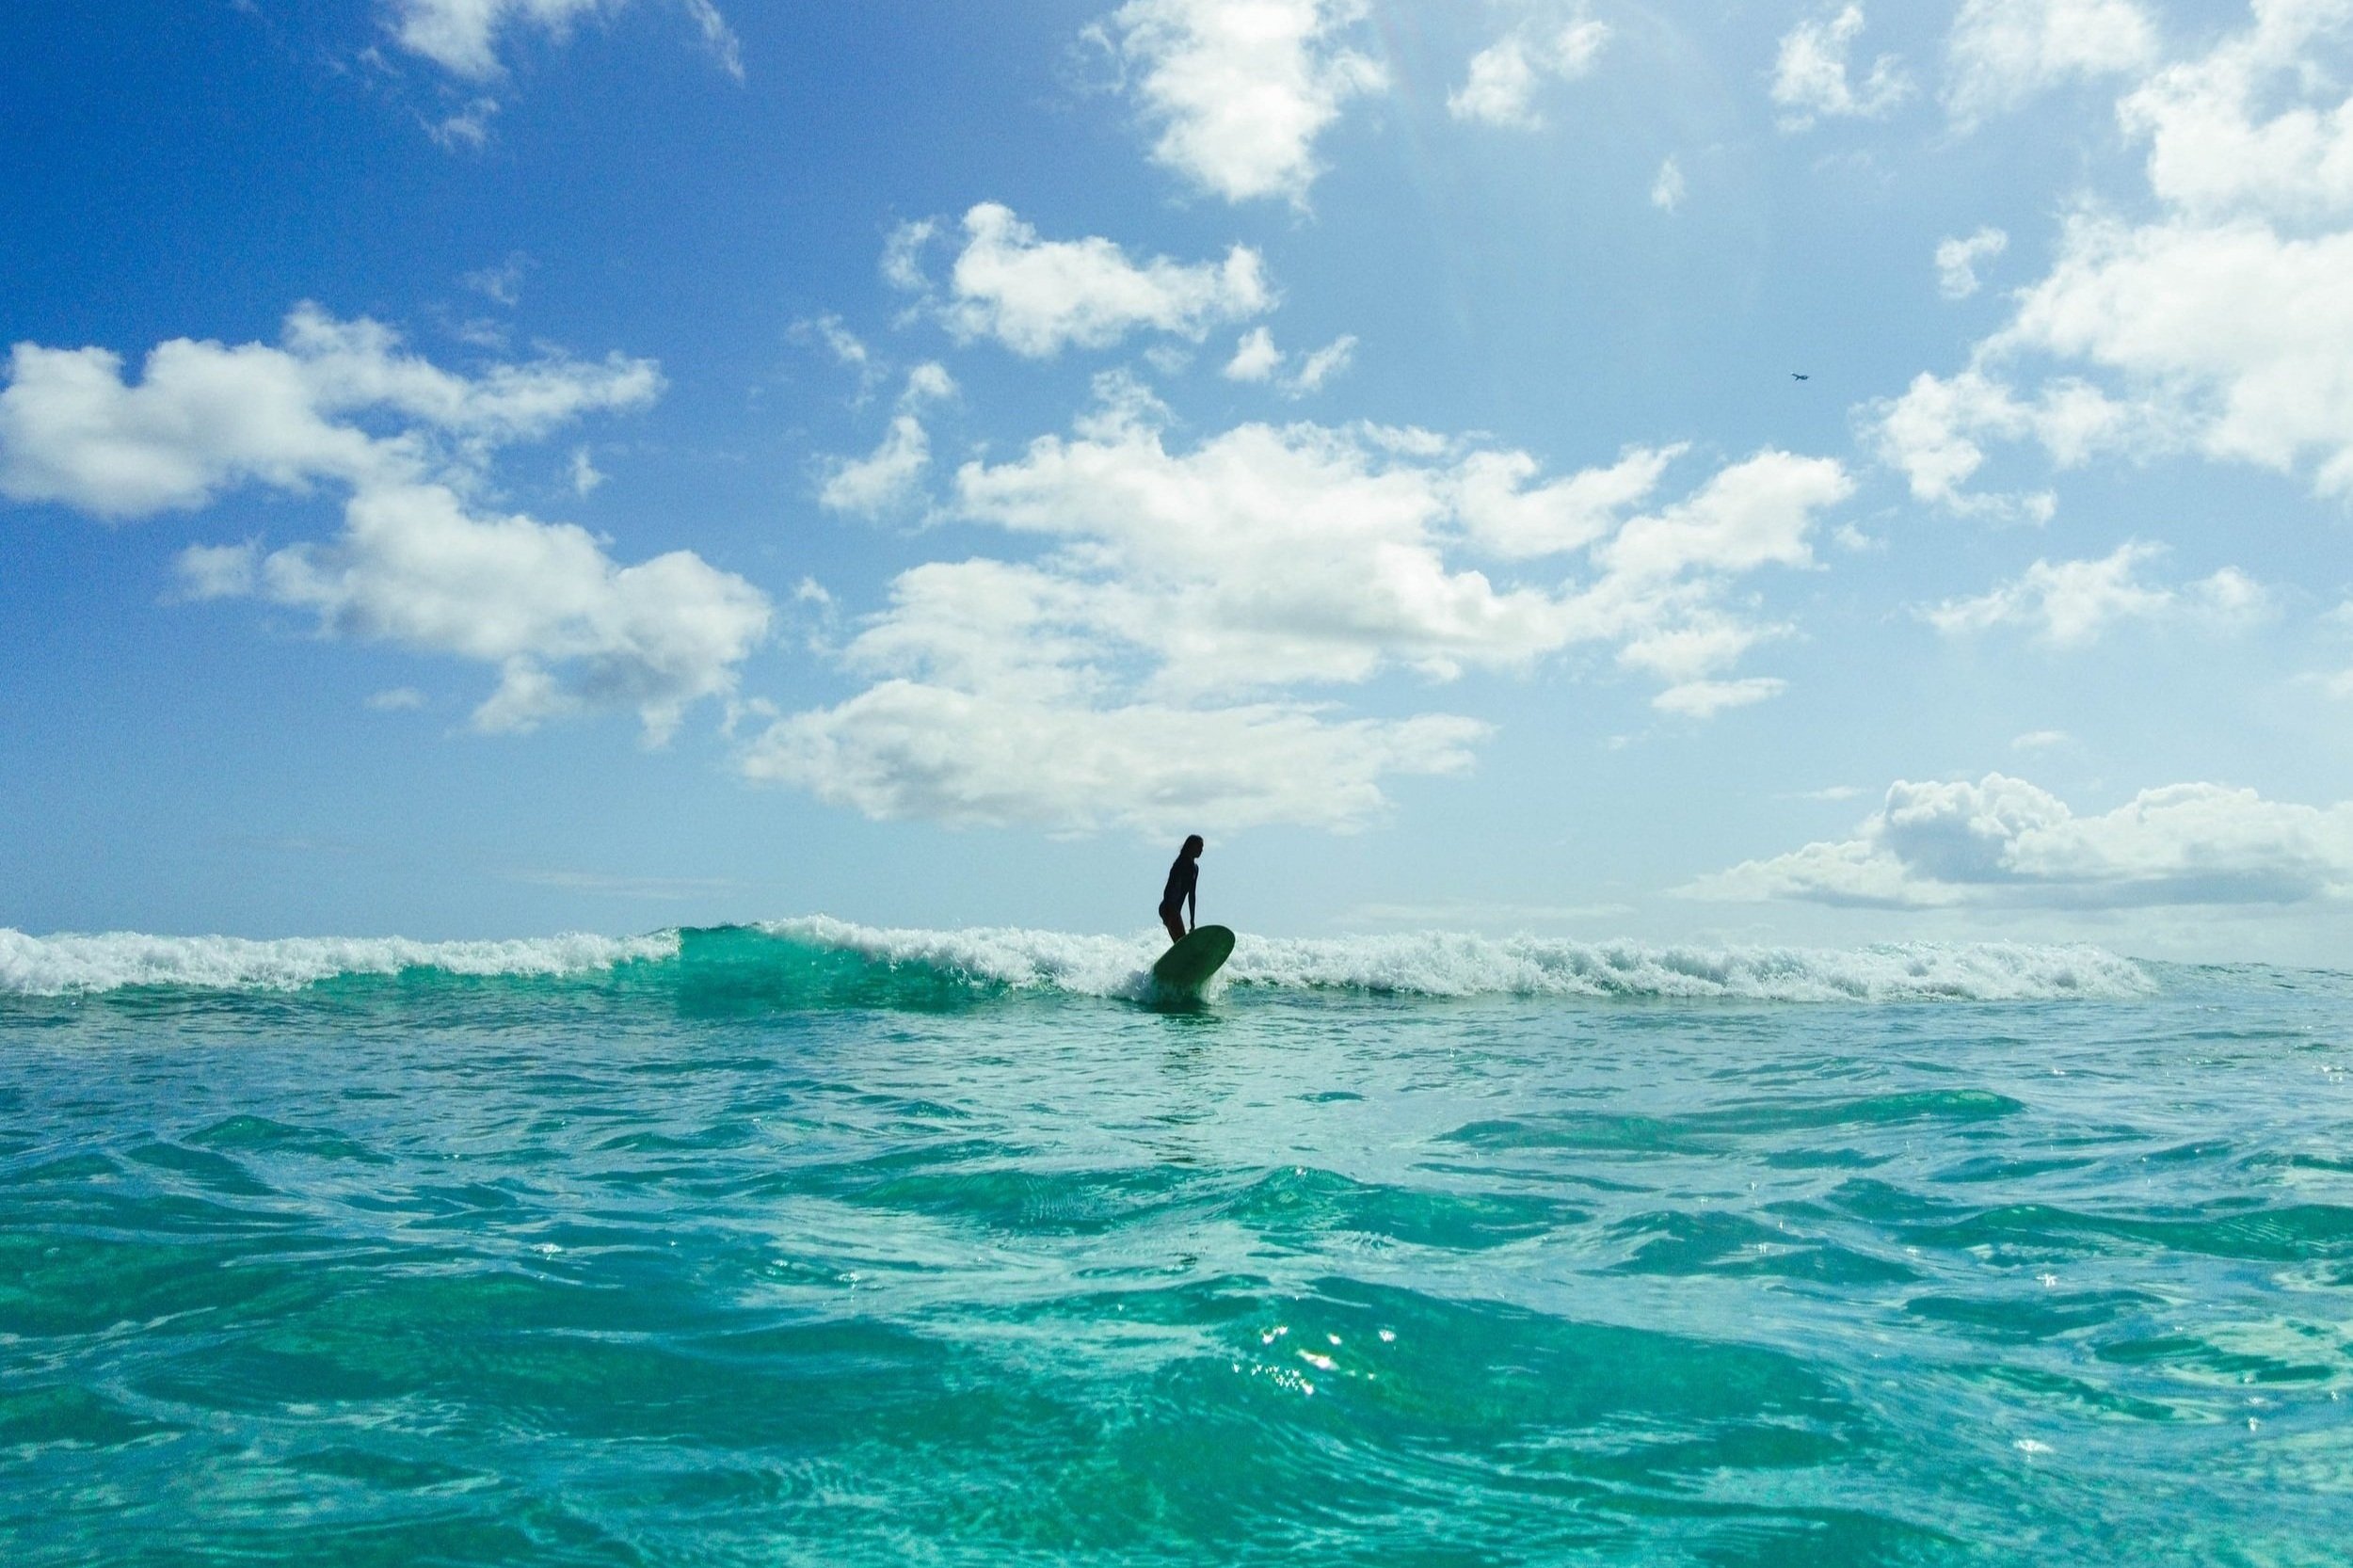
Surf Lesson!
Swim / Hop around in the waves
Float (grab an innertube from an ABC store and float)
Typical Waikiki weather and waves.

On a boat in the Waikiki bay.
Waikiki Floatchella! Grab your favorite beverage and a tube, then let the waves do the rest :)
Surfing: Waikiki has absolutely amazing waves for beginners. They are gentle and pretty consistent most days. However, it is usually very crowded and often there are a lot of beginners who do not know how to control their boards that well. Stay safe and watch out for others! If you do get a surf lesson, I recommend scheduling it for the morning. I got a surf lesson at 4pm and I could tell my instructor was very tired since he had been giving lessons since 9am. The water is also less crowded in the morning and the waves are more consistent.
The Waikiki Surf Zoo! Get a feel for how crowded the surfing can be in Waikiki and what the waves look like.
Grab an afternoon snack!

A Banan Papaya Boat!
If you get hungry in the afternoon, no need to pack everything up! There are plenty of amazing options right around the beach (and swimsuit attire is acceptable).
Poke @ Maguro Brothers. About a block away from the beach, Maguro Brothers offers basic counter-service for a wide variety of poke and sashimi for takeout only, which is perfect because you can head right back to the beach to enjoy your meal.
Banana-Based Snacks @ Banan Hawaii. Right off the beach, Banan transforms Hawaiian grown bananas and other island grown ingredients into dairy-free frozen goodness. While living in Waikiki, this was my FAVORITE beach snack: healthy, quick, and delicious! You can also get your treat in the cutest little papaya boats or pineapple homes.
Mai Tai’s from the Royal Hawaiian. Literally on the beach, you can run up to the Royal Hawaiian and order off their drink menu. Whether you’re in the mood for a Mai Tai or a Pina Colada, their drink menu should have you covered!
Walk Waikiki Strip
Time: 3 to 5pm
Time Needed: 1-2 hours to walk Waikiki strip, explore the stores, and people watch.
Details:
The Strip: Waikiki strip is a ~1 mile strip in the heart of Waikiki with tons of shops, restaurants, and people. It is a super fun area to walk around and explore. There are usually street performers, face painters, and musicians. If you’re lucky you might run into the parrot man, who walks around with parrots and will happily show you their tricks.
Restaurant Wait Times: Before you walk too far, get your name on the list of the restaurant you want to eat at if you don’t already have a reservation! The strategy for the Waikiki walk-in restaurant game is always put your name on the list 1-2 hours before you actually want to eat. That way, you can eat at the best restaurants without being upset, hungry, and inconvenienced by the wait times.
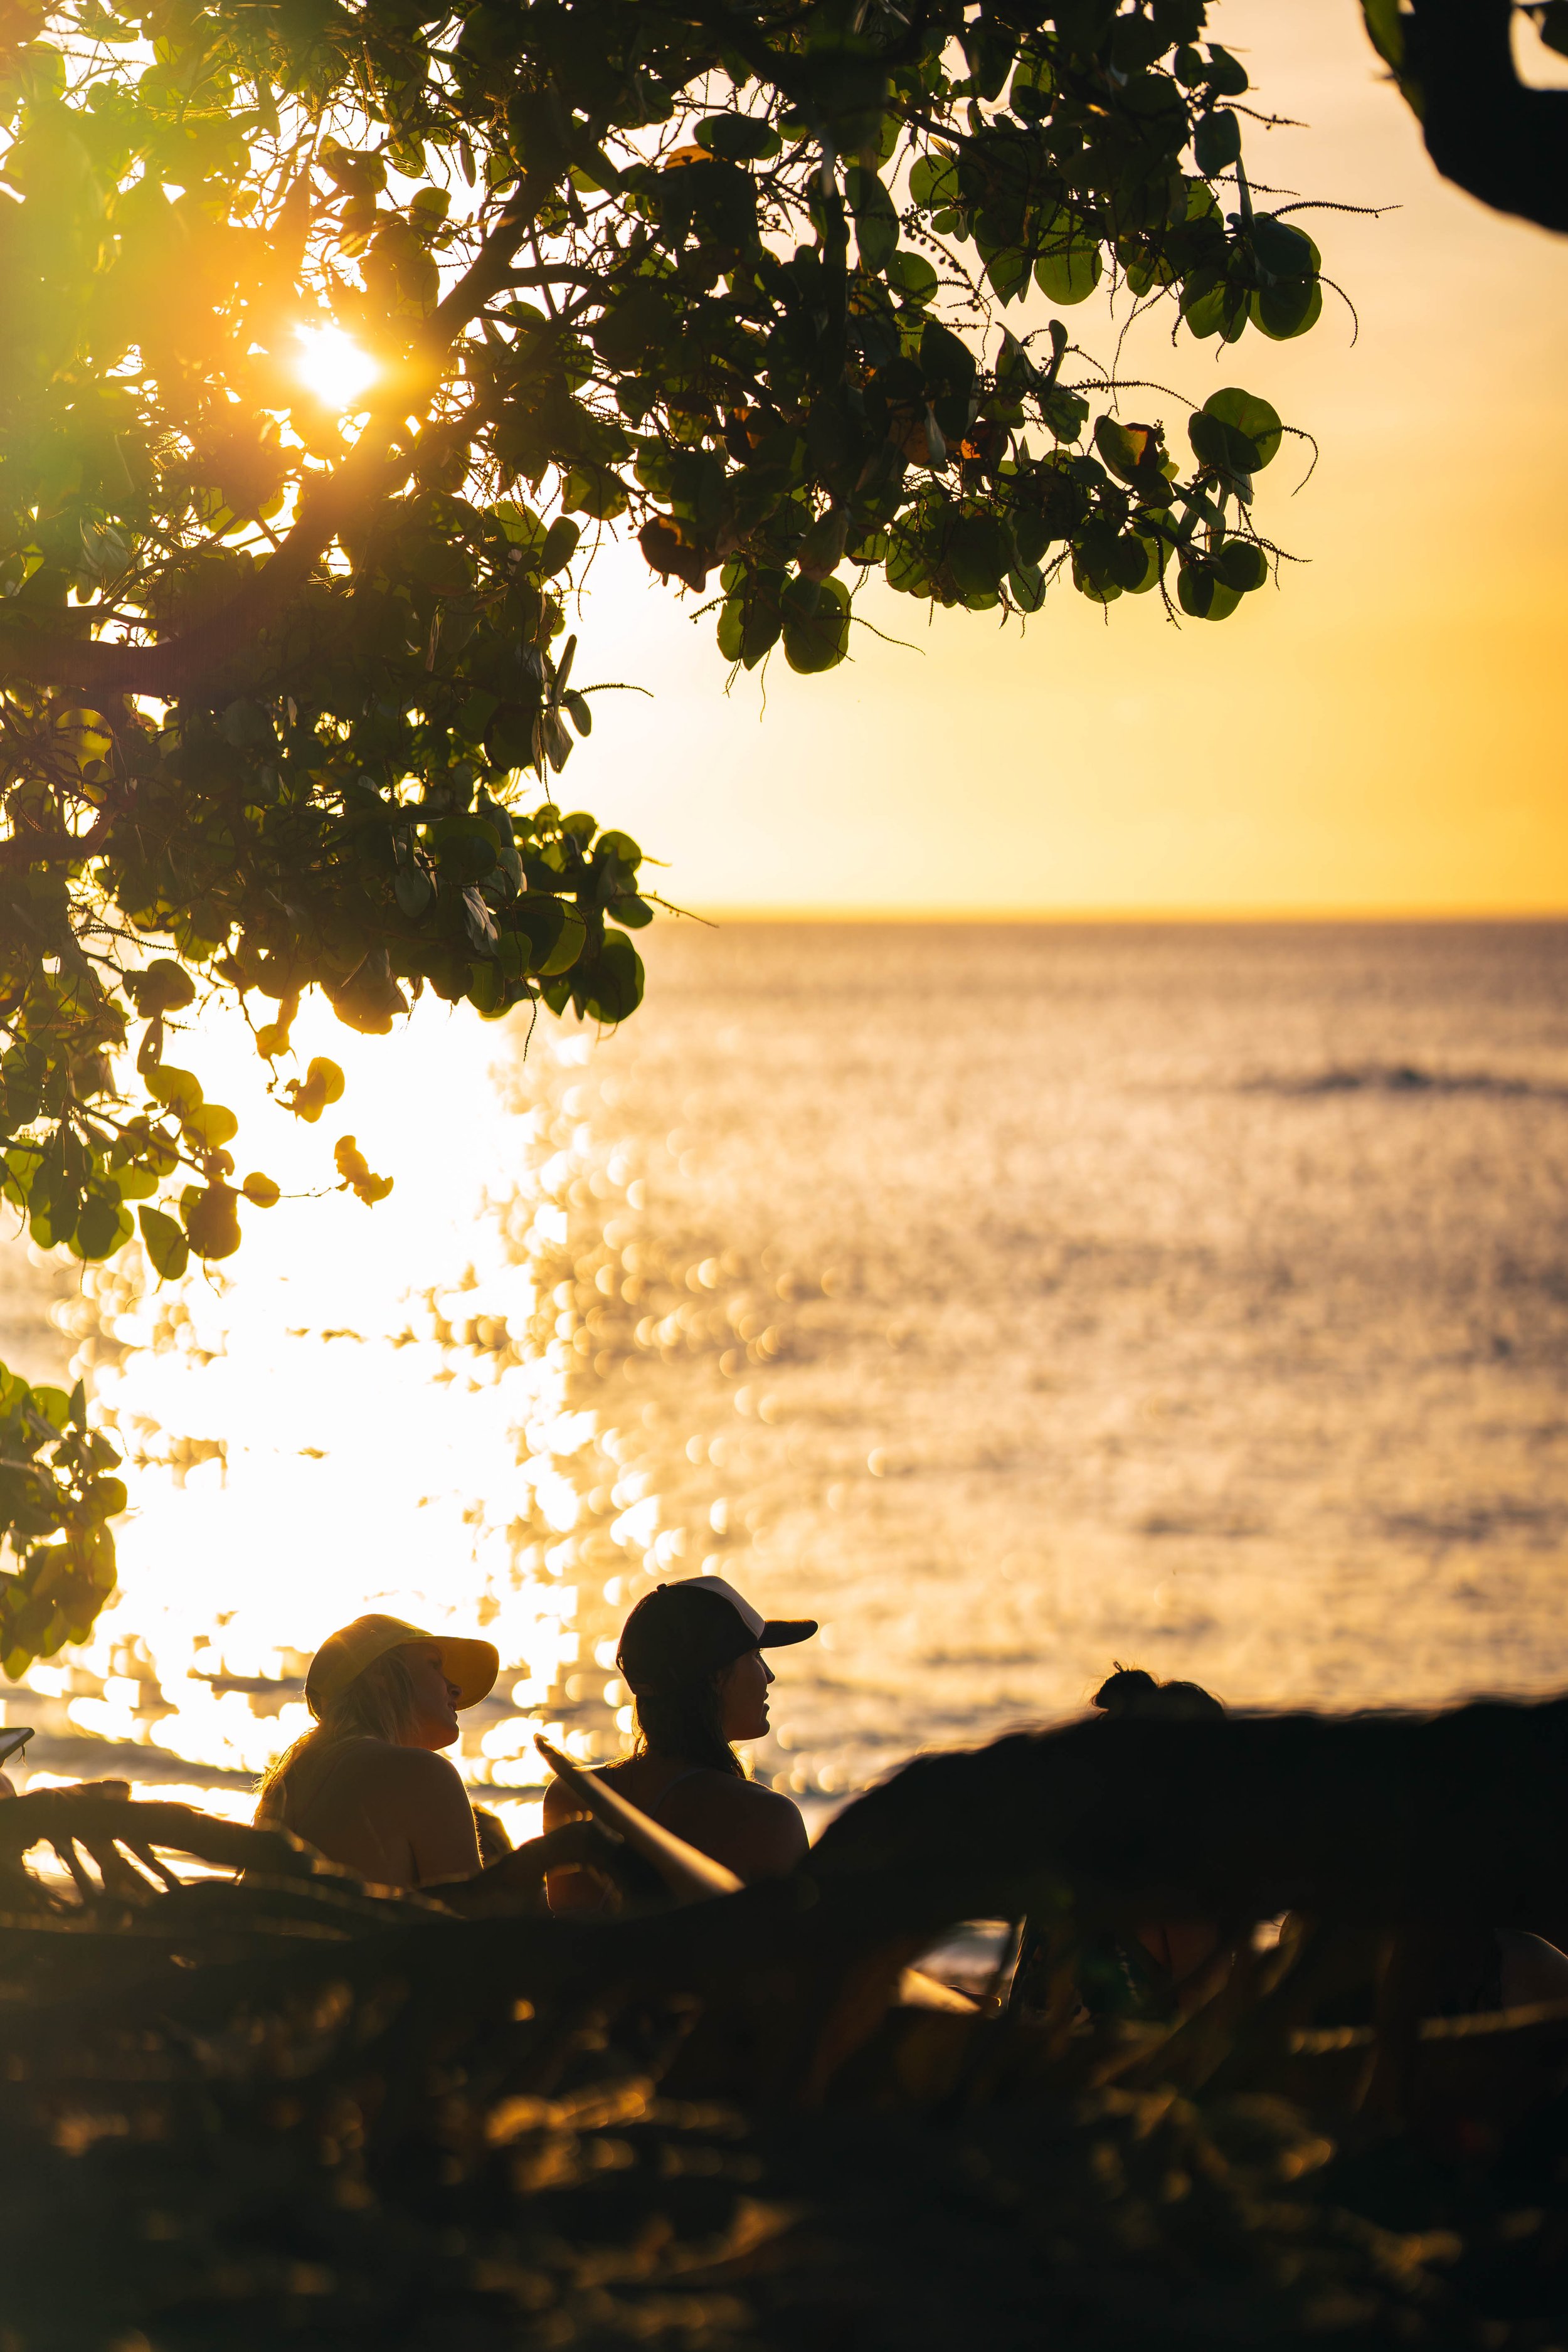
Watch Sunset from the Waikiki Water!
Time: Sunset. Check your weather app for the daily forecast but typically sometime between 6 to 7pm.

Restaurant Tip: Put your name in at a restaurant, then go enjoy the sunset on the beach. Once you’ve showered and cleaned up, it’ll be perfect timing for your reservation.
Description: One day, I was watching the sunset from Waikiki Beach, when I got the sudden urge to swim out and watch the sunset from the water. It was one of the most magical moments of my life. I felt so at peace and content and like, floating there in the ocean with the sun slowly fading, I was part of something much, much bigger than myself.
Warning: Strong swimmers only! Or, paddle out on a surf board.
Dine in Waikiki!
Time: 5 to 6:15pm or 7 to 8:30pm (Try to be at the beach at sunset!! Sunset usually occurs between 6:15 to 7pm. Or, SKY Bar is a great place to watch sunset.)
Time Needed: 1-2 hrs
Details: Due to how busy restaurants are in Waikiki, make sure to plan ahead. Have a place in mind, then: 1) if possible, make a reservation, 2) if walk-ins only, put your name on the list 1-2 hours before you want to eat, or 3) be prepared to wait.
Favorite Restaurants:
Duke’s Waikiki. Located right on the beachfront, Duke’s is a very popular (and touristy) restaurant known for it’s awesome, tropical drinks and resort-style Hawaiian vibe. This is a family-friendly place to go if you want something a little more upscale. Given the touristy nature, it is a little pricey. The back story of Duke’s is pretty legendary. The restaurant is named after Duke Kahanamoku, who rode a monster wave for 1.25 miles at Waikiki in 1929, which is likely the longest ride in modern times.
Tlacuaches 808 Food Truck. Looking for something fast, quick, and SO good. Try Tlacuaches food truck, which services Mexican homestyle dishes such as tacos, wraps, salads, & nachos. As of now, the food truck is open from 2 to 9pm every day except for Wednesday and Thursday.
SKY Waikiki Raw & Bar. SKY Bar offers an elevated guest experience in an open-air lounge atop a 19-story building featuring happy hour and light bites. It is pricey and the real value is the view not the food! If you’re looking for ambience, this it it. I recommend putting your name on the list 1-2 hours before you plan to go and getting drinks only, while enjoying the view.
Day 2: Southeast Oahu
Koko Head & Makapu’u Lighthouse
9:00am Drive to Koko Head Trailhead
9:30am Hike Koko Head & Enjoy A Breakfast Picnic at the top
11:00 am Head to Cockroach Cove
11:30am Relax at Cockroach Cove (Picnic Lunch)
2pm Drive to Makapu’u Lighthouse
2:30pm Hike Makapu’u Lighthouse Trail
3:30pm Enjoy Makapu’u Tide Pools
5:30pm Head to a Sunset Spot
6:00pm Watch the Sunset
7:00pm Head back to Waikiki
7:30pm Dinner in Chinatown
Getting There
You will need a car for this day! DO NOT rely on an Uber for this day’s itinerary. If you don’t have a car, I recommend reserving a HUI ahead of time. A few things to note: service can be spotty out in the southeast and Ubers rarely travel that far out. Don’t get stranded.
Once you have a car to take you around, you can head east to explore a number of different spots on the southeast corner of Oahu. It’s about 40 minutes all the way out to the Makapu’u Lighthouse.
Koko Head Hike
Koko Head Crater. On the hike, you’re climbing up the left side of Koko Head.
View of the crater from the back-side (on the road to the Makapu’u Lighthouse).
Time: 9:30 to 11:00am
Time Needed: 1.5 hours to hike, enjoy breakfast or a snack at the top, and take a few pictures!
Details:
With over 1,047 steps, Koko Crater Trail, better known as “Koko Head Stairs”, is nature’s stair master with an epic panoramic view at the top.
Not going to lie, this is a HARD hike! It is basically stairs straight up. If you sprint, it can take 15 minutes; if you take a lot of breaks, it can take 90 minutes to climb. I’ve climbed it twice: the first time I did it with my family and it took us about 40 minutes up; the second time I did it by myself as a workout and it took me about 22 minutes.
The view is incredible when you get to the top. Both times I didn’t bring any food with me and I definitely wished I had a picnic to eat at the top!

Aerial view of the stairs… there’s not really that many, right?

If you’re looking for a workout, look no further! If you want a challenge, see how quickly you can climb the stairs. Just be careful not to go too fast, as there are a lot of opportunities for missteps on the climb.
Explore Kalaniana’ole Highway | Cockroach Cove

The Kalaniana’ole Highway, leading out to the most southeastern point on Oahu.
Time: 11am to 2pm
Time Needed: Honestly, you could easily spend all day here! So really, it’s up to you how much time you want to spend at various spots along the road.
Details:
Just past Koko Head, you’ll get onto Kalaniana’ole Highway, which is the only oceanside road that goes out to the Maka'pu’u Lighthouse from Waikiki.
There are a ton of incredible spots to stop and explore! I’ve listed all my favorite spots in my preferred order below. You can decide what you’re up for, whether that’s more hiking or just finding a nice spot to sit on a beach.
There are not a lot of food spots out here, if any! I would bring all my own food for any meals you want to have while exploring the southeastern portion of the island.

Aerial view of the Kalaniana’ole Highway. This is the base of Koko Head.
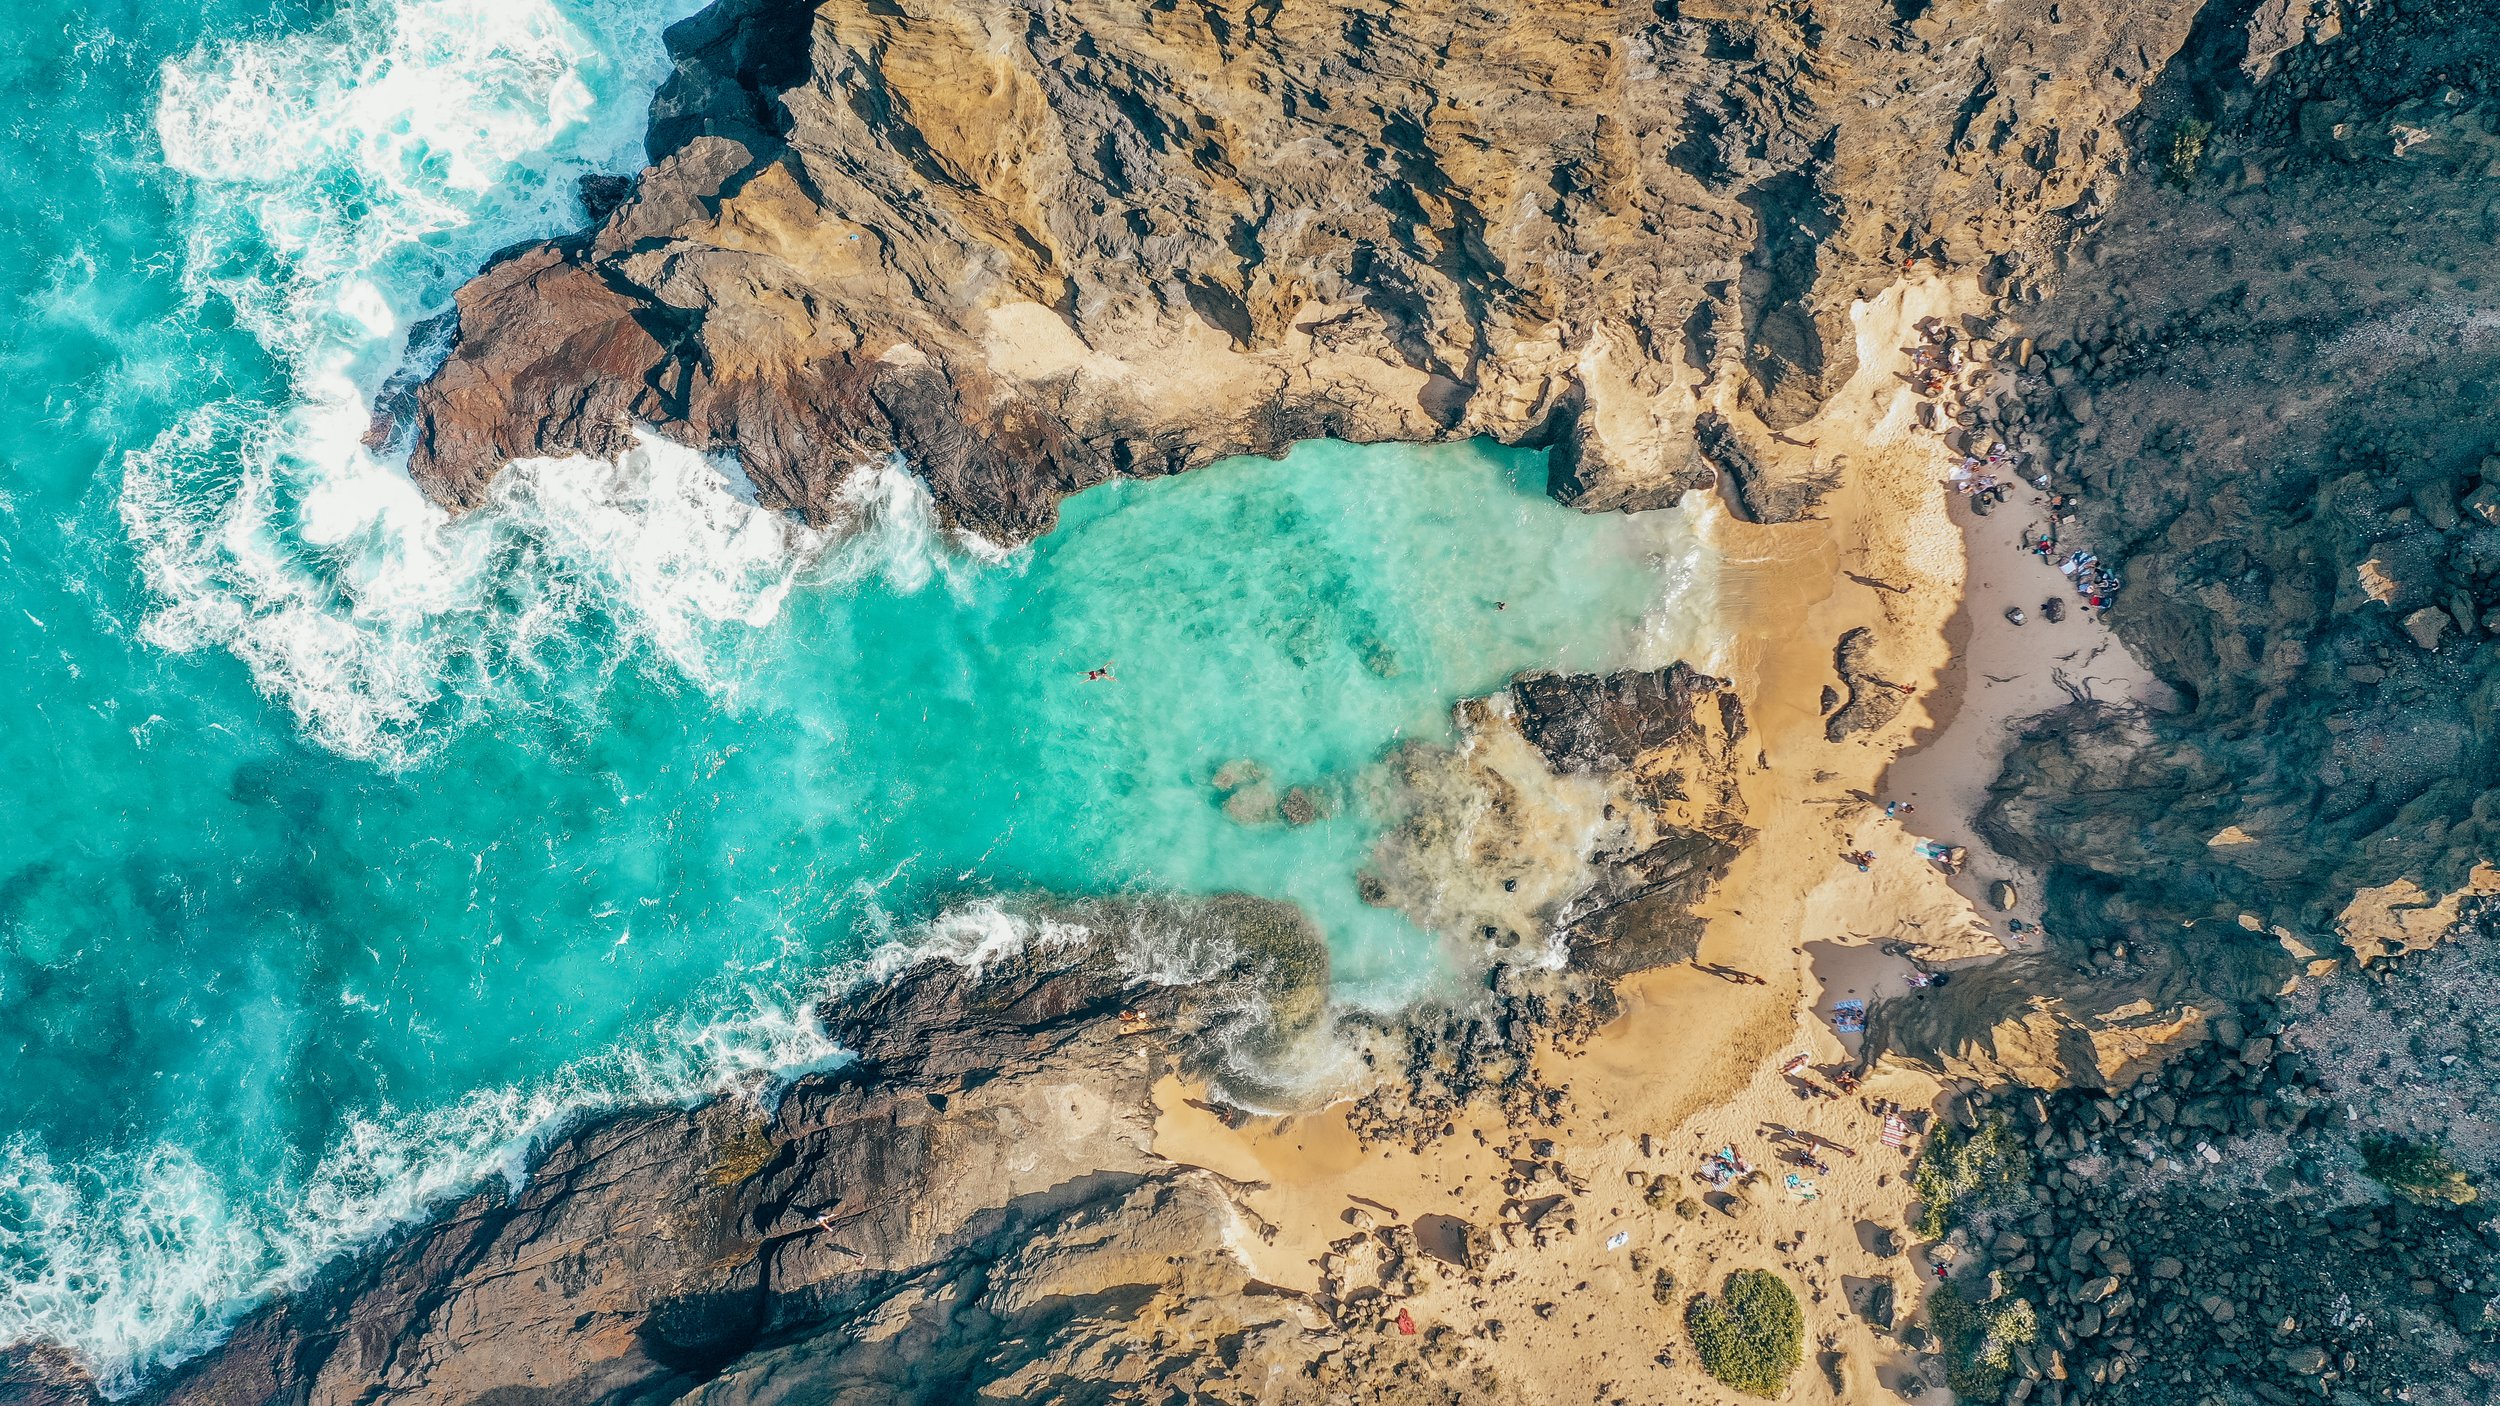
Cockroach Cove
Believe it or not, this oddly-named beach is literally right off the highway. There’s a parking lot for easy parking. Then, after a short and relatively easy (0.1 mile) climb down, you’re at a beach that’s perfect for relaxing or wave jumping.


Halona Blowhole
The blowhole is a fun stop. Every so often, the blowhole will shoot water up to 30 feet into the air from a lava tube. This is not constant so you may not see it when you visit. However, the area itself is beautiful and definitely worth a stop!

View to the right from the Koko Crater Arch.

Koko Crater Arch Hike
This ~1.25 mile hike is relatively short and easy elevation-wise. I recommend parking in the Halona Blowhole area then walking up the road to the hike. I did feel like actually getting to the arch was a little dangerous… Near the arch, it’s kind of like a steep slab of rock that you climb up. Physically, it’s not that challenging; but mentally, it’s a little intimidating. I would not recommend for little kids.
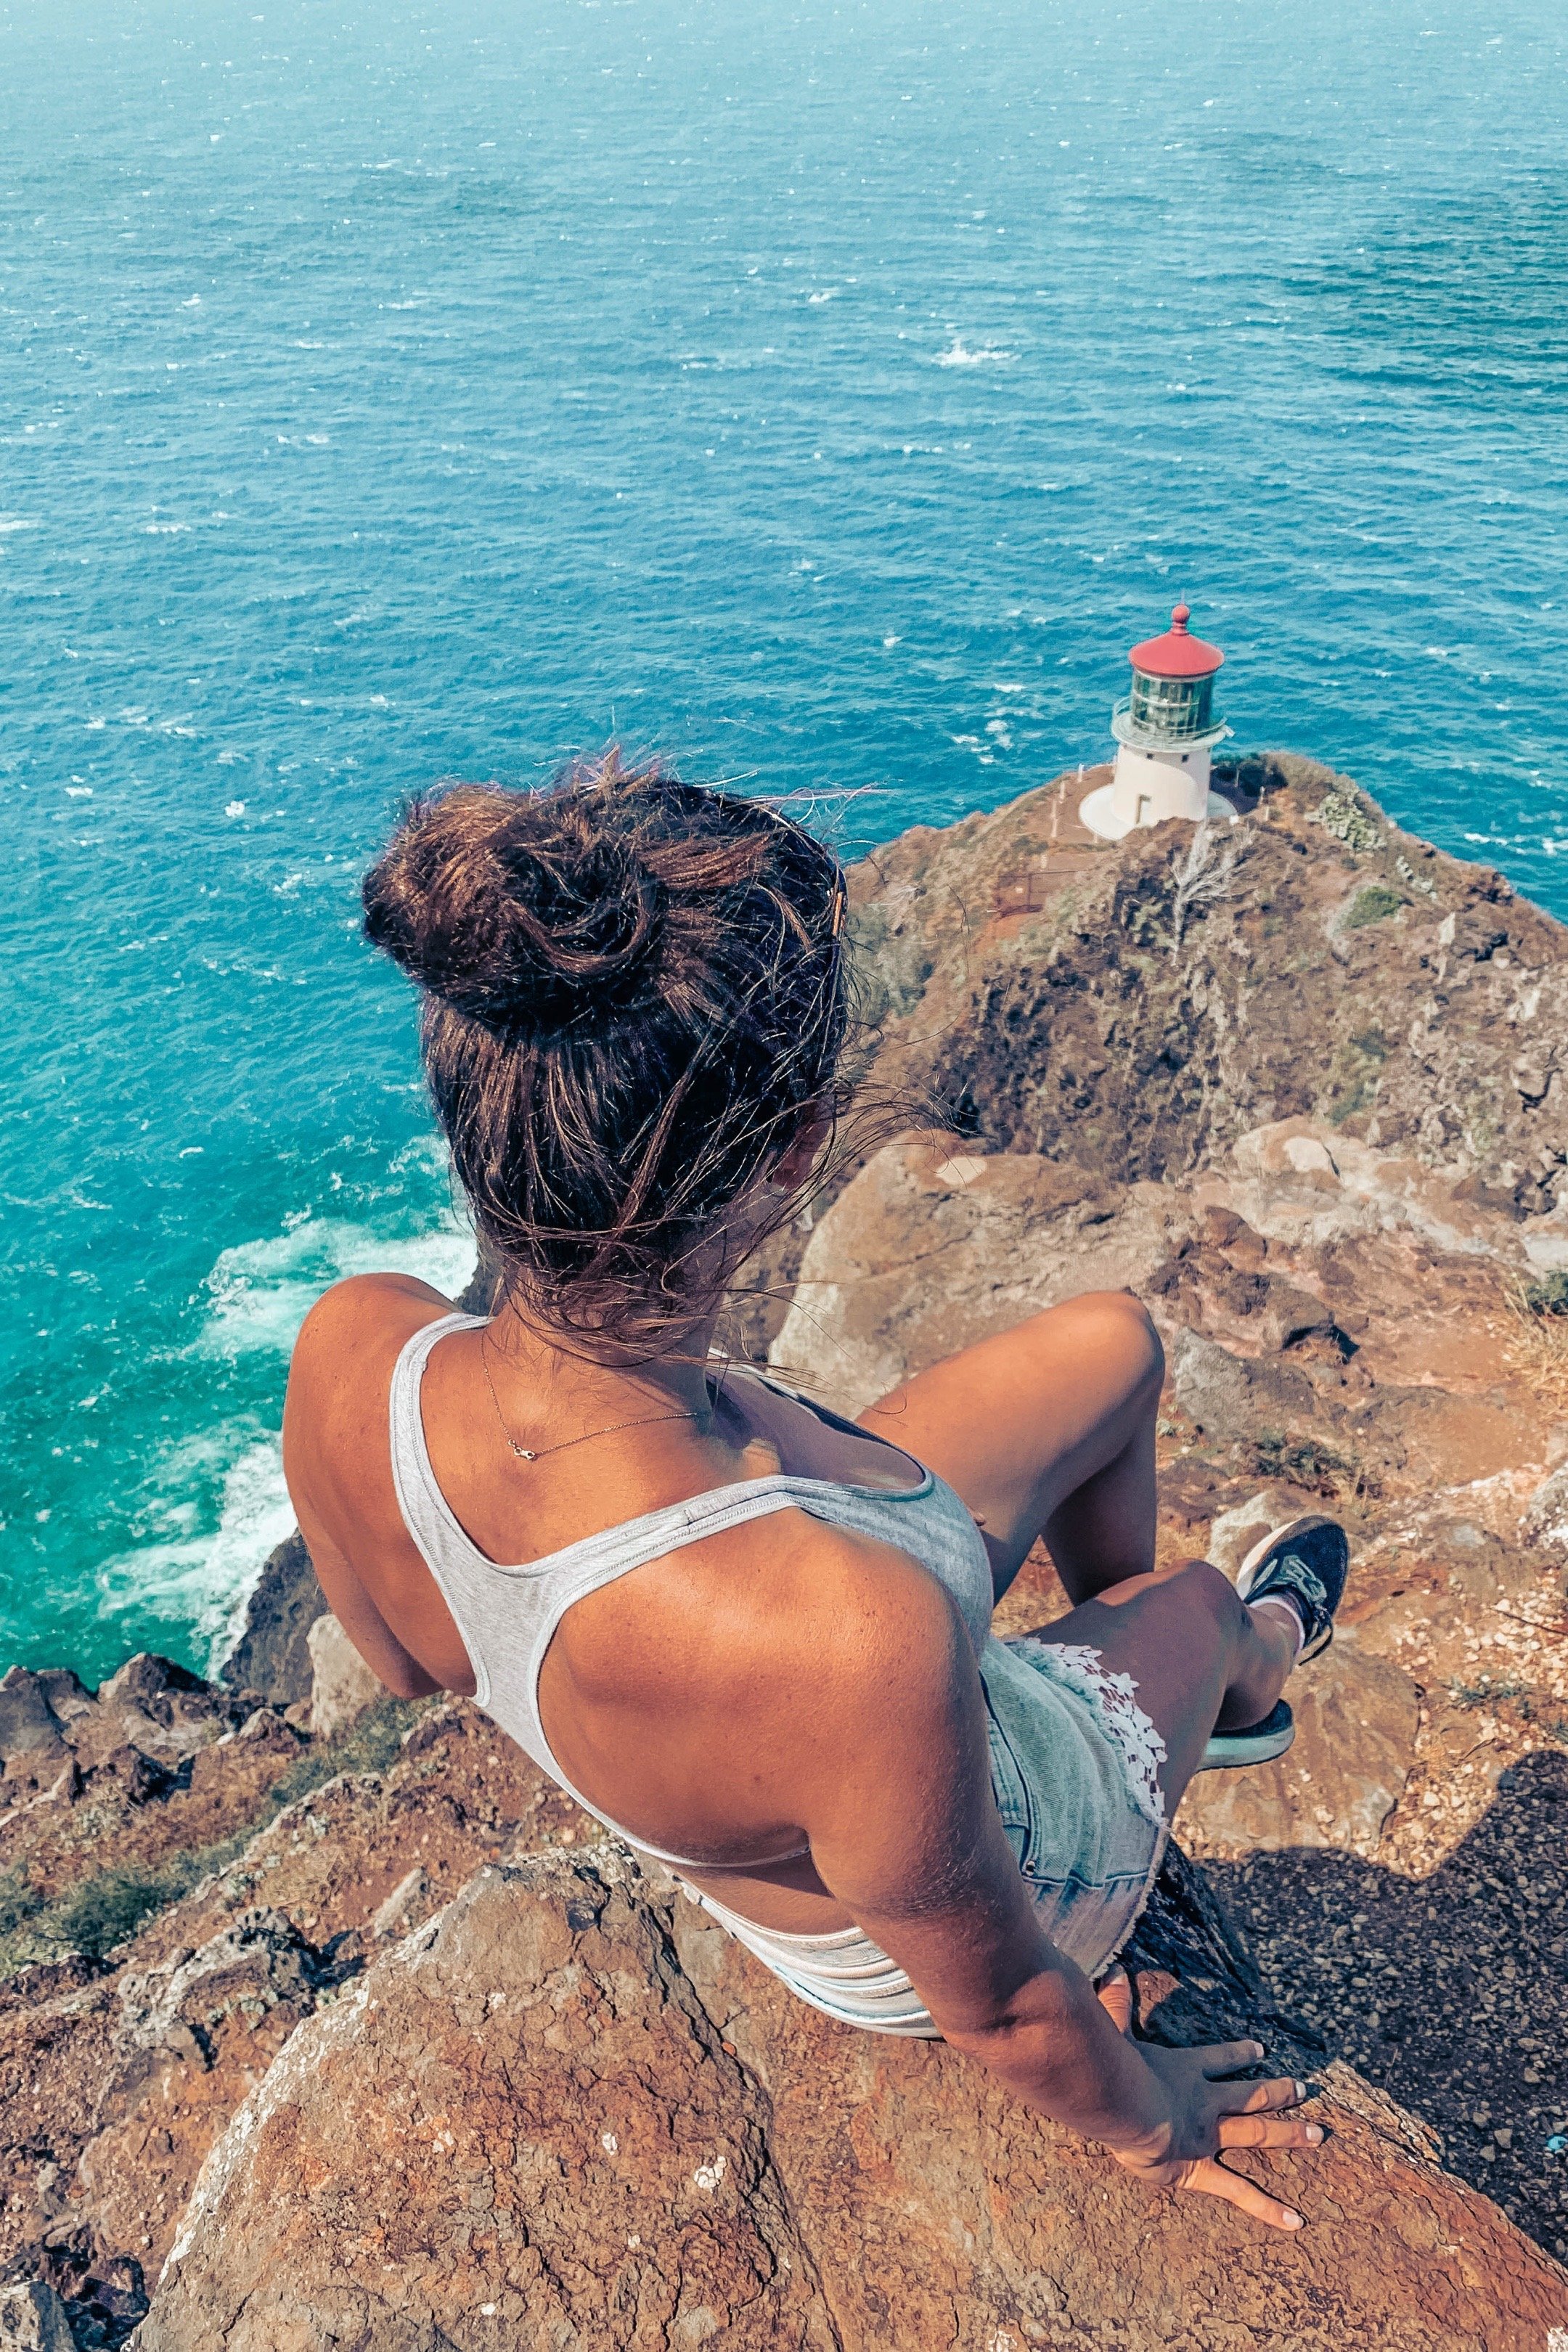
Makapu’u Lighthouse Hike & Tide Pools
If you’re thinking, “Wow, this is a lot of hiking for one day!”, I agree. Please don’t try to do everything on this list as it is too ambitious for one day. However, if you’re only going to do one hike, I would recommend the Makapu’u Lighthouse hike. Not only is it pretty easy but you also get to see an awesome lighthouse. Plus, there are also some really cool tide pools you can hike down to and hang out in.
Time: 2:30 to 5:30pm
Time Needed: I would plan for at least 3 hours if you plan to do the hike (1.5 hours) and the tide pools (another 1.5 hours).
Details:
Food & Drinks: Bring food! There is no food or beverages out here. Whatever you plan to consume, pack it up and bring it with you.
Lighthouse Hike: The hike to the lighthouse is a 2.5 mile easy, paved out-and-back trail that offers a panoramic view of the southeast tip of Oahu.
Tide Pools Hike: On the way back down from the lighthouse, there is side path that leads down to the Makapu’u tide pools. This side path is easy to miss. It’s on the ocean-side about halfway down. This path is not steep but it is rocky (bring good shoes). Though it looks pretty straightforward, it took us about 25 min to get down.
Tide Pools Safety Warning: Don’t underestimate the ocean! Big waves do come in sometimes so be watchful of where you’re sitting. I thought it would be fun to get a picture while the wave came up to the tide pool. None of the waves had looked big so I wasn’t worried. Bad idea! Of course, as I’m sitting there, an unexpectedly big wave came up and dragged me and the photographer along the rocks. We were just a little scraped up but it was not a pleasant experience and it could’ve easily been much worse. However, if you are mindful and stay back from some of the furthest tide pools, you should be fine.
Tide Pools Storage Warning: Also, keep your stuff far back. There were a few people in our group that thought they would bring their phones out to one of the further out tide pools. Almost immediately, a huge wave came in that covered all the rocks at the outer tide pools. After that, we brought all of our stuff to the rocks right near the trail back up. If the rock looks at all wet, do not set anything of value on it.


This is what the tide pools look like from about halfway up the trail that takes you down to them.
As you can see, the trail is pretty rocky, though the descent is not that steep.

Yes, unfortunately, these were the shoes I wore and it was a horrible decision! Bring real hiking shoes.

Despite how beautiful they are, the tide pools aren’t too crowded. I had this pool all to myself.

Cotton candy sunset at the Makapu’u Tide Pools! While it is beautiful, don’t do sunset here unless you want to walk up in the dark. I recommend bringing a few beverages to enjoy down here while you soak in the pools.
Choose A Sunset Spot
Time: 5:30 to 7pm
Time Needed: 1-2 hours to drive to the sunset spot, then enjoy the sunset. Make sure to get to whatever spot you choose about 20-30 minutes before the sun is set to go down.
Details: There are some amazing spots to enjoy the sunset on the southeast side of Oahu. You really can’t go wrong but below are a few of my favorite options.

China Walls
A stretch of lava-rock ledges & cliffs above the ocean that attract experienced surfers and jumpers. Beautiful spot to watch the sunset. Jump at your own risk.

Spitting Caves
An iconic Oahu sunset spot, known for its (risky) 70 ft+ cliff-jumping and it’s affinity for attracting whales, turtles, and sea lions. A small inlet feeds into a cave in the cliffs below and as the pressure builds inside the cave with each ebb and flow, the water “spit” outs with huge force.
The entrance is in a neighborhood, with a short path right next to the side of a house. It’s a great picnic spot!


Haunama Bay Lookout
Haunama Bay Lookout is a 0.8 mile heavily trafficked loop trail with stunning views of the U-shaped Haunama Bay. If you follow the path out to the end, you’ll come to a fence that you can enter. After the fence, the bluffs are covered with grass and offer a gorgeous sunset view.

Sandy Beach
Sandy Beach lies at the base of Koko Crater. There is plenty of parking here. Not only is it often frequented by locals, but is is also known for its excellent bodyboarding and bodysurfing opportunities due to shore break and consistent barrels. If you want to watch the sunset from a true beach on southeast Oahu, this is the place.
Dine in Chinatown!
Time: 8 to 10pm (Post-sunset)
Time Needed: 1-2 hrs
Details: After watching the sunset, head down to Chinatown for a late dinner. There are a number of truly amazing places to eat. Again, as in Waikiki, due to how busy popular restaurants are, make sure to plan ahead. Have a place in mind, then: 1) if possible, make a reservation, 2) if walk-ins only, try to put your name on the list 1-2 hours before you want to eat, or 3) be prepared to wait.
My absolutely favorite spot in Chinatown is Opal’s Thai, which is walk-in only. The chef comes out, chats with your table, tests your knowledge of authentic thai dishes, and then brings out a number of dishes he thinks you’ll like. Everything is amazing! It is also a very affordable place to eat. Learn more about the restaurant here.
Day 3: East Side
Kualoa Ranch, Lanikai, & “The Mokes”
7:00am Drive to Lanikai area
8:00am Lanikai Pillbox “Sunrise” Hike | Enjoy Breakfast at the top
10:00am Drive to Kualoa Ranch
11:00am Kualoa Ranch Tour
1:30pm Drive to Kailua area
2:00 Grab lunch @ Kalapawai Market
2:30pm Kayak to “The Mokes”
5:00pm Enjoy Lanikai Beach
6:00pm Watch Sunset @ Lanikai Beach!
7:30pm Dine on the East Side!
Getting There
Like yesterday, this will be a day that requires a car! I do not recommend Ubering to these locations as Uber is not reliable on the east side of Oahu. If you decide to just do Kualoa Ranch, it is possible to sign up for a tour that will provide roundtrip transport. However, to do the entire itinerary, a car is definitely a must.
It is about a 35-45 minute drive from Waikiki to Lanikai Pillbox. Then another 35-45 minutes to Kualoa Ranch. However, the travel time is not wasted in the slightest! Along the route, you will see such beautiful scenery, from lush rainforests to beautiful, blue coastlines. The itinerary purposely builds in some extra time for you to pull over at anything that particularly catches your attention.
Also, note that while Kualoa Ranch and Kailua Beach Adventures do have designated parking lots, you will have to find parking for the Lanikai Pillbox Hike and Lanikai Beach.
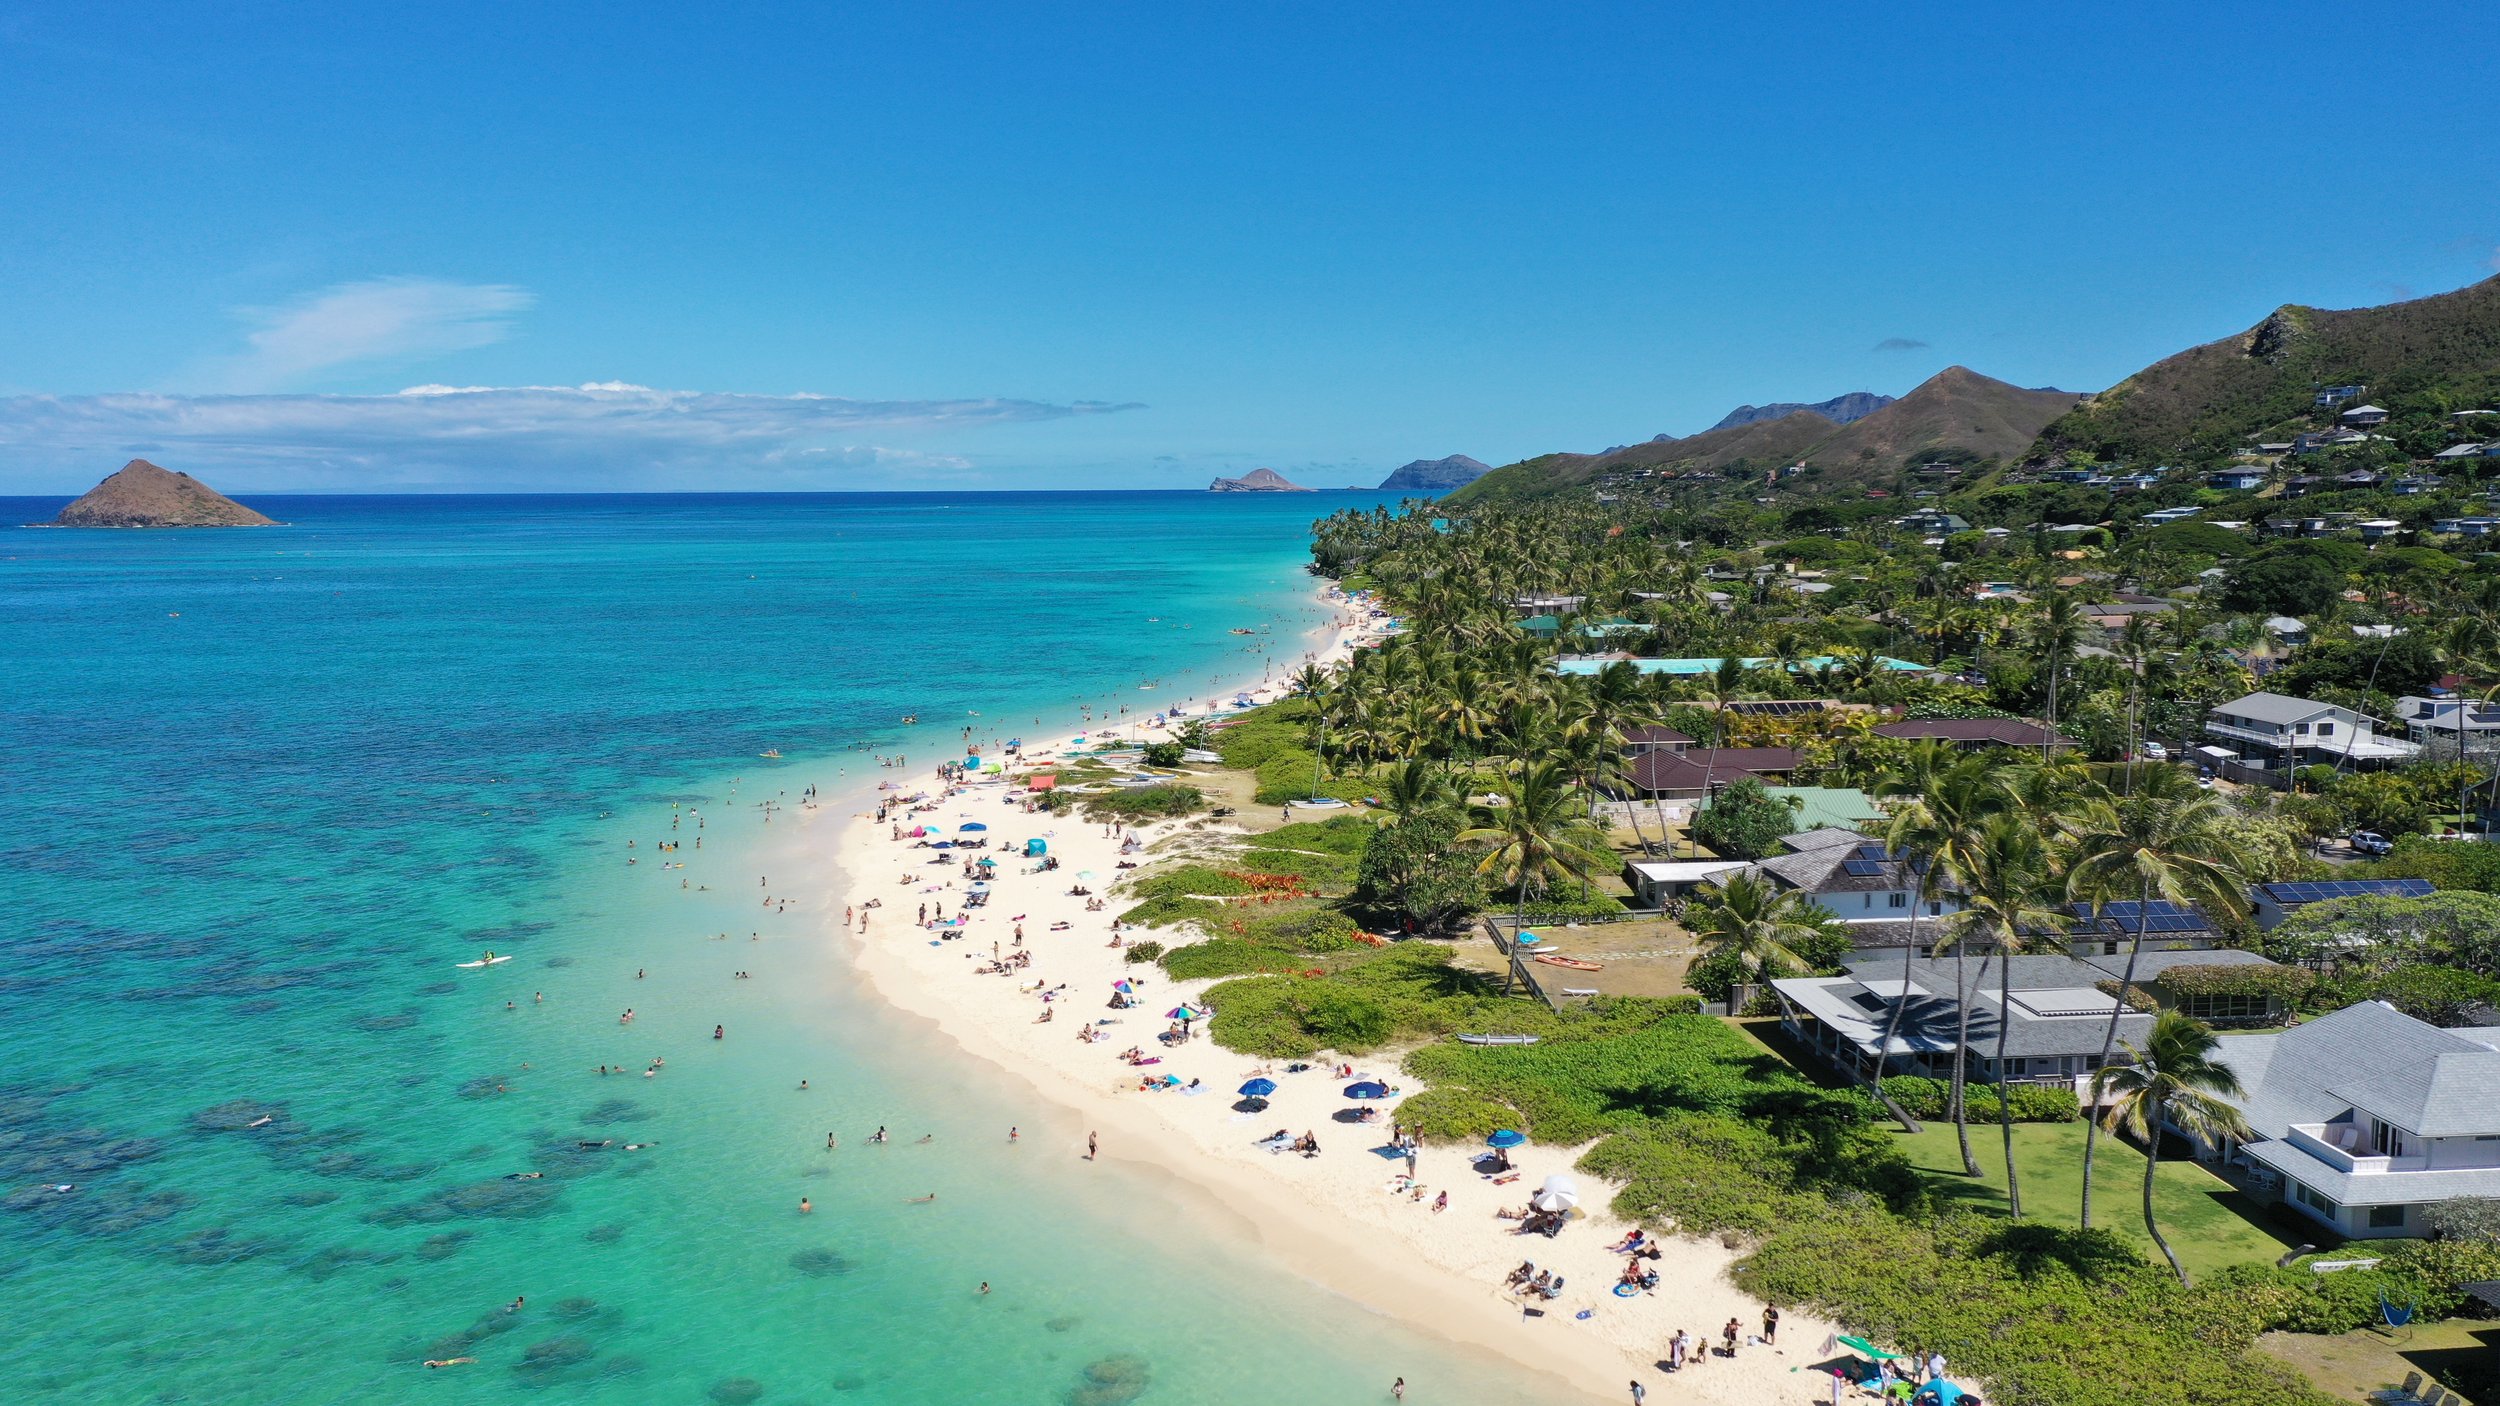
Lanikai Pillbox “Sunrise” Hike
Time: 8 to 10am (If you are up for it, the earlier the better! Sunrise is fantastic from the Lanikai pillboxes…)
Time Needed: 2 hours to hike and enjoy a breakfast or snack at the top!
Details:
Hike: The Lanikai Pillbox (Kaiwa Ridge) Trail is a 1.8 mile heavily trafficked out and back trail located near Kailua, Oahu.
Difficulty Level: It is rated as moderate. I think it’s a pretty great and do-able trail with good weather but I would not recommend it in the rain. You do use ropes to assist you in climbing up at certain parts of the trail, which, when wet, could be slippery.
Trailhead: The trailhead can be a little confusing. It is across and a little up from the Mid-Pacific Country Club. We found parking on Aalapapa Drive, right next to Lanikai Park, and then walked up to the trailhead from there.
Recommendations:
Bring breakfast or a snack to enjoy at the top once you get to the pillboxes!
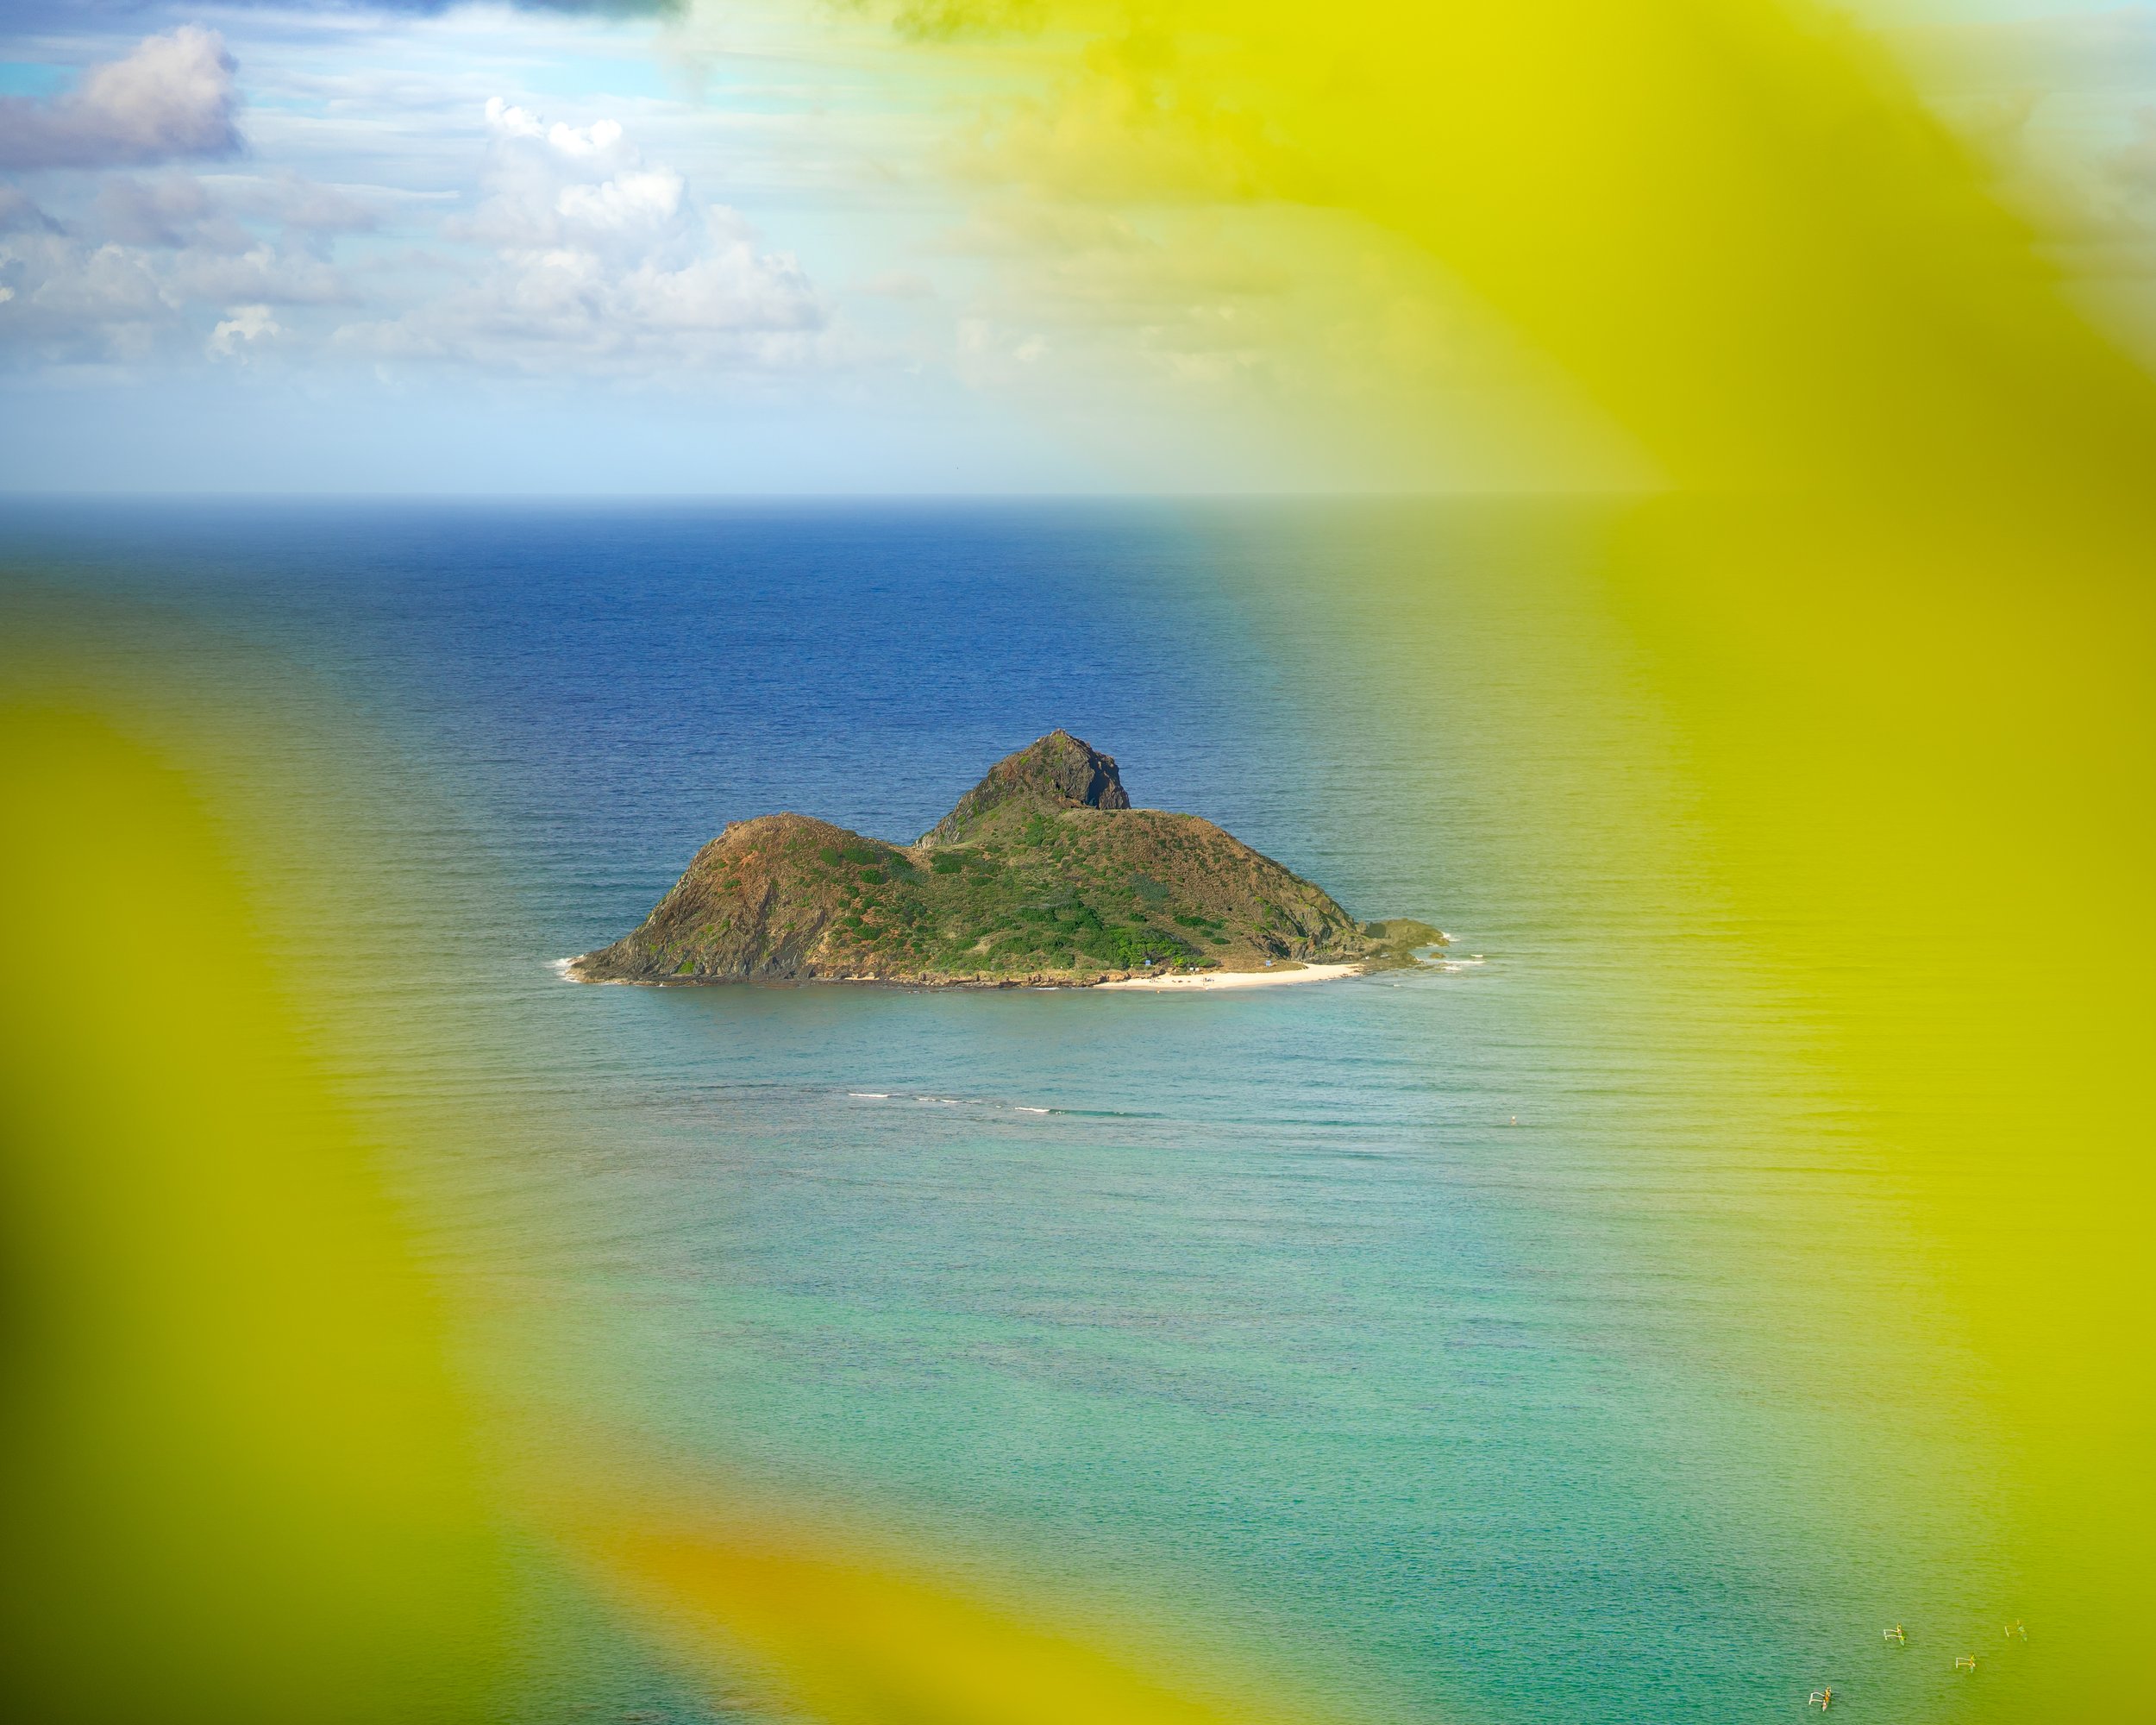
As this is one of Hawaii’s most photographed spots, go ahead and snap a picture at one of the pillboxes with “The Mokes” in the background. Located off Wailea Point, “The Mokes,” as they’re called by locals, are a pair of tiny isles that were formed over a million years ago. Learn more about The Mokes here.
One of Hawaii’s most photographed spots!
Kualoa Ranch Tour

Over 200 Hollywood movies and TV shows have been filmed at Kualoa Ranch since the 1950’s… from Elvis classic and Jurassic Park, right up to Jumanji, 50 First Dates, and the new Netflix “Finding ‘Ohana’” blockbuster!
Time: 11am to 1:30pm (This will depend on what time your tour is scheduled.)
Time Needed: 2-3 hours
Costs: Tours range from $50 to $200 per person, depending on what you want to do.
Details:
Recommendations: You will need to make reservations in advance - and the sooner, the better! It is not surprising for the tours to book out 1-2 months in advance. Reserve your spot early.
Tours: There are a ton of different tours to choose from: ATV, Electric Mountain Biking, Jurassic Adventure Tour, Horseback riding, and more! If you want something more adventurous, you can do the Jurassic Valley Zipline tour. Or, if you’re looking to sit back and learn something, the “Hollywood Movie Sites & Ranch Tour” shows you where over 300 of Hollywood’s biggest blockbuster movies and TV shows were filmed!
You cannot go wrong with what tour you choose! They are all amazing. All the tours we wanted to do were sold out, so we ended up doing the Jurassic Adventure Tour and it was amazing.
About Kualoa Ranch:
“Kualoa Ranch Private Nature Reserve is owned and managed by the eighth generation descendants of Dr. Gerritt P. Judd. Kualoa’s mission is to enrich people’s lives by preserving Kualoa’s sacred lands and celebrating its history. Established in 1850, Kualoa’s company vision is to be a role model as stewards of these amazing 4000 acres named Kualoa, Hakipu’u and Ka’a’awa. Our goal is to protect and enhance the natural beauty of these lands while developing sustainable recreational, agricultural and aquacultural enterprises that are compatible with the environment. All tours and commercial activities enable Kualoa to keep the lands undeveloped so that future generations will be able to enjoy them as well.”
The terrain on the ranch is absolutely epic. You truly do feel like you are on a movie-set.
Anyone remember this scene?
Along The Road…
There are so many cool road side stops along the east side. If you have time (and an appetite for adventures), stop off at some of these iconic sites…

Snap a picture on the sideways palm tree!
Although I do recommend this spot at sunrise, from Waikiki you’ll need to get up around 4-5am to be at this spot for sunrise, which may not be quite the “vacation” vibe. This sunrise only lasted for about 45 seconds and we were lucky enough to pull up right as the sun was coming up over the horizon.
Also as a side note, palm trees are HARDER to climb than they look. I did actually fall off onto the rocks below and ended up losing a toenail :’( Be careful when climbing!
This spot is about 15 minutes north of Kualoa Ranch, right across from the Hau’ula Civic Center. The only other sideways palm tree I’m aware of on Oahu is on the North side at Sunset Beach.


Swing at Kahana Bay Beach Park
There are some iconic rope swings at Kahana Beach Park that are fun to swing on! What’s even better, this beach is extremely secluded. If you are looking for a relaxing spot away from crowds of tourists, this is a great option. The picture on the right is at the top of the Crouching Lion Hike. Behind us to the left, you can find Kahana Beach Park.


Visit Chinaman’s Hat Island
Known as “Chinaman’s Hat” because of its shape, this little island is a popular spot to take photos on the east side. The island has some a interesting legend, which you can read about here.
This stop is across from Kualoa Ranch. There’s a great beach for hanging out at with lots of space and parking.


Appreciate the Byodo-In Temple
The Byodo-In Temple was established on June 7, 1968, to commemorate the 100 year anniversary of the first Japanese immigrants to Hawaii. The Byodo-In Temple in O'ahu is a smaller-scale replica of the over 950-year-old Byodo-in Temple, a United Nations World Heritage Site in Uji, Japan.
The Byodo-In Temple is a non-practicing Buddhist temple which welcomes people of all faiths to worship, meditate or simply appreciate its beauty.
Hours of Admission: 8:30am to 5pm daily (last entrance is at 4:45pm)
Entrance Fee: $5.00 (ages 13-64), $4.00 Seniors (age 65 & up), and $2.00 Children (2-12 years). Can be paid in cash or credit card.
I recommend planning to spend at least 45 minutes here!
Lunch @ the Kalapawai Market
After the Kualoa Ranch tour, head to the Kalapawai Market for lunch. They have a delicious deli with tasty sandwiches and a variety of snacks to choose from. If there’s room, you can park at the Kailua Beach Adventures, which is about a block away, and where' you’'ll head right after lunch. Once you’re done with lunch, you can head back over to Kailua Beach Adventures to rent kayaks!

Kayak to “The Mokes”
Time: 2:30 to 4:30pm
Time Needed: You can do a 1/2 or full day of self-guided kayaking, or you can take a guided tour! Depending on the wind, it usually takes about 30-45 minutes to paddle out to the Mokes.
Details: Kailua Beach Adventures
Reservations: You can make reservations to rent single, double, or triple kayaks from Kailua Beach Adventures. They do tend to sell out 1-2 days in advance so I do recommend making reservations at least a week in advance to ensure you’ll have kayaks for the time / day you would like. Also, cancellation is free if the rental is cancelled prior to the day of. If the weather looks bad or you’re no longer up for kayaking, you can just cancel the day before.
Kayak Transport: Though Kailua Beach is the only kayak company within walking distance of Kailua Beach, you do have to transport your kayak each way, which is about a 5-10 minute walk. They give you a rolling stand though so it’s a pretty easy lift to carry the kayak.
Alternative Options: If you’re not into kayaking, you can also rent paddle boards, bikes, surf boards, boogie boards, and snorkeling gear.
Cost: A 1/2 day single kayak rental starts at $69.
Weather Matters: Kayaking gets very hard if it is a rainy or windy day, which makes the waters choppy. We went twice, once on a rainy day and once on a sunny day. It was two completely different experiences. I highly recommend skipping this activity if it is rainy or windy, especially if you are not in the mood to paddle hard.
Timing: The shop closes at 5pm and requires kayaks to be returned by 4:30pm. Keep this in mind as you decide what time to schedule your reservation and where to go once you have the kayaks.
Island Permits: When you pick up your kayak from Kailua Beach Adventures, you can also get a permit to paddle to Kailua’s offshore islands (The Mokes).
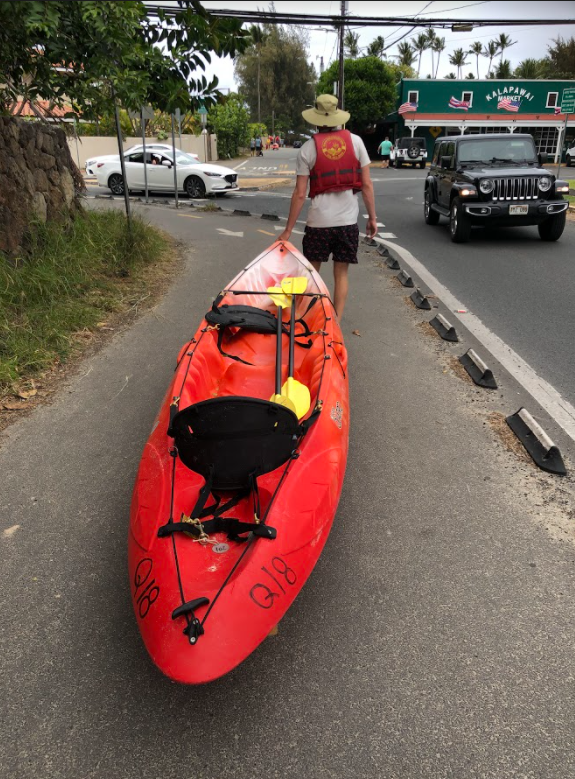
Kayak Transport
About a 5-10 minute walk from the kayak rental location to the beach. They give you a rolling stand so it’s not too hard to carry the kayak
Enjoy Lanikai Beach
After a fun day of activities, it’s time to relax at the beach and wait for the sunset!
Time: 5 to 7pm
Time Required: However long you would like!
Details: After finding parking near Lanikai Beach (which can take a few minutes), walk out and enjoy yourself on what is my absolutely favorite beach on all of Oahu! Take snacks and kick back.
Day 4: West Oahu
Ko Olina & Electric Beach
On day four, you may want a more relaxing day in the water, swimming with the fish, then exploring Oahu’s resort area! Ko Olina is the Hawaii you see in the movies: absolutely gorgeous, peaceful resorts nestled amongst palm trees and perfectly manicured golf courses.
9:00am Head to Electric Beach
10:00am Snorkel (Self-Guided OR a Guided Tour from Trident Adventures)
1:15pm Head to Ko Olina
1:30pm Explore the Ko Olina Lagoons OR Enjoy a Game of Golf!
5:30pm Dine at Monkey Pod OR Go to a Luau
8:30pm Head back to Waikiki
Getting There
It takes about an hour to get from Waikiki to the lower west side. However, once you’re over there, everything is within pretty close proximity.
Once again, I recommend a car! Roundtrip Ubers are pretty expensive. A HUI reservation can work but would require a whole day reservation, which likely means booking a few weeks in advance.
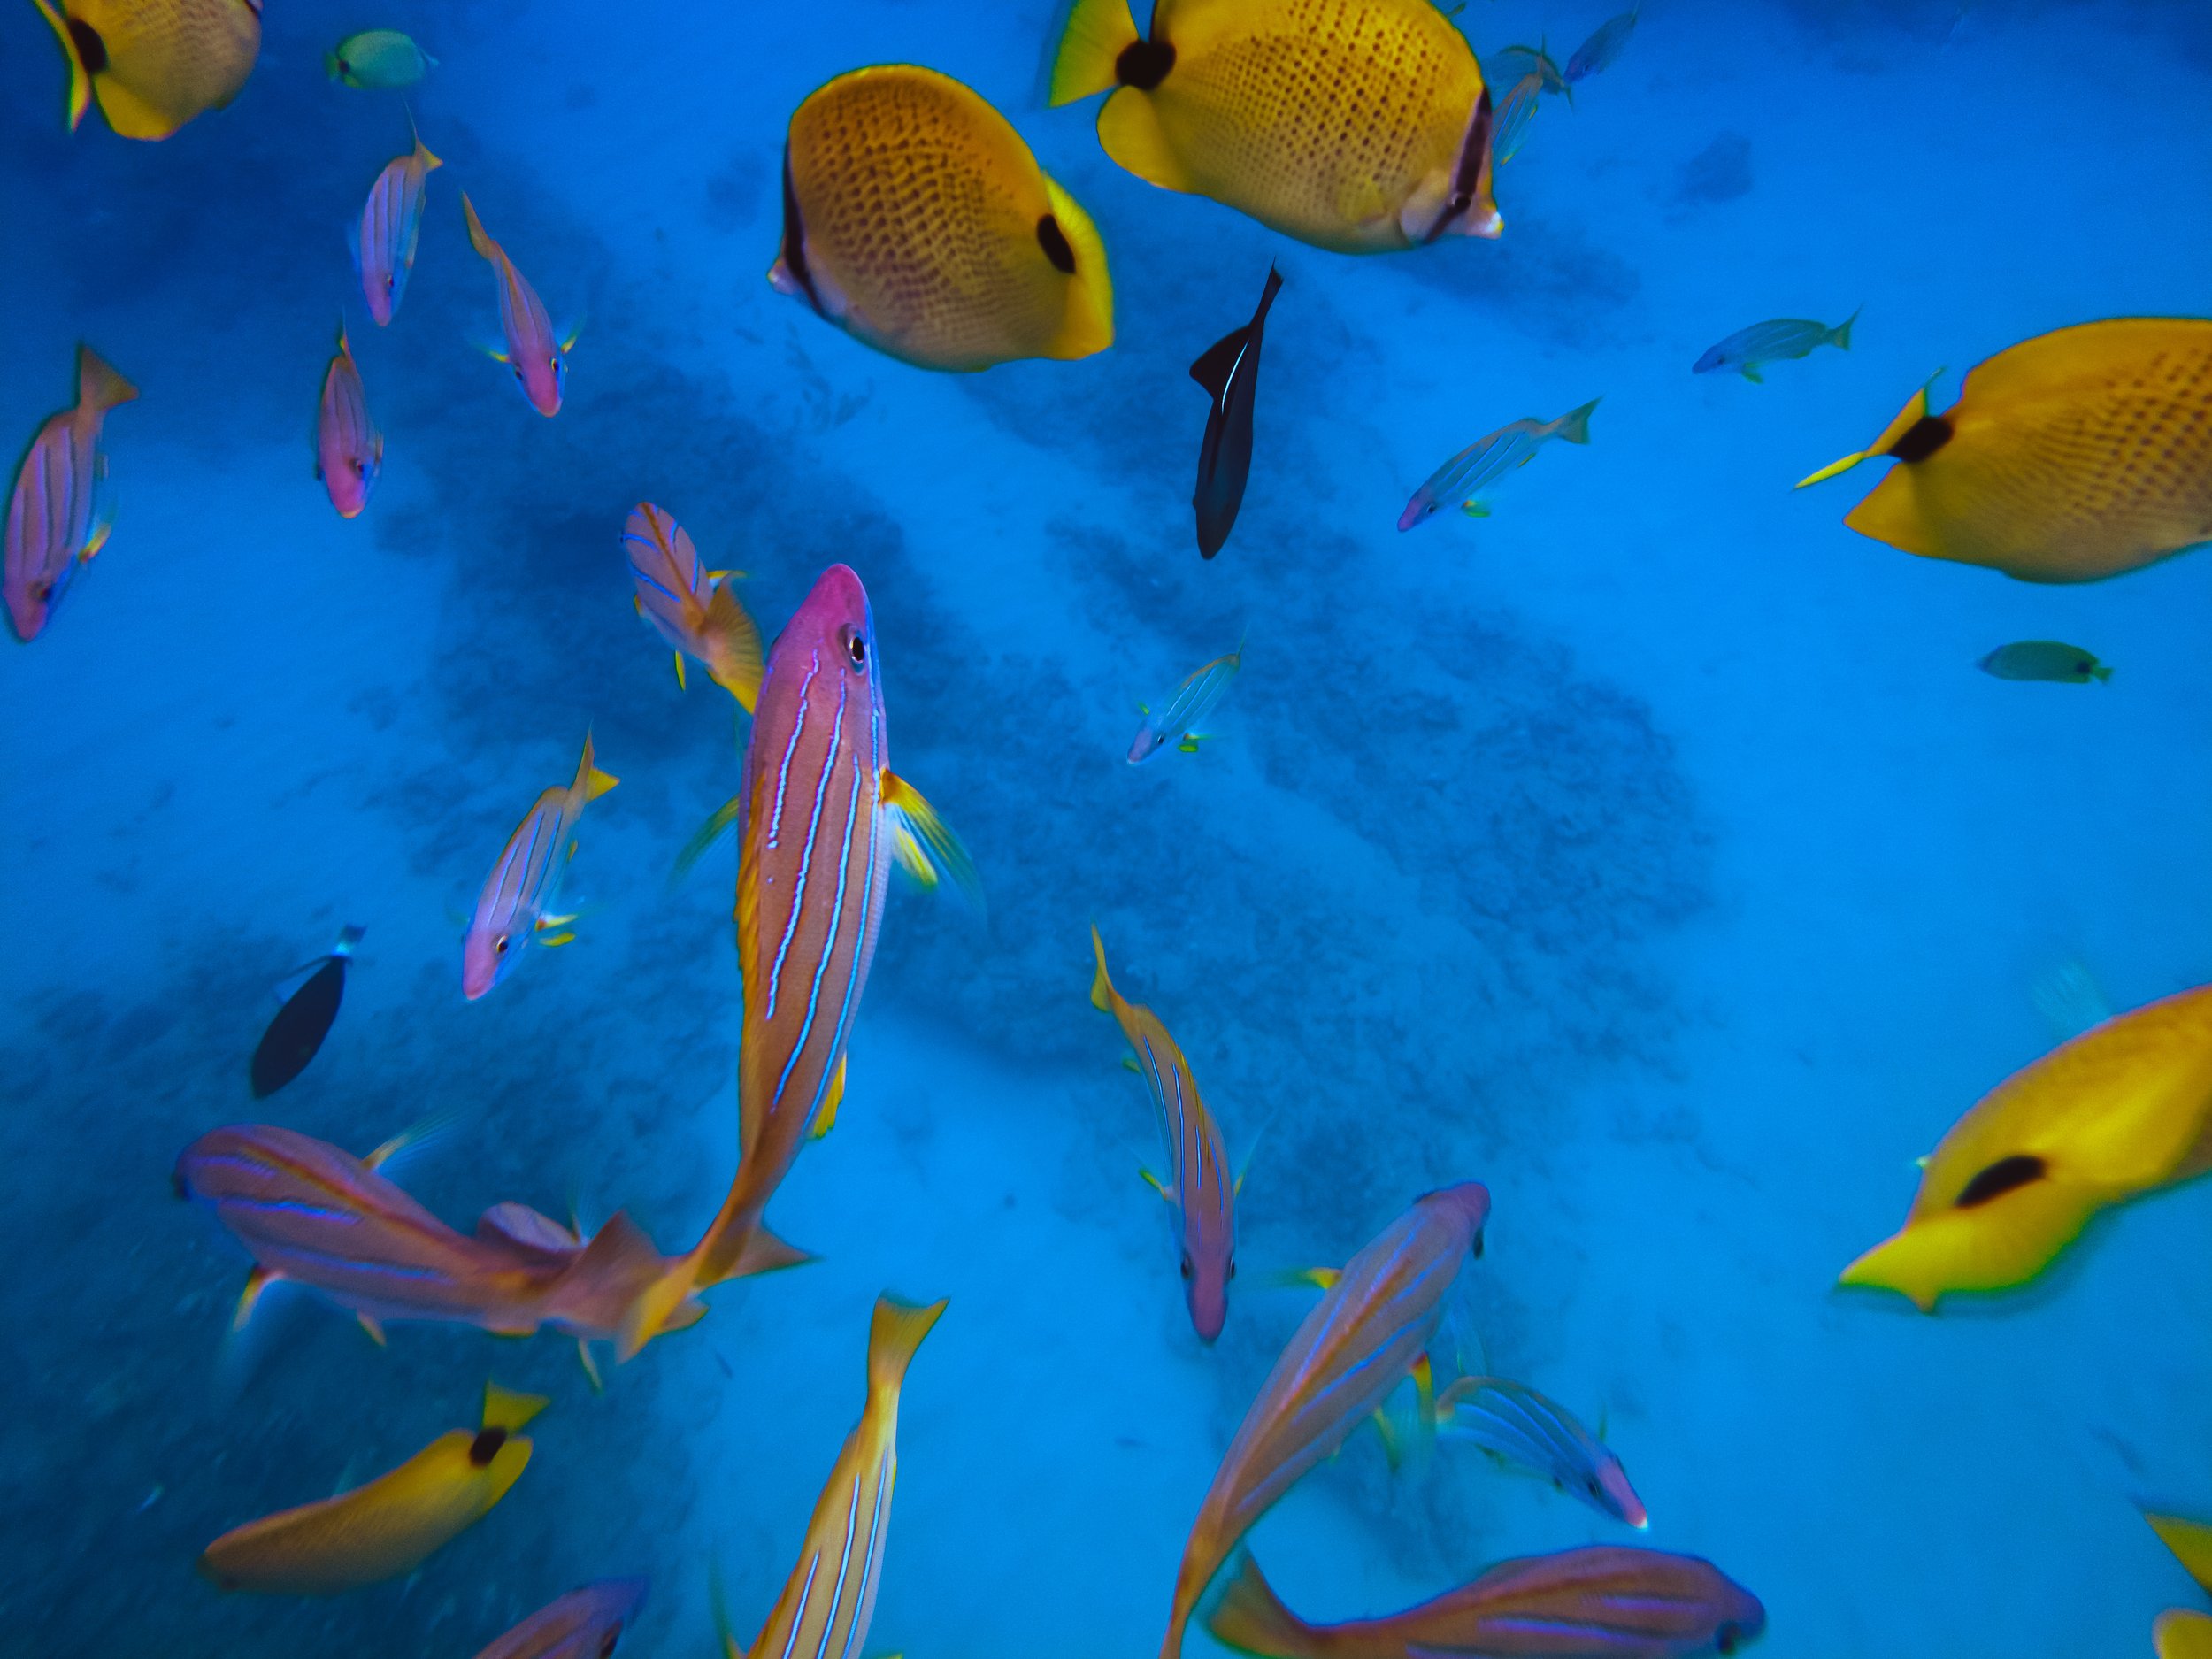
Snorkel @ Electric Beach
Bring fish food for the best results! On our guided snorkel tour, they gave us fish food, and we were SURROUNDED by colorful fish.


Time: 10am to 1pm
Time Needed: 2-3 hours
Costs: Snorkel Gear. Optional: Guided Tour
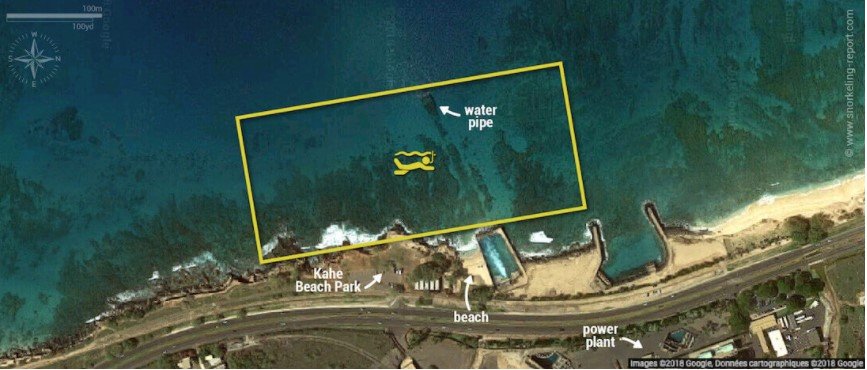
Location: Electric Beach. There is a good-sized parking area and bathrooms but not much else. Make sure to pack your own snacks.
Details:
Kahe Point, nicknamed “Electric Beach” because of the electric power plant located nearby, is a very popular snorkeling spot on Oahu. Two large cooling pipes outflow warm water to the ocean, attracting scores of sea life, including reef fish, sea turtles, eagle rays, and even pods of spinner dolphins to the area.
When I went, there were so many fish! Even more come up to you if you bring fish food. I also spotted a turtle and ended up following him around at a distance for 30 minutes, which felt absolutely unreal. Turtles are such graceful swimmers.
The friend I was with (a local) said there’s a Buddha statue somewhere under the water that he found the last time he was there but we couldn’t find it again. So if you do go, keep your eyes out!
Safety:
Due to the potentially dangerous currents that can occur in the area, this spot may not be the best for beginners. However, when I went, there were a ton of people in the area and I never felt any currents that were particularly strong, so I felt safe. I also saw plenty of families that seemed fine.
Getting out into the open ocean was a little tricky. The beach is quite narrow with waves that were rolling in about every 30 seconds. You have to swim past the surf about 25 feet out, where the water is calmer, then the snorkeling is great. Wear swim fins, and do not enter the water if the surf is too strong.
If you are concerned about safety I recommend a guided tour where the tour instructors will be there to keep watch and help, if needed.

Guided Tour Recommendation: Trident Adventures
If you’d like to do a guided tour, they are fantastic and definitely worth the money in my opinion! We went with Trident Adventures, which has a number of different options and is owned and operated by U.S. Navy Seals.
They offer snorkeling, scuba diving, fishing, and even a “Navy SEAL experience”!
Their most popular snorkeling package is 3-hours (either 7 to 10am or 12 to 3pm) and costs $189 per adult.
If you are worried about safety, the quality of their gear, instruction, and oversight is excellent. You will feel very safe with them.
They say that you’ll explore “secret reefs” but they took us to Electric Beach, which was very recognizable by the nearby Electric Plant. However, they do take you out quite a bit further then you’d go if you entered the water from the beach.
They have a beautiful boat, a great crew, and they also bring delicious snacks and refreshments. They had pineapple with some local seasonings to dip it in, which was delicious.
Want to swim like Aqua Man? They also have Dive Propulsion Vehicles (basically water scooters) that you can use to get around faster.
All equipment is included: flippers, goggles, DPVs, and they have an excellent way to keep the goggles from fogging up, so you have a very good viewing experience.
They also give you fish food so you can attract all the fish!
On our trip with Trident Adventures, we spotted a pod of dolphins so the Captain stopped the boat and we all climbed to the front of the boat to watch the dolphins swim around us. It was UNREAL.

Explore Ko Olina

Time: 1:30 to 4:30pm
Time Needed: 3-4 hours; this could be an all-day activity but I recommend exploring in the afternoon.
Costs: Free for exploring. If you want to golf, the golf round is on the expensive side. See prices here.
Location: Ko Olina
Details:
The Ko Olina Resort area is 642-acre master-planned vacation and residential community on the leeward coast of Oahu. Ko Olina has 2 miles of coastal frontage and includes three natural and four man-made lagoons with white-sand beaches. The master-planned resort community is home to four hotel resorts: Aulani, a Disney resort & Spa, Marriott’s Ko Olina Beach Club, the Beach Villas at Ko Olina, and The Four Seasons Resort O’ahu at Ko Olina.
Although Ko Olina is privately owned,, public pedestrian traffic is permitted to and from the lagoons. I highly recommend an afternoon spent walking around the resorts and the lagoons! Choose your favorite and go for a swim. The lagoons are very calm waters, perfect for kids.
Recommendation:
Bring a floatie!
Take a picture. In my opinion, Ko Olina is one of the most picturesque spots on Hawaii. Whenever I’ve been, there has always been a wedding happening.
As soon as you get to Ko Olina, go to Monkey Pod and put your name down on the waiting list. The experience this restaurant provides is incredible, from the delicious and well-priced food to the ambience and lighting of the space. However, it is first-come first-serve and typically has a long wait time. When we went, we put our names down at 3:30pm and ended up getting seated around 5pm. The wait is not bad at all if you’re prepared for it: you can go explore the lagoons and walk around.
Dine @ Monkeypod Kitchen
Photo Credit: Monkeypod Website
Time: 4:30 to 6:00pm. Happy hour is 3:30 to 5:30pm, so I recommend getting there around 4:30pm so you get the Happy Hour deals and can leave in time to watch sunset at the lagoons.
Time Needed: 1.5 hour
Details: Monkeypod Kitchen is dedicated to delivering high-quality food in an ambient environment. The chef-driven concept is led by the classically trained, award winning Chef Peter Merriman. For over twenty years Peter has served as a culinary pioneer in Hawaii utilizing both an unmatched creativity and a locally inspired way of thinking.
Recommendations:
You can’t go wrong with the food!
Just make sure to get your name on the list before you / your travel companions get hangry, as the wait is usually at least 30 minutes.
Check their website because they often have live music and you can plan your meal around when the live music will be going on!
Go to a Luau!
If it’s your first time in Hawaii and you want to experience a luau, the west side is a great place to do it! If you do the luau, grab lunch at monkeypod instead of dinner.

Epic view of the sunset at the Paradise Cove Luau.
Time: 5 to 9pm
Time Needed: 4 hours
Costs: $125 for Adults, $105 for Youth (ages 13-20), and $90 for Children (ages 4-12). Roundtrip transportation to and from Waikiki for $35 per person.
Details:
The Paradise Cove Luau was my first (and only) luau and it was a very fun and lively experience, though quite touristy! The food was okay and the drinks were watery but the entertainment and venue were amazing (to be honest, it’s much more about the experience than the food, so I was fine with the fact that the food was pretty bland and unappetizing).
Upon arrival, you have a few hours to walk around and look at the different stations. You can grab a drink, take a little canoe ride, go to target practice, watch the dancers, listen to live Hawaiian music, and enjoy the absolutely stunning area. After some time, everyone will be seated and guests will get up to go grab dinner. Then the show starts: you get to see traditional Hawaiian singing and dancing, as well as a flame thrower once the sun goes down. It was very cool!
The Luau experience does come with the option to get roundtrip transportation from the Waikiki area. The bus ride was actually one of my favorite parts of this experience. Our guide had our entire bus singing and dancing in our seats the ENTIRE way home. It was unreal.
Recommendations:
If you’ve never done a luau before and accept the fact that it is a pretty touristy activity, this is a super fun thing to do! If you don’t like “tourist” activities, I do not recommend.
Try the poi! It is a very unique flavor.

A look at the food.
Day 5: North Shore
North Shore Adventures
On day five, it is time to head up north to the legendary and aptly named North Shore: home of Jack Johnson and world famous for it’s insane surf, such as the Banzai Pipeline (located at Ehukai Beach). Every year Oahu’s North Shore area hosts three competitions, which make up the Triple Crown of Surfing. From November to February, North Shore waves average heights of 16 feet but for about 20 days during the peak season, the waves swell to 36 to 60 feet in size. Some winter waves have topped 100 feet. Surf at your own risk!
9:00am Head to North Shore
10:00am Stop at the Dole Pineapple Plantation
11:30am Skydive
4:00pm Laze around at Shark’s Cove
5:30pm Get Thai food from Elephant Truck
6:00pm Watch Sunset at Sunset Beach
8:00pm Night snorkeling adventure
10:00pm Head back to Waikiki
Getting There
It takes about an hour to get from Waikiki to the start of North Shore. Once on North Shore, you’ll want to drive around and explore. That being said, once again I do not recommend an Uber. We rented a HUI car for the day, which worked great.
Stop at the Dole Pineapple Plantation

Time: 10am (Open everyday from 9:30am to 4:30pm)
Time Needed: 1 hour
Cost: Free
Location: Dole Plantation Farm on route to North Shore
Details:
Originally operated as a fruit stand beginning in 1950, the Dole Plantation opened to the public as Hawai’’s “Pineapple Experience” in 1989. Today, the Dole Plantation is one of Oahu’s most popular visitor attractions and welcomes more than 1 million visitors a year.
The Dole Plantation provides fun activities for the entire family, including a Pineapple Express Train Tour, the Plantation Garden Tour, and the Pineapple Garden Maze.
They do not take reservations. Tickets for the main attractions are sold on a first come, first serve basis. See prices here.
Recommendations: I never actually made it to the Dole plantation myself but if I went back I would definitely make a stop here, especially because I love pineapple!

Skydive
Time: 11:30am to 4pm
Time Needed: Expect anywhere from 1 to 4 hours, though the actual flight is ~10 minutes.
Cost: $224 for a Tandem Skydive + optional photo/video packages starting at $120
Location: Pacific Skydiving Honolulu
Details:
Join the experienced staff for an adventure you won’t forget with unparalleled views of North Shore Oahu!
All instructors are USPA licensed, highly experienced skydiver with thousands of jumps under their belt.
The skydive begins with a team exit from 9-10,000 ft followed by a 15-20 second freefall.
The timeline for each skydive is somewhat flexible, as the activity is highly weather dependent. After checking in and completing paperwork, expect to be at the drop zone (where you wait for the instructors to take you up in the plane for the jump) between 1 to 4 hours. The plane ride itself takes about 15-20 minutes and then the actual flight is less than 10 minutes.
On our experience, we got there around 1:30pm and ended up actually going up around 3pm.
Recommendations:
Book your skydiving appointment ahead of time! Earlier in the afternoon is generally better (i.e. before 1pm). Later in the afternoon, the wind tends to pick and cancellations are more common.
Get the photo/video package! First of all, the company does a great job capturing your entire experience. The quality of the deliverable is amazing! Second of all, the experience happens so fast, it is really nice to have something to relive the experience and laugh at the moment you jumped from the plane. Unfortunately, I didn’t opt for a photo/video package and it was a huge regret of mine, since I wanted to look back at it and can’t.
If you are nervous, just relax and enjoy the adrenaline rush! The instructors will keep you safe and make sure you know everything you need to know.
Temper your expectations. Sometimes the weather doesn’t cooperate and you’re not able to jump as planned. Know that this cancellation is in your best interest, even if it is disappointing.
Jumping from the plane.
Pre-jump excitement.
Day Snorkeling @ Shark’s Cove
Time: 4:30 to 5:30pm
Time Needed: You could easily spend all day here but we’ll be coming back to this spot later in the day for some night snorkeling so an hour in the afternoon if you have time should suffice!
Details:
It may not look like a lot from the road, but Sharks Cove has been rated by Scuba Diving Magazine as one of the “Top Twelve Shore Dives in the World”. Located on Oahu’s world famous North Shore, this small rocky bay forms part of Pupukea Beach Park and boasts blue water and an impressive amount of sea life. The bottom is made up of large smooth boulders and coral heads forming small caves and ledges for marine life to hide. The walls of the surrounding cliffs provide calmer water attracting schooling surface fish.
It is relatively calm, safe waters and you will find many families frequenting this area, which is great not only for snorkeling but also people watching from the beach area.
Across the street from Shark’s Cove, there are a bunch of food trucks in case you need a snack.
Recommendations:
Bring good water shoes.
Be careful of the fish and sea life. This is their home!
Watch the weather. Depending on the time of year, there may be bigger swells that could create stronger currents. March to November is typically the best time for more relaxed waters on North Shore.
Watch Surfer’s @ Banzai Pipeline
Time: 4:30 to 5:30pm
Time Needed: You could easily spend all day here but an hour or two should also suffice!
Details:
If you don’t feel like snorkeling at Shark’s cove, head over to the Banzai Pipeline on Ehukai Beach Park and watch the surfers!
At Banzai, you’ll find the biggest waves and the most experienced or adventurous surfers.
Recommendations:
The surf action will depend on the time of year. In the Winter, the waves are the biggest and that’s when you’ll see the real action.
I lived in Hawaii during the summer so there wasn’t anything too crazy at Banzai when I went there.
If you come at the right time, you might just be there for the annual surfing competitions.

A winter wave.
Thai Food @ The Elephant Shack
Time: 5:30 to 6:00pm (The truck is open from 5 to 9pm Monday to Saturday.)
Time Needed: 30 minutes or less. Just grab you food, then eat it on the beach while watching sunset!
Details:
The Elephant Shack offers an array of freshly-made thai food… and it’s right across the street from the beach! Being a food truck, they don’t offer everything but they do have almost all of the classics.
They make their noodles in-house, which means the noodles have an amazing consistency and freshness to them.
Recommendations:
Once you pick up your food, head over to Sunset beach to watch the sunset.

Sunset @ Sunset Beach
Time: 6:00 to 7:30pm
Time Needed: 1 hour. Make sure you have enough time to enjoy your Thai food and capture what will surely be one of the best sunsets of your trip.
Details: Sunset Beach is on the North Shore of Oahu and known for big wave surfing during the winter season.
Recommendations:
Bring a picnic blanket!
Enjoy how the glowing sun fades into a colorful sunsset.

The sunset from Sunset Beach.

A sunset from behind the palm trees of Shark’s Cove (a few miles west of Sunset Beach).
Night Snorkeling @ Shark’s Cove

Tickle this creature just right and it will eject this purple goo, which is a protection mechanism that can clog a predator fish’s gills, distracting them from preying on the creature.
Time: 8 to 10:00pm
Time Needed: 2 hours
Details:
This is NOT something to do by yourself. There is a guided tour that you can sign up for on AirBnB with a local and extremely knowledgeable marine biologist named Don: Discover Coral Reef Creatures At Night.
With Don, you will explore Shark’s Cove and encounter the incredible creatures that make up Hawaii’s nocturnal marine life. You will get to go snorkeling with underwater lights, mask and snorkels, and reef shoes, all of which are provided by Don as part of the experience. Don will describe and discuss each animal you find.
Don takes photos of everything you come across, which he shares with the group after the snorkeling.
“Night snorkeling” may sound cold or scary but it was truly one of the best experiences I had on the island. I felt like I was in a real life National Geographic movie, seeing up close and learning about all these amazing sea creatures that hide during the day.
Recommendations:
It is a little chilly in the water! Be mentally prepared for that. But hey, the experience is TOTALLY worth it.
Sign up for the tour because it is such a unique experience that will make you feel alive and completely in awe with the world.


Day 6: Central Oahu
Hiker’s Paradise | Central Oahu
While the coast of Oahu tends to be all beaches and have great, constantly sunny weather, Central Oahu is a different story: it’s very mountainous, which makes it a hiker’s paradise! The mountainous central area creates a very different weather pattern: air is lifted up and as that happens the moisture in the air condenses and produces clouds and rain. It was very common for us to be enjoying the 80 degree sun in Waikiki, decide to go for a hike in the central area, and then encounter wind, rain, and lots of mud. But all the rain results in an amazing, lush, green rainforest that is absolutely awe-inspiring and a ton of waterfalls to explore!
All that being said, check the weather before you embark on a hike! Don’t just rely on the weather where you’re at (even though it’s a small island). Many of the hikes in the central area are safe on a dry day but become much more dangerous on a rainy day, when it’s easy to slip in the mud.
8:00am Choose Your Hike, Check The Weather, & Head Out
9:00am Hike
5:30pm Get Your Favorite Takeout
6:00pm Watch Sunset at Tantalus Lookout
Getting There
All the hikes mentioned in this section will be in the central area. While travel times vary, you can expect a ~30 minute to 1 hour drive to each. I don’t recommend an Uber because service can be spotty. We still did it though and usually it worked out fine. There was one instance where we ended up walking an extra two miles along the road until we got service… so Uber at your own risk!
Option #1: Stairway to Heaven ( HARD: ~10 miles)

Panoramic view from the top! Yes, we climbed the “legal” way and then took a quick picture on the infamous stairs themselves.
Time: 9am to 4pm
Time Needed: 5+ hours. There are two ways to climb Stairway to Heaven, one is illegal and one is legal / blurred line illegal. The illegal hike is shorter and involves climbing up 3,922 steps (so exhausting but not too dangerous) and will take between 2-5 hours depending on your hiking speed. The “legal” hike, which I’ve heard is not really legal (it’s more just ignored by security) is ~10 miles and it is HARD and strenuous, especially if it’s wet. It took us, a group of fit and relatively experienced hikers, 8 hours but that included lunch and a drone session at the top!
Security: Despite authorities best attempts at dissuading people from attempting the hike, the added security risk has seemed to attract more hikers. To many, the Stairway to Heaven feels like a rite of passage when visiting Hawaii. However, I have heard security has increased and I have personally known people who have been hit with the $1,000 fine. Though security is primarily there to discourage hiking of the illegal way i.e. up the actual stairs, I had a friend who hiked the “legal” way and then walked on the stairs at the very top, at which point a cop jumped out of the bushes and handed her a $1,000 fine. Hike at your own risk!
Location: Central Oahu. The trailhead is in a neighborhood and the neighbors are very hostile to hikers and very sensitive to people parking in front of their homes.
Details for the “Legal” way:
This ~10-mile trail is quite difficult due to the extreme incline and slippery conditions. Throughout the 17 kilometers, you will ascend more than 1500 meters. The terrain is rocky, dusty, and overgrown in some sections so you can expect to get muddy and dirty on this route. If it has rained any time in the days before your hike, the trail is very slippery and muddy. Despite the ropes available on the route, unless you have experience with difficult terrains this might be very challenging.
We were determined to hike this trail so a little rain didn’t deter us at all. Don’t make that mistake! About 2/3 of the way up, I was slipping and sliding all over the place with literally nothing to grab onto in some spots. I was digging little holes in the mud to put my hands and feet into and then pull myself up a few inches. It was not pretty and it was very scary. The whole time I was thinking, “I can hardly get up this, how am I going to get down.” Luckily, when we got to the top, the sun came out, so the way down, which would’ve been very scary in the rain, was all dried mud which had good traction and made the hike down relatively easy. I was also covered head to toe in mud!
All the cautionary stuff being said, this hike is legendary. There is a reason the fines don’t stop people. The panoramic view from the top is absolutely unreal and arguably the best view on the island. You can see everything. Plus, you will be so proud of yourself for all the hard work you put in!
Bring food, more water than you think you’ll need, and be prepared to get dirty!

Unreal feeling at the top. Unreal.

Quick mid-hike drone session! Packing all the camera equipment on this hike really added up :’) But worth it to have it all captured.

In the morning, after it rained!

In the afternoon, once the sun came out!
Option #2: Three Peaks (Medium-Hard: 4.4 miles)

Time: 9am to 4pm
Time Needed: This is a longer hike. How long it takes you depends on your hiking speed, how far you go, and how many snacks you bring and eat along the way. I would leave at least five hours for this hike.
Location: Also known as Olomana Trail, see it here on All Trails.
Details:
Located in Kailua, on the windward side of Oahu, Olomana Trail (“three peaks”) is a strenuous hike with amazing views if you can make it to the top. It is not for those who are afraid of height.
The trail can be accessed from the intersection of Maunawili Road and Auloa Road off of Pali Highway. There is no parking area at the trailhead - the map shown on All Trails will direct you to parking on the side of the road with a walk to the trailhead from there. Users have reported cars getting towed and parking tickets in this area. It is not clear where the legal parking is, so park at your own risk. We parked about a mile down the road, which just added to the total hiking time.
To get to the trailhead you will walk along the road to the golf course, then there will be a path on the left.
Hiking to the first peak, Mount Olomana, is about 1.5 miles (2.4 km) up with steep drop-offs on both sides and takes about an hour and a half to get to. Toward the top there are some rock climbing elements. The top of the first peak offers 360 degree views. It is steep on the downhill slope towards the second peak. The next peak isn't as challenging but still has an excellent view. The last peak (3rd peak) should only be tried by experienced hikers in good shape and requires ropes all the way up. To return to your car you must go back the same way you came. This is a favorite hike in Oahu, however, it can be very challenging with all of the ups and downs.
We hiked halfway to the third peak and then decided that was good enough for us. The path to the third peak gets somewhat technical and the drop-offs are dizzying, plus it has the worst view of the three peaks. In my opinion, the real purpose of the third peak is to say you did all “three peaks” but the risk vs. reward trade-off just wasn’t there for me.
Recommendations:
Bring snacks! Plan to have a lunch at one of the peaks.
View of the Third Peak from the Second Peak. There’s a great spot for lunch on the Second Peak!
Ropes required to descend the Second Peak on your way to the Third Peak.
An example of what “rock climbing” looks like! Also, a word of caution, some of the ropes have been around a long time. Always have two points of contact with whatever you’re climbing for safety.

Some parts are challenging but fun and pretty safe as long as you’re careful with your footing and hand placement! The real “dangerous” parts are when you’re climbing on a ledge.

One of my favorite views on all of Oahu. The straight wall of mountain (view from the First Peak). This picture makes me feel so small and young, like there is so much strength, power, and history in these mountains.
Option #3: Manoa Falls & Related Trails (Easy: 1.7+ miles)
Time: 9am to 4pm
Time Needed: There are so many short fun hikes to do in the Manoa region! You can easily fill this time hiking, snacking, relaxing underneath the trees, or sprawled near a waterfall.
Details:
The hike to Manoa Falls only is about ~1.7 miles on an out-and-back heavily-trafficked and relatively easy trail. When we went there were bugs, so bring bug spray (one of the only hikes I noticed the bugs). From this trail, there are a ton of other trails that branch out. Depending on how long you want to spend hiking, you can easily wander around on various trails for hours.
When we went, we did the hike to the waterfall and then started exploring. Seven miles later and only a few “lost” moments, we emerged from the forest near the Tantalus lookout and walked a few miles along the road until we had service and were able to Uber back to Waikiki.
Recommendations:
Unless you are feeling very adventurous, I recommend deciding how far you want to hike and then planning out your trail path before you go. Some of the maps on the back trails are a little confusing and the service is spotty making it easy to get lost. I recommend having All Trails up ahead of time. The GPS function makes it so you can see where you are relative to the trail you’re supposed to be on.
Use All Trails to see connecting trails and options to extend the Manoa Falls path.

The Manoa Falls is a bit of a “trickle” and the water is pretty stale so I don’t recommend swimming!

There are a ton of bamboo forests in this hiking area.

Don’t forget to look up and check out the canopy!
Watch Sunset @ Tantalus Lookout

The view from the Tantalus Lookout right before sunset.
Time: 6:00 to 7:30pm
Time Needed: An hour or two to enjoy a meal while you take in the sunset and gorgeous view of Waikiki twinkling at twilight.
Details:
Tantalus Lookout is on top of a 1,048 ft hill and allows you to see inside Diamond Head Crater, the entirety of Waikiki, and to the horizon line on the ocean.
The road leading up to the Tantalus Lookout summit is a beautiful drive winding through the lush suburb of Manoa. There are many turns and if you keep your eyes open you will take in great views of Waikiki before you even reach the top.
Recommendations:
Grab takeout, then enjoy your meal while also taking in the landscape!
It’s a very romantic spot so if you’re with your special someone, a bottle of wine might not be a bad idea.
Be aware that cell service is spotty at the top. If you drive yourself, it is common for people to stay in their car to watch the sunset.

Just after sunset with Diamond Head in the background! The sparkling city below is Waikiki at night.
Day 7: Choose Your Adventure
After an entire adrenaline-filled, scenic, and adventurous six days, it’s time to take a day to relax and soak in all the newly-generated memories.
OR, you can also use this day to go back to any spots you felt like you didn’t have enough time at or that you had to skip earlier in the week.

Enter Hawaii “Relaxation” Mode.
Other Ideas If You Have Time:

Crouching Lion Hike
Short, steep climb to a rock formation with incredible views over Kahana Bay. It’s a little hard to find (use AllTrails to get on the correct trail).

Go Parasailing!
It’s a very peaceful and safe way to experience the water and get a beautiful birds-eye view of Waikiki. We went through X-Treme Parasail and they were great.

Visit Pearl Harbor
The iconic Pearl Harbor is a sobering and reflective experience. You can do a self-guided or guided tour, which will likely include transportation.

Beach Bonfire!
Though beach bonfires are illegal on public beaches in Oahu without permission, there are still a number of opportunities for bonfires. Look for bonfire events during the time you’re visiting!
Bring a sweatshirt to snuggle up in because it does get a little chilly on the beach at night.

Visit the Honolulu Botanical Gardens
The centrally-located botanical gardens are a fun and affordable way to spend a few hours amongst nature and learn some unique history about Hawaii!

Hike to the Pink Pillbox
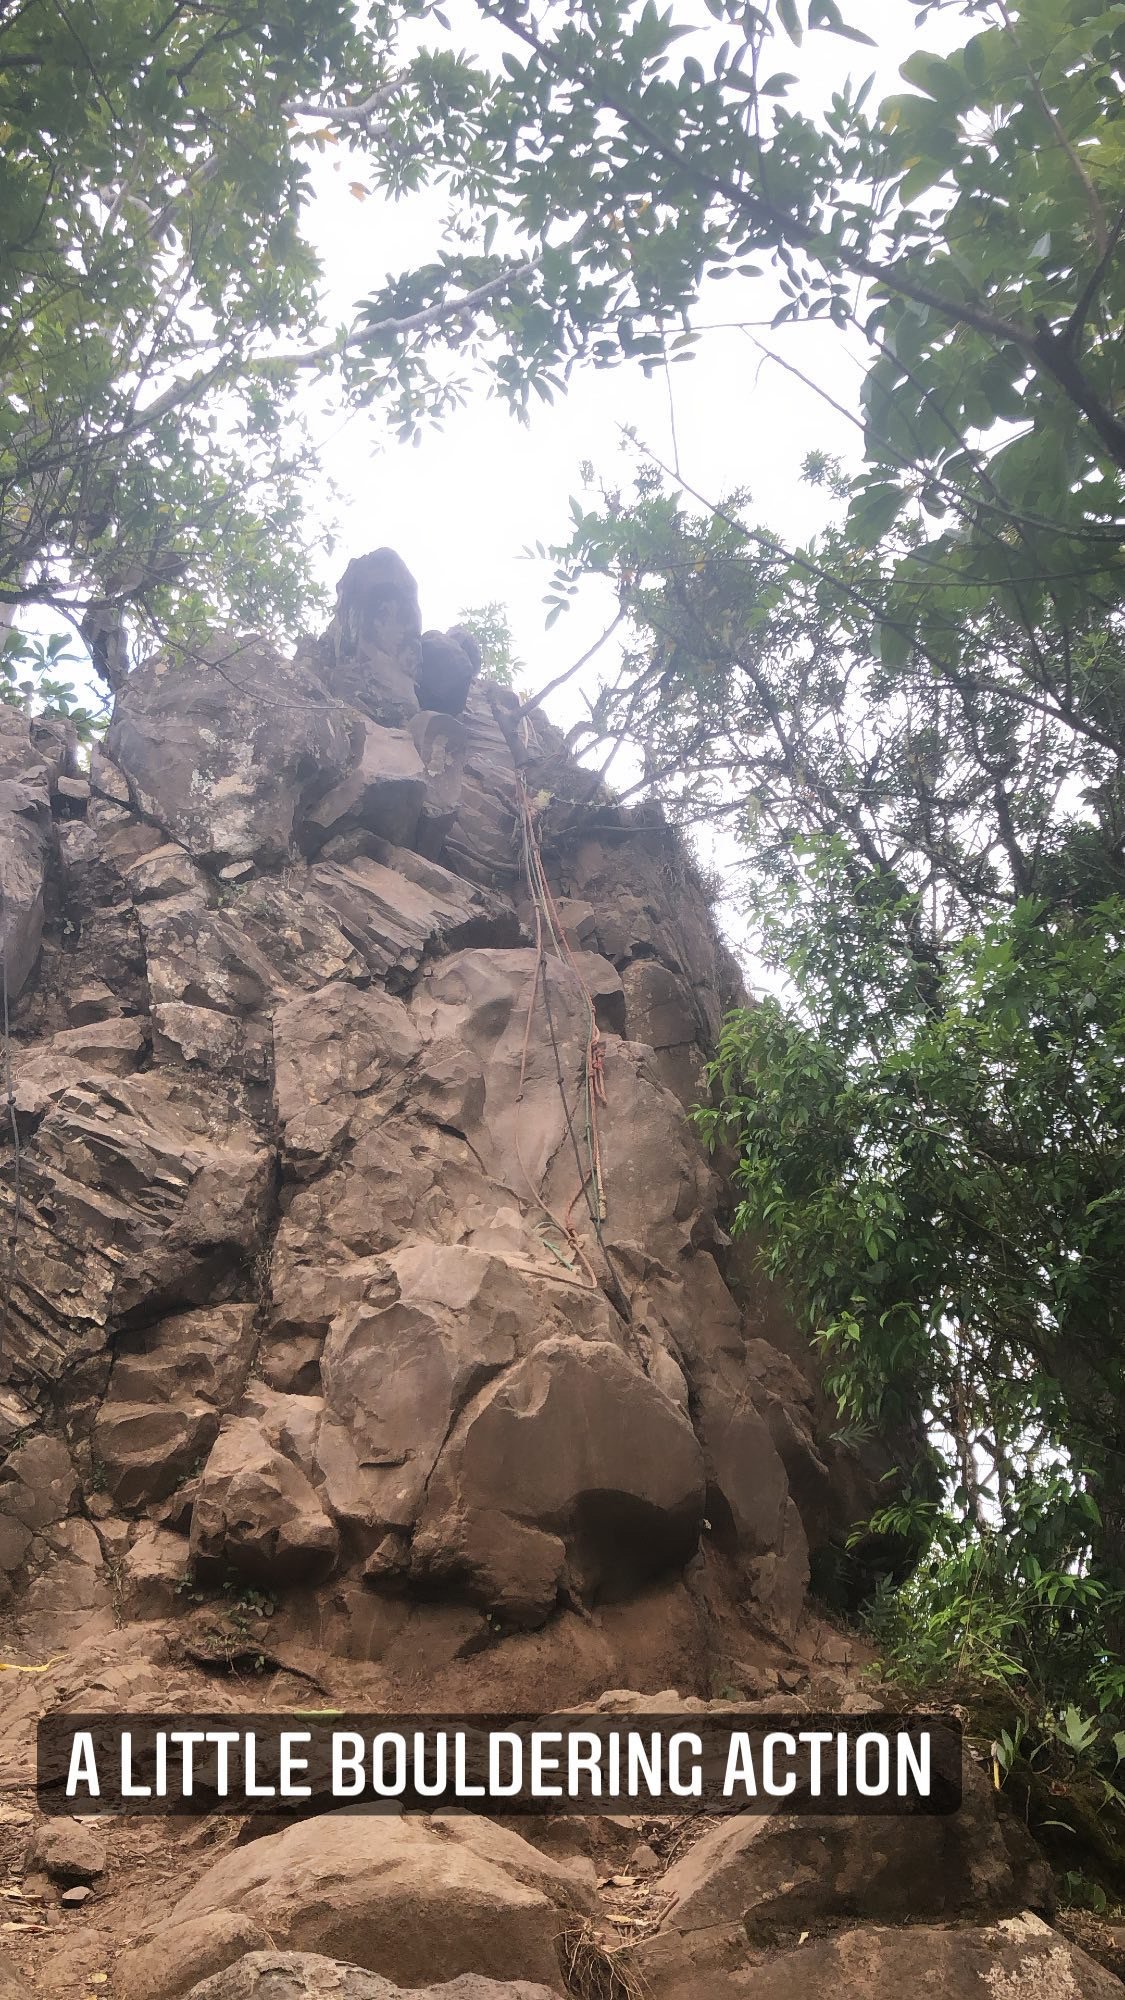
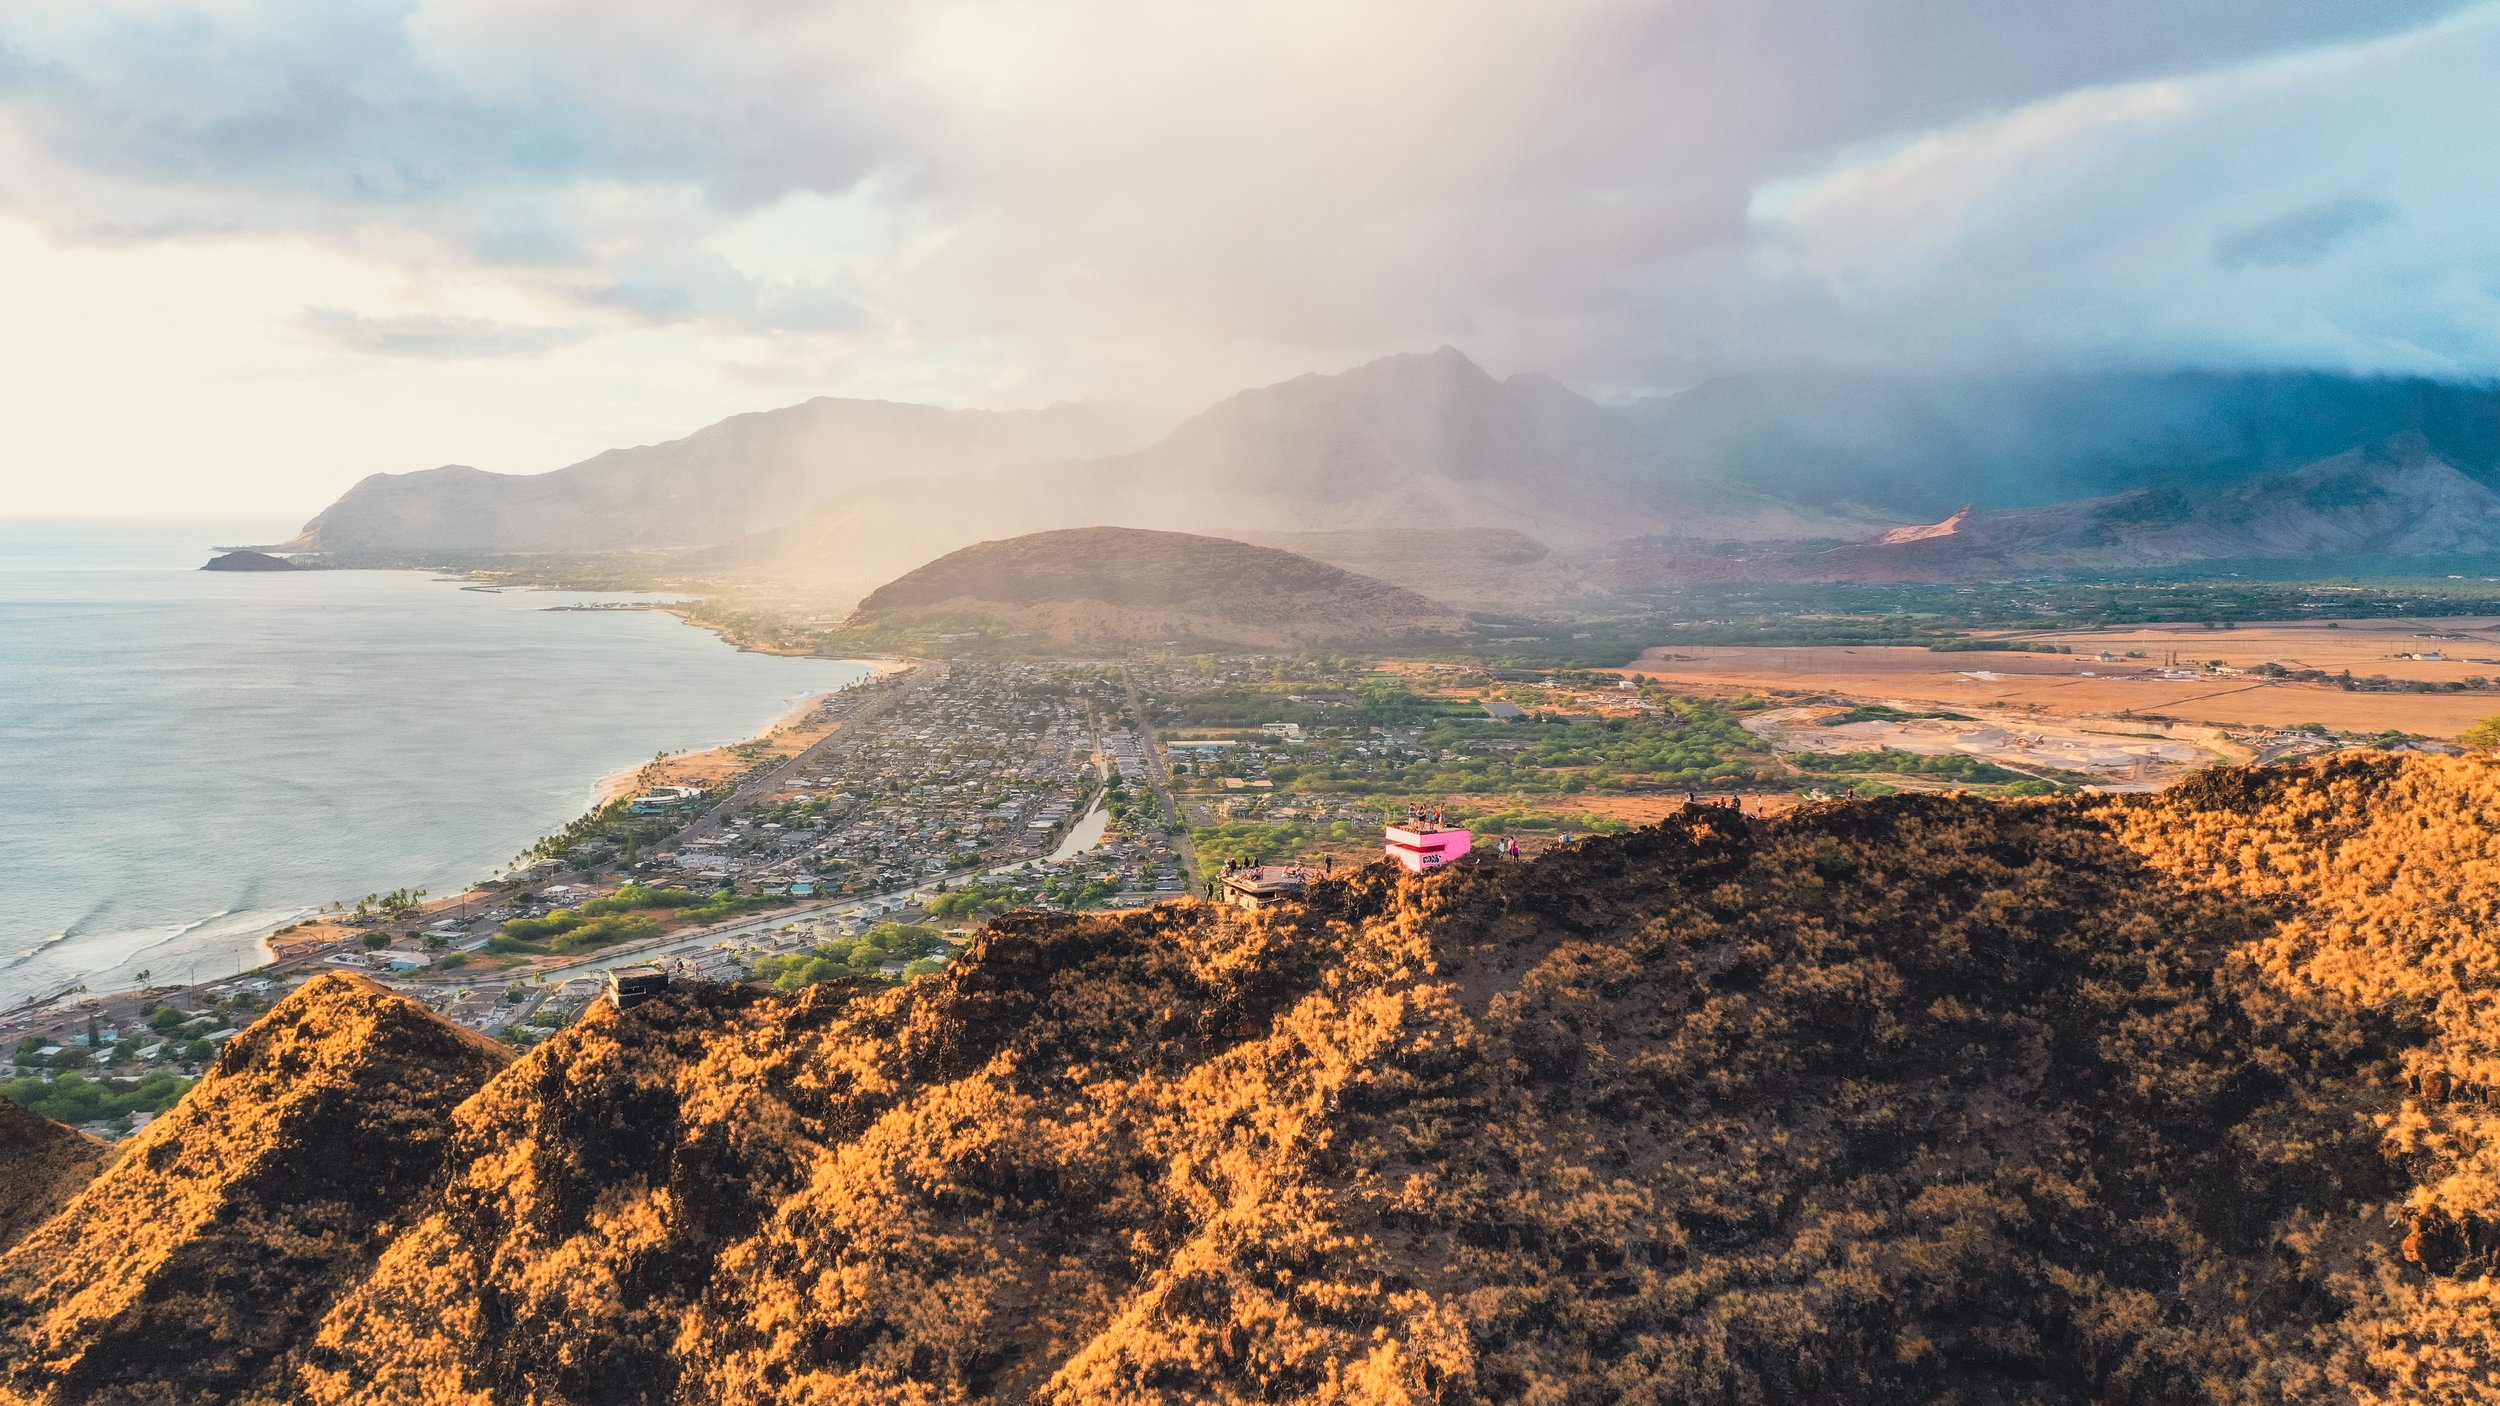
An incredible 1.6-mile out-and-back moderate hike up to multiple pillboxes (my favorite, and the one the hike was nicknamed after, is the pink pillbox). This trail is in the very dry Waianae region of Oahu so there isn’t a lot of shade. Bring water and go at dusk to watch the sunset.

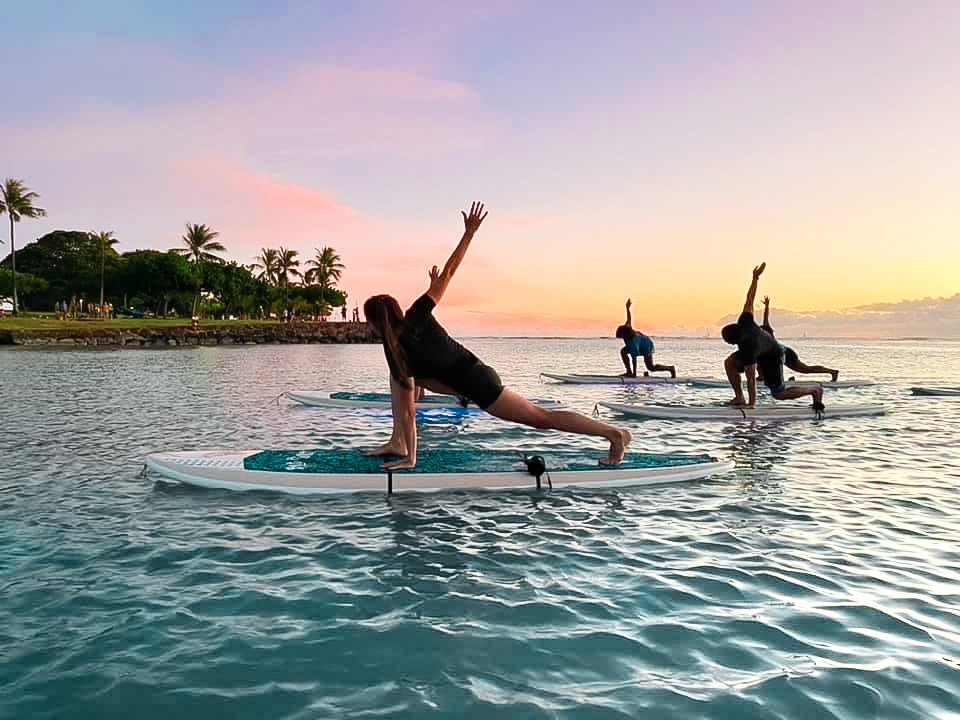
Try Float Yoga!
Regardless of how much yoga you’ve done before, this will be a whole new yoga experience. Expect splashes during the class! It is magical, especially as the sun sets.
Nothing like forgetting everything else for awhile and just being truly present in a beautiful place.
If interested, you can sign up for classes through Yoga Floats (night classes are ~$65 per person).

Start when the sun begins to set.
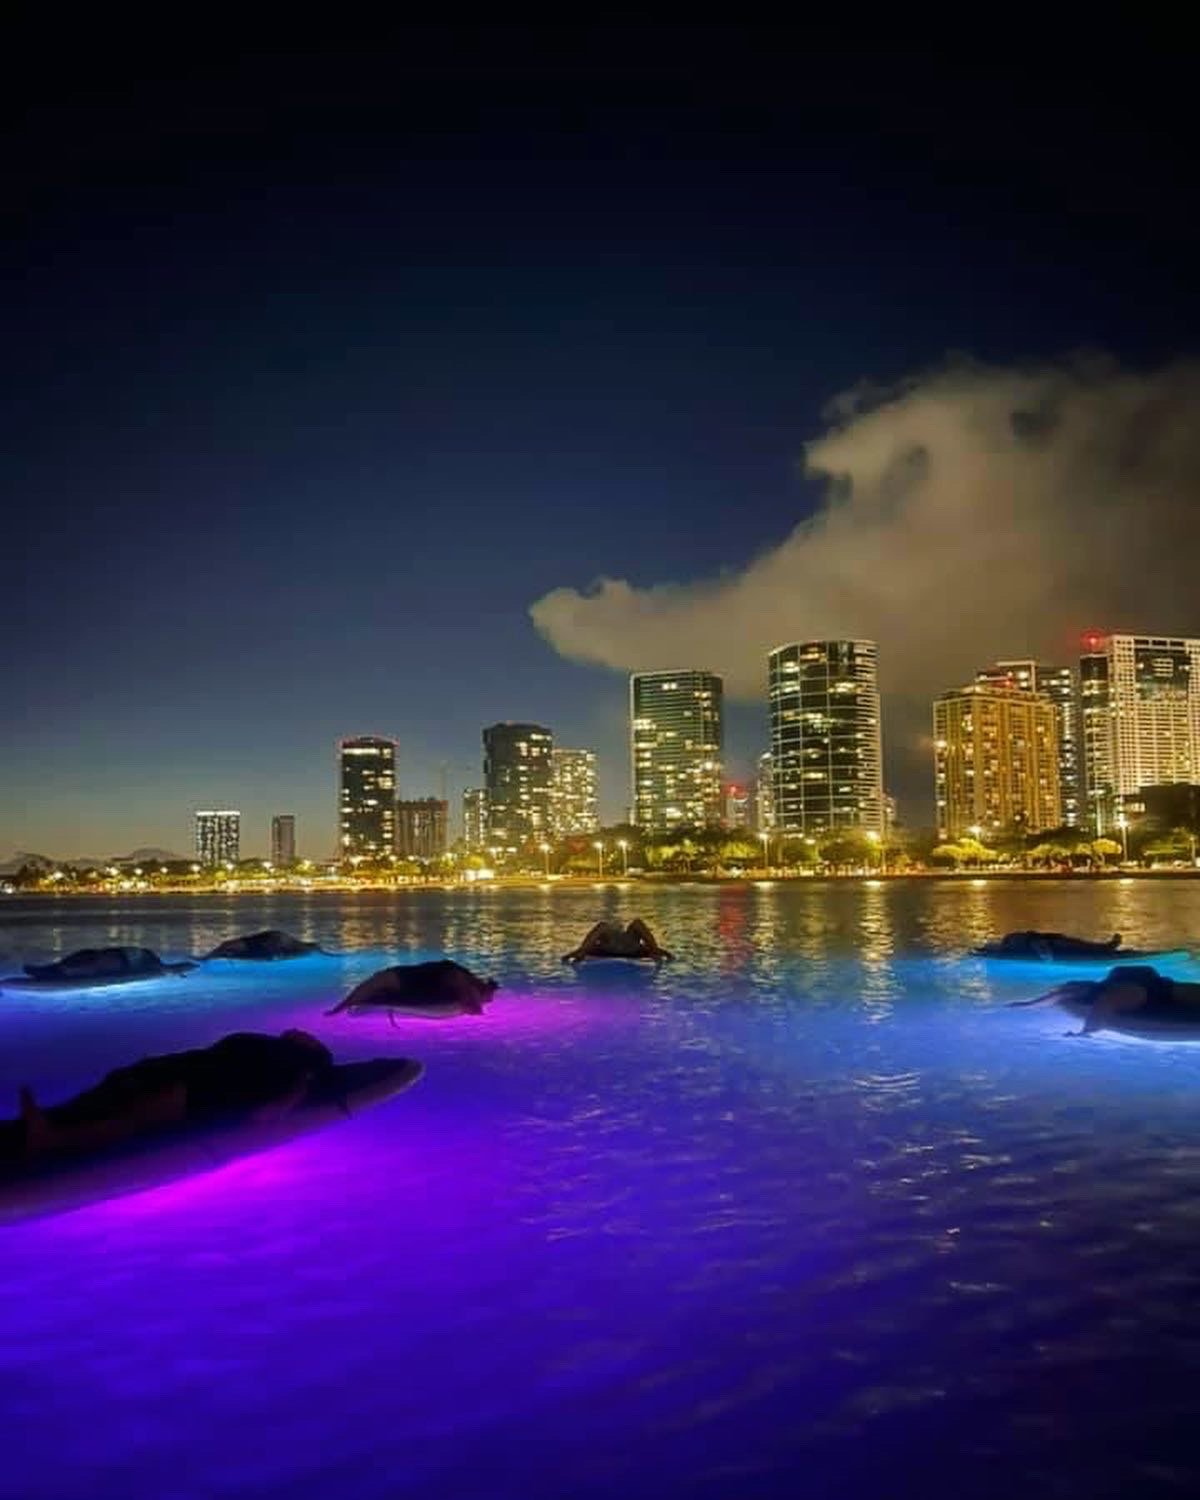
End in Shavasana with the skyline illuminated!

Do an Underwater Photoshoot!
Hawaii is one of the few places the water is warm enough to want to attempt this! Between holding your own breath, the photographer holding their breath, timing those breaths with the pose, and making sure you have a camera that can capture well underwater… underwater photography is much harder than it looks, but it is so much fun to try!
If you want amazing underwater photos, reach out to Ocean Light Photo.

Any questions or suggestions?
I always love hearing from people - reach out if you have any comments or questions. If you do use this itinerary, let me know how it works out. Enjoy!