
North Cascades
4-Day Summertime Adventure Itinerary based out of Mazama, Washington
Washington Alps Adventure
If you ever wanted to go to the Swiss Alps but you live in the states, this itinerary is the one for you! It combines amazing views of what I now call the “Washington Alps” aka the North Cascades with river floating, stargazing, mountain biking, and sunset picnics all packed into an adventuresome four days.

High-Level Itinerary
Day 1
Hike Maple Pass Loop Trail & Yoga at the Ranch

Day 2
Mountain Bike the Methow Valley & Hike Blue Lake Trail

Day 3
Float the River, Lunch in Winthrop, & Sunset Picnic
Day 4
Hike Goat’s Peak Trail, grab lunch, then head back home

Lodging: Mazama Ranch House
There are quite a few options for places to stay. For the hikes we did, I recommend staying in Mazama, where you can find a beautiful cabin or inn and stay within an hour of everything on the itinerary. However, Winthrop is a bustling little town, right along the river with additional lodging options and more options for eating / night life. It does add about 50 minutes round trip to most of the hikes on the itinerary since it is further east. My personal preference is to stay closer and avoid additional drive time.
We stayed at the Mazama Ranch House and absolutely loved it! The main house has two wings with sectioned off rooms, as well as a few different cabins you can stay in. It is very close to all the outdoor activities / hikes, and right next to the Mazama Grocery Store, which was fully stocked with high quality foods, fresh locally-grown produce, a variety of dairy-free and gluten-free options, and an on-site bakery and restaurant.
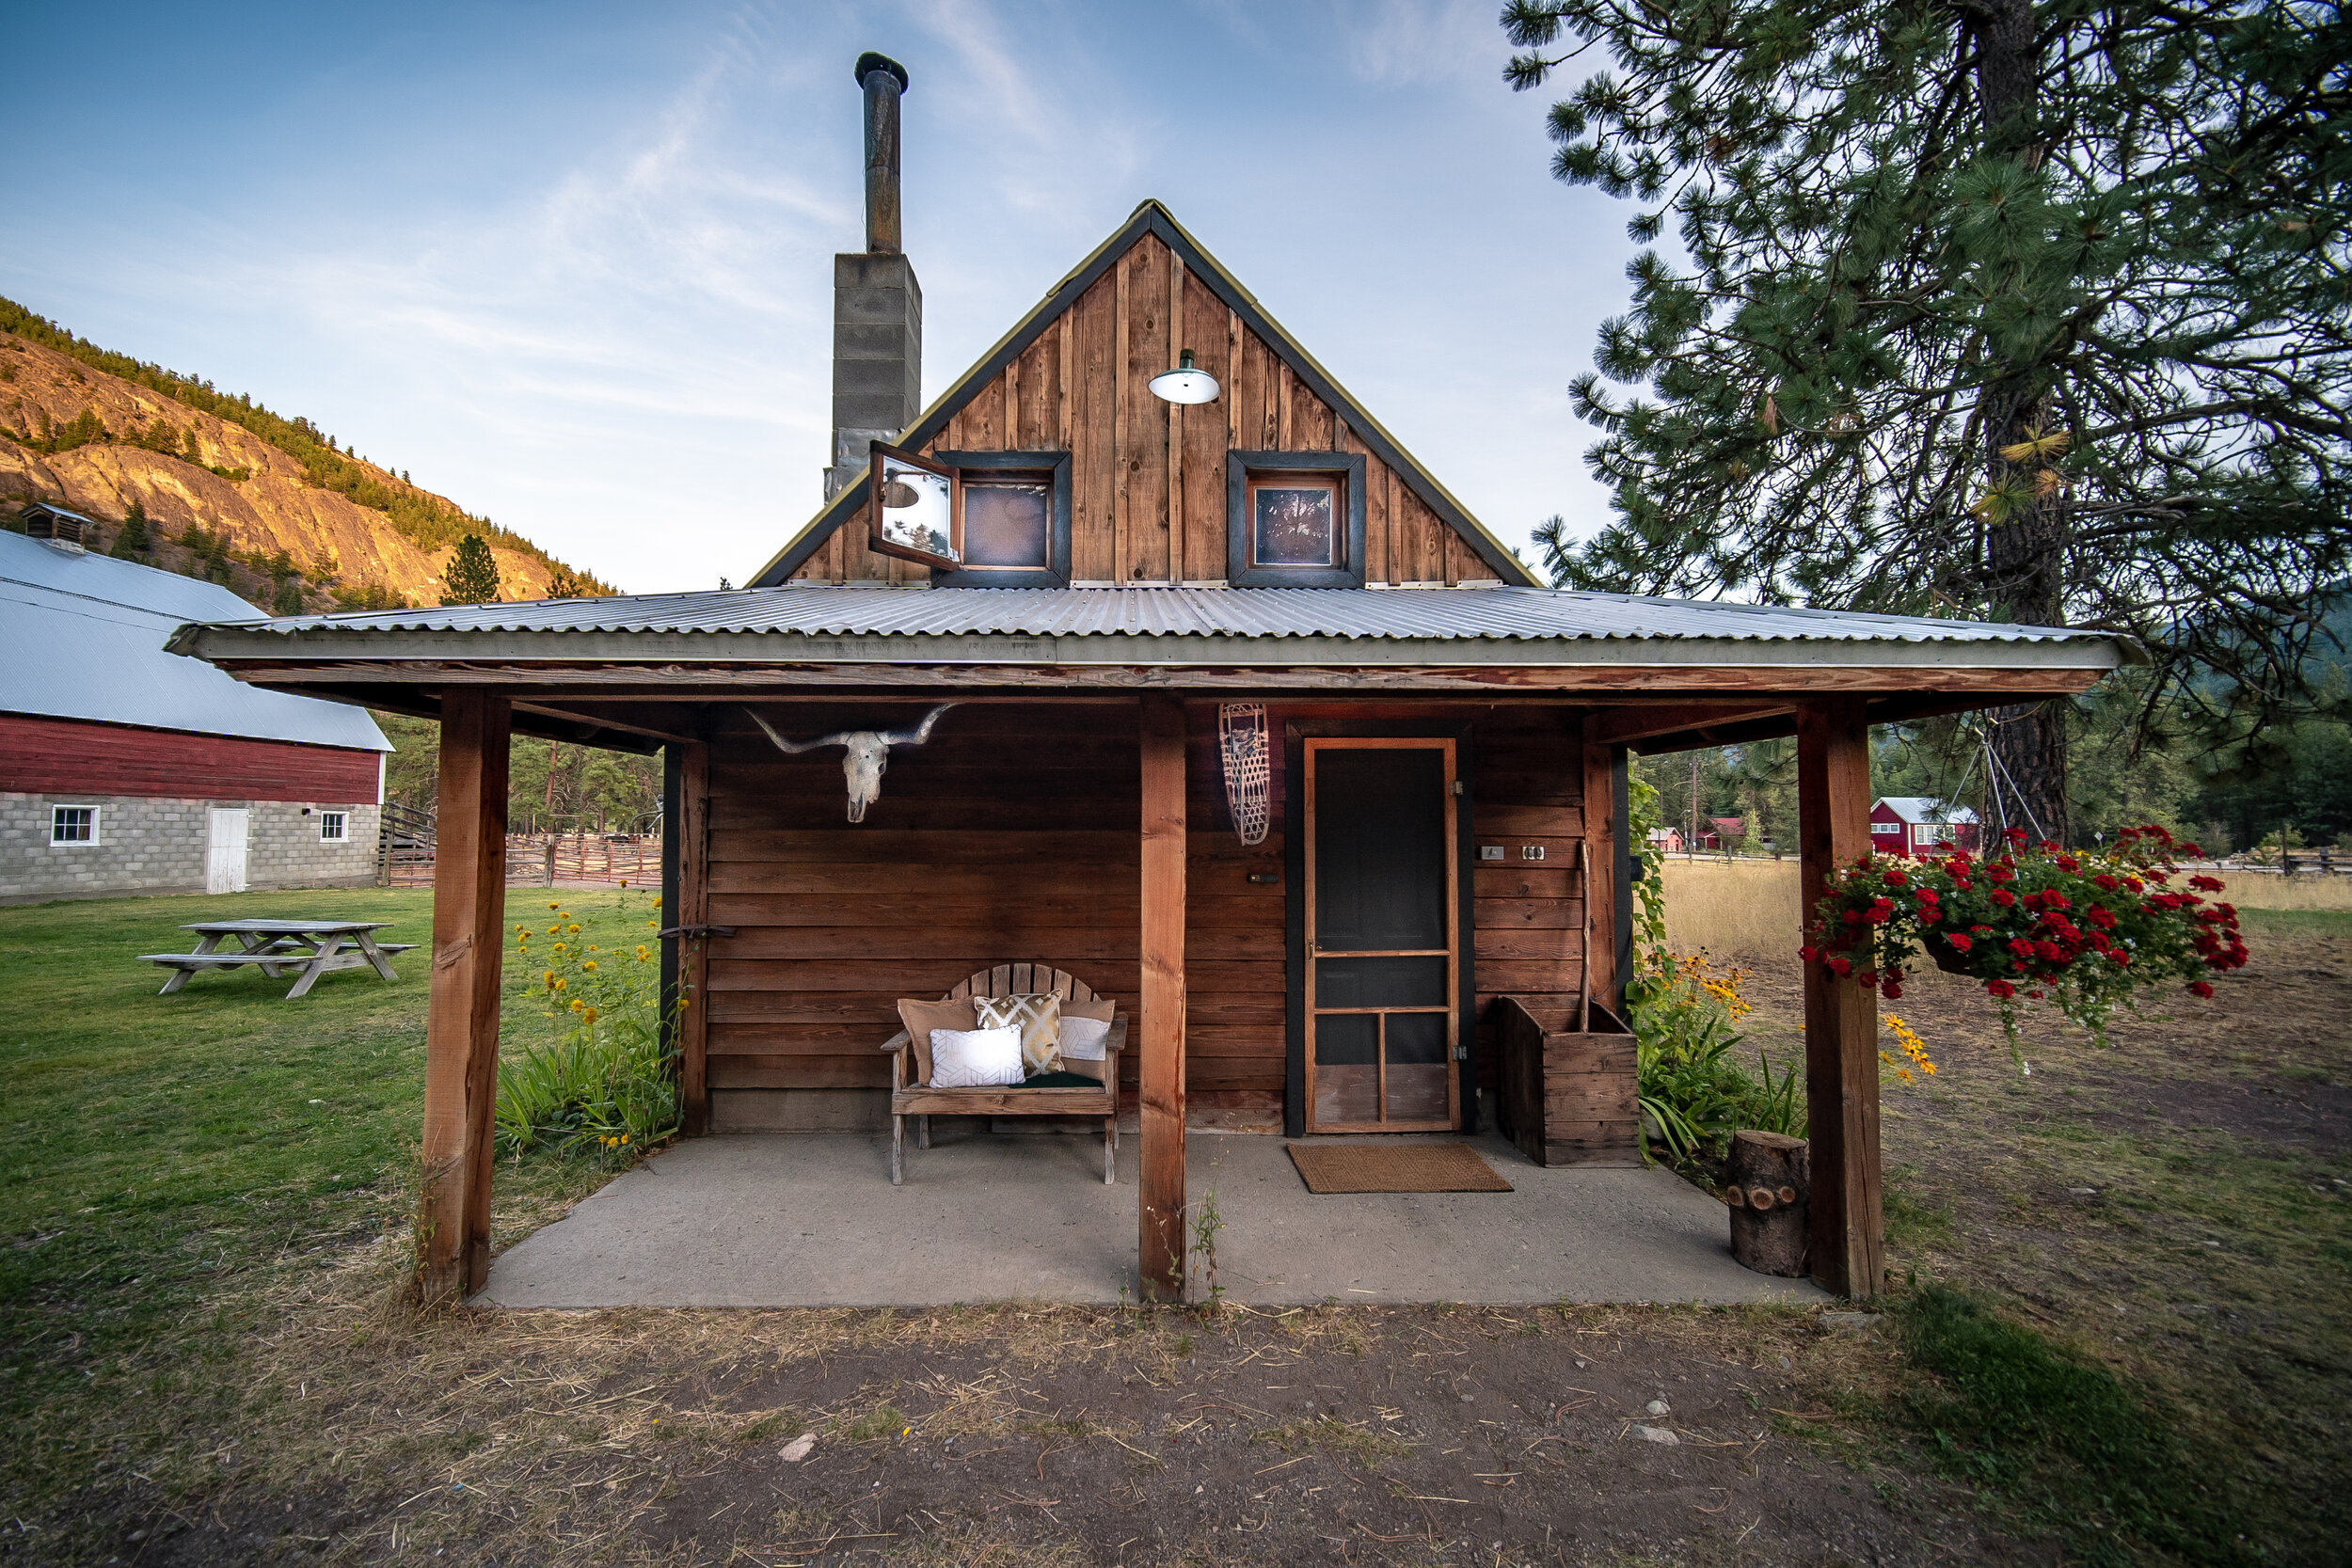
We stayed in the Longhorn Cabin and it was exactly what we were looking for: rustic, picturesque, and spacious (sleeps 2-4). It had a pullout couch on the main floor and a queen-size bed in the loft. It also had an adorable, fully-equipped kitchen. Beautiful sunflowers surround the cabin outside and it is just a few steps away from a hot tub, secluded by even more sunflowers.
Price: The price varies based on seasonality and weekday/weekend rates. We paid a total of $590 for 4 nights (Tuesday – Friday night). Weekday rate was $130 and the weekend rate was $145. This isn’t a bad price split between a few people.
Drinking Water: The well water that bubbles up into the cabin is not only drinkable but it does taste pretty great so you can fill all your containers right at the cabin.
Service / WiFi: The WiFi is okay. It was a little slow but better than nothing. I wouldn’t count on it for super reliable streaming. However, we were able to stream Netflix every night except Friday night. The cell service in the valley was good and pretty reliable as well.
Rustic Aspects: It came with a few mice crawling around the cabin. We even found one in a mouse trap the first day. However, still a perfect location to enjoy the beauty of the North Cascades, especially for the price:


Location Information relevant to Itinerary:

Getting to Mazama
from Seattle
Seattle straight to Mazama Ranch House: 3.5 hrs, 176 miles
Seattle to Diablo Lake: 2.5 hrs, 128 miles
Diablo Lake to Washington pass: 36 min, 30.8 miles
Washington Pass to Mazama Ranch House: 20 min, 17.6 miles

The Essentials (from Mazama Ranch House)
Hot Tub: 1 min, 20 ft from cabin
Mazama Grocery Store: 3 min, 0.1 mile
Goat’s Beard Mountain Supplies: 3 min, 0.1 mile

Activities (from Mazama Ranch House)
Methow River Floating: 5 min, .2 mile
Winthrop: 16 min, 13.7 miles
Blue Lake Trailhead: 21 min, 18.6 miles
Maple Pass Loop: 25 min, 22.5 miles
Goat Peak Lookout Trail: 37 min, 13.6 miles
Day 0
Getting There
From Seattle, the drive to Mazama is ~3.5 hours. I recommend driving up in the afternoon so you can enjoy the beautiful drive along North Cascade Scenic Highway at sunset. The views are breathtaking with plenty of photo ops around every corner. Here are a few of my favorites:
Diablo Lake Vista Point
Diablo Lake Vista Point @ 10am (after sunrise)
Time Needed: 30 minutes, take some photos and enjoy a snack
Details: The color of the water is absolutely unreal – a deep, rich aqua. There is a parking area with a fence around the perimeter. For the best photos, I recommend walking past the bathrooms, there will be a little trail that takes you out to an area where you can see the view with no obstruction.
Photography Considerations: For photos here, you really want full light on the lake so I recommend sometime between 10am to 4pm. We tried to catch both sunrise and sunset here, but for both, the mountains obstructed a lot of the light so you couldn’t see the deep blue of the lake or the details of the mountain. We ended up enjoying the view with a snack for a few hours after sunrise, before taking these pictures at 10am, when the lake finally had full light on it.
Additional Option: If you’re getting an earlier start, there are a ton of amazing places to stop and swim as you drive up to the viewpoint (heading North East to Mazama). It will be cold, but the water is so clear and colorful it will feel like the perfect place to pull over and take a quick dip or enjoy a meal.
Time Needed for Lakeside stop: 30 min to a few hours; it would be easy to spend all day here or just stop for a quick dip.
Washington Pass Overlook Trail
Washington Pass @ 6pm - the mountains are partially shaded because the sun is going down.
Time Needed: 30 minutes, take some photos and enjoy a quick snack / glass of wine
Details: For this viewpoint stop, there is plenty of parking. From the parking area, you have a 0.2 mile walk before coming across a number of different locations where you can see different angles of the valley below.
Photography Considerations: This area would be beautiful for any time of day, but especially at sunrise and sunset. My recommendation would be to see this view at sunrise or earlier in the day, when the mountains are lit up beautifully and you can capture the details.
Day 1
Hike Maple Pass Loop Trail & Yoga
9:00 am Leave for Maple Pass Loop Hike
9:30 am Arrive at Maple Pass Loop Hike (Rainy Lake Trailhead)
12:30 pm Lunch at the top
1:00 pm Head back down
2:30 pm Drive back to Mazama
3:00 pm Shower / Clean up
4:00 pm Yoga
5:00 pm Dinner
6:30 pm Hot Tub & Enjoy the Evening
Maple Pass Loop Hike
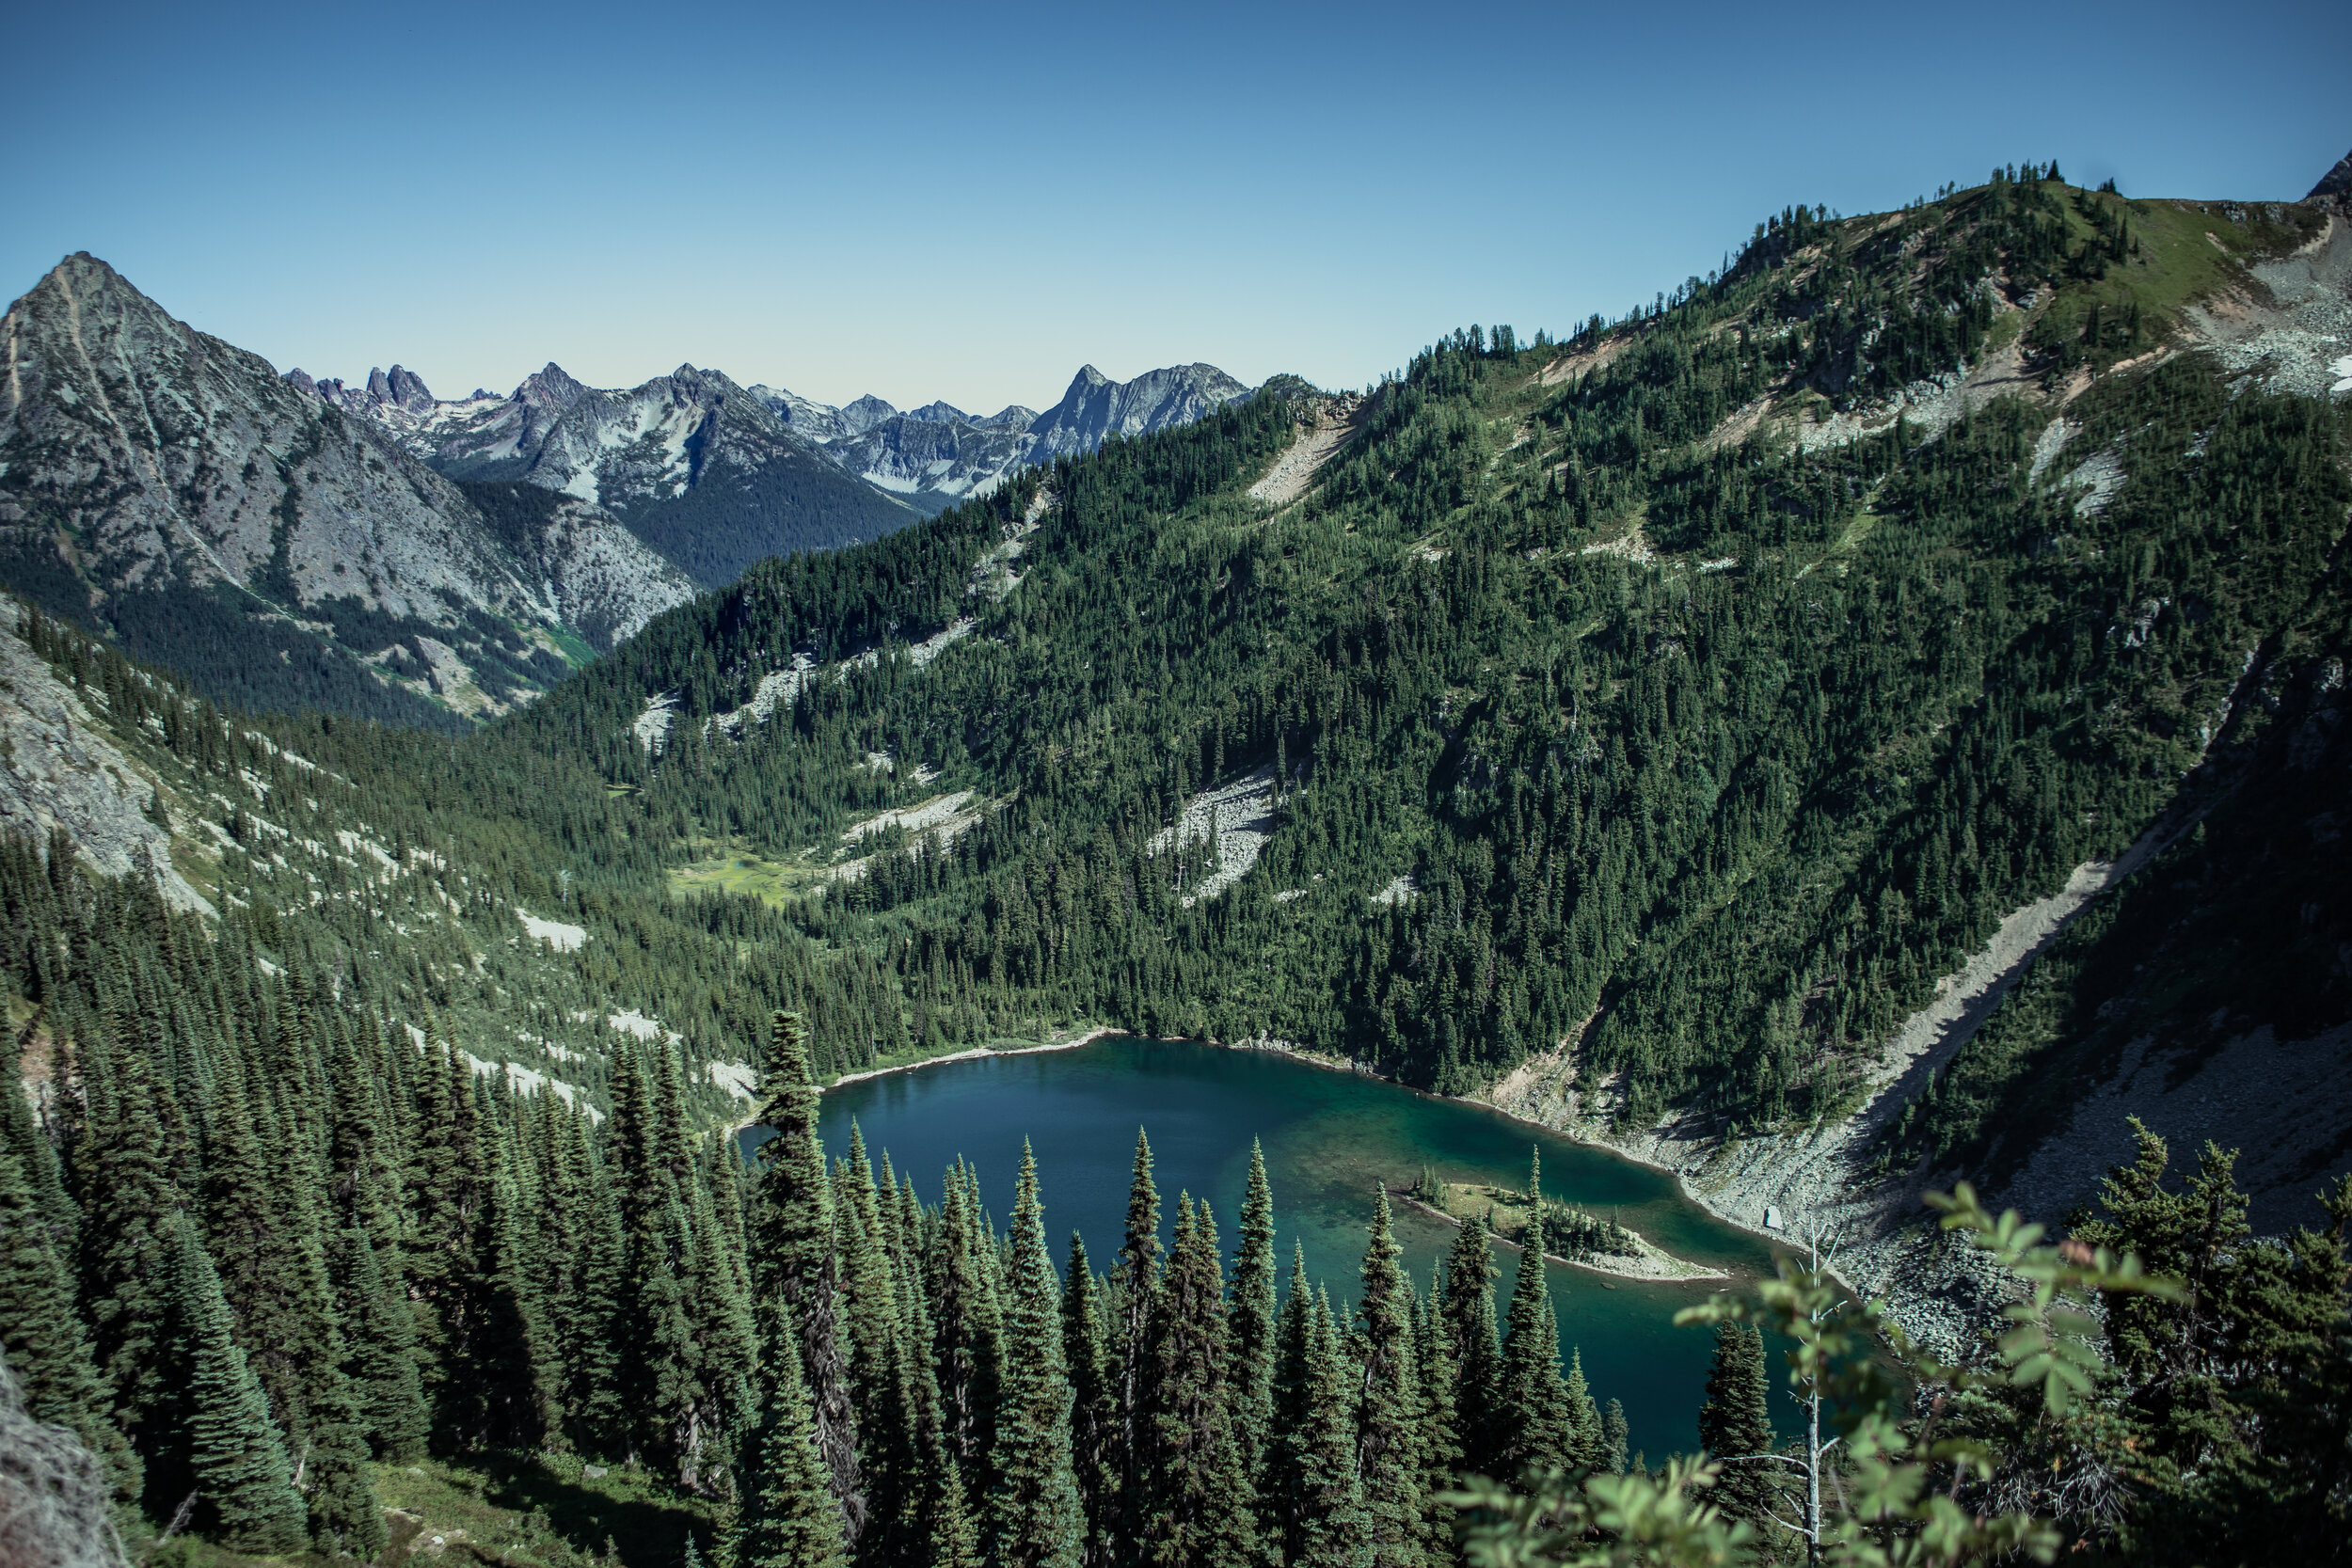
Lake Ann at around 3pm from the ridge leading up to Maple Pass
Time Needed: 5 hours for hike, lunch, and some time to take photos at the top
Cost: $5 Parking Fee, deposit payment onsite
Location: Heather - Maple Pass Loop along the North Cascades Highway
Details:
Maple Pass Loop Trail is a ~10 mile hike with ~2,500 ft of elevation and stunning views of both Lake Ann and Rainy Lake, as well as all the surrounding mountain ranges. Since the views are of the lakes below, the best time of day to view the lakes / get great photos is mid-day where there will be full light on the lakes and mountain areas. Originally, I had wanted to do sunset pictures here, but we ended up skipping this idea because not only are the lakes no longer lit up at sunset but it is also about an 1.5 hour hike down and we didn’t want to do that in the dark.
Recommendations:
Bring snacks, lots of water (we had 1 gallon each and we drank all of it by the time we returned), and give yourself enough time to enjoy the hike and make stops along the way.
Use hiking sticks even if you are in great shape! It really helps to stay stable on the longer hikes and to avoid twisting an ankle. I didn’t think I needed them but my mom forced me to take at least one and I found it to be super helpful and really helped with my balance.
I recommend going counter-clockwise and starting at the Lake Ann trailhead because it has a less steep incline.
View from Maple Pass Ridge at the very top around 4:30pm. The view of the lakes is partially shaded at this point in time.
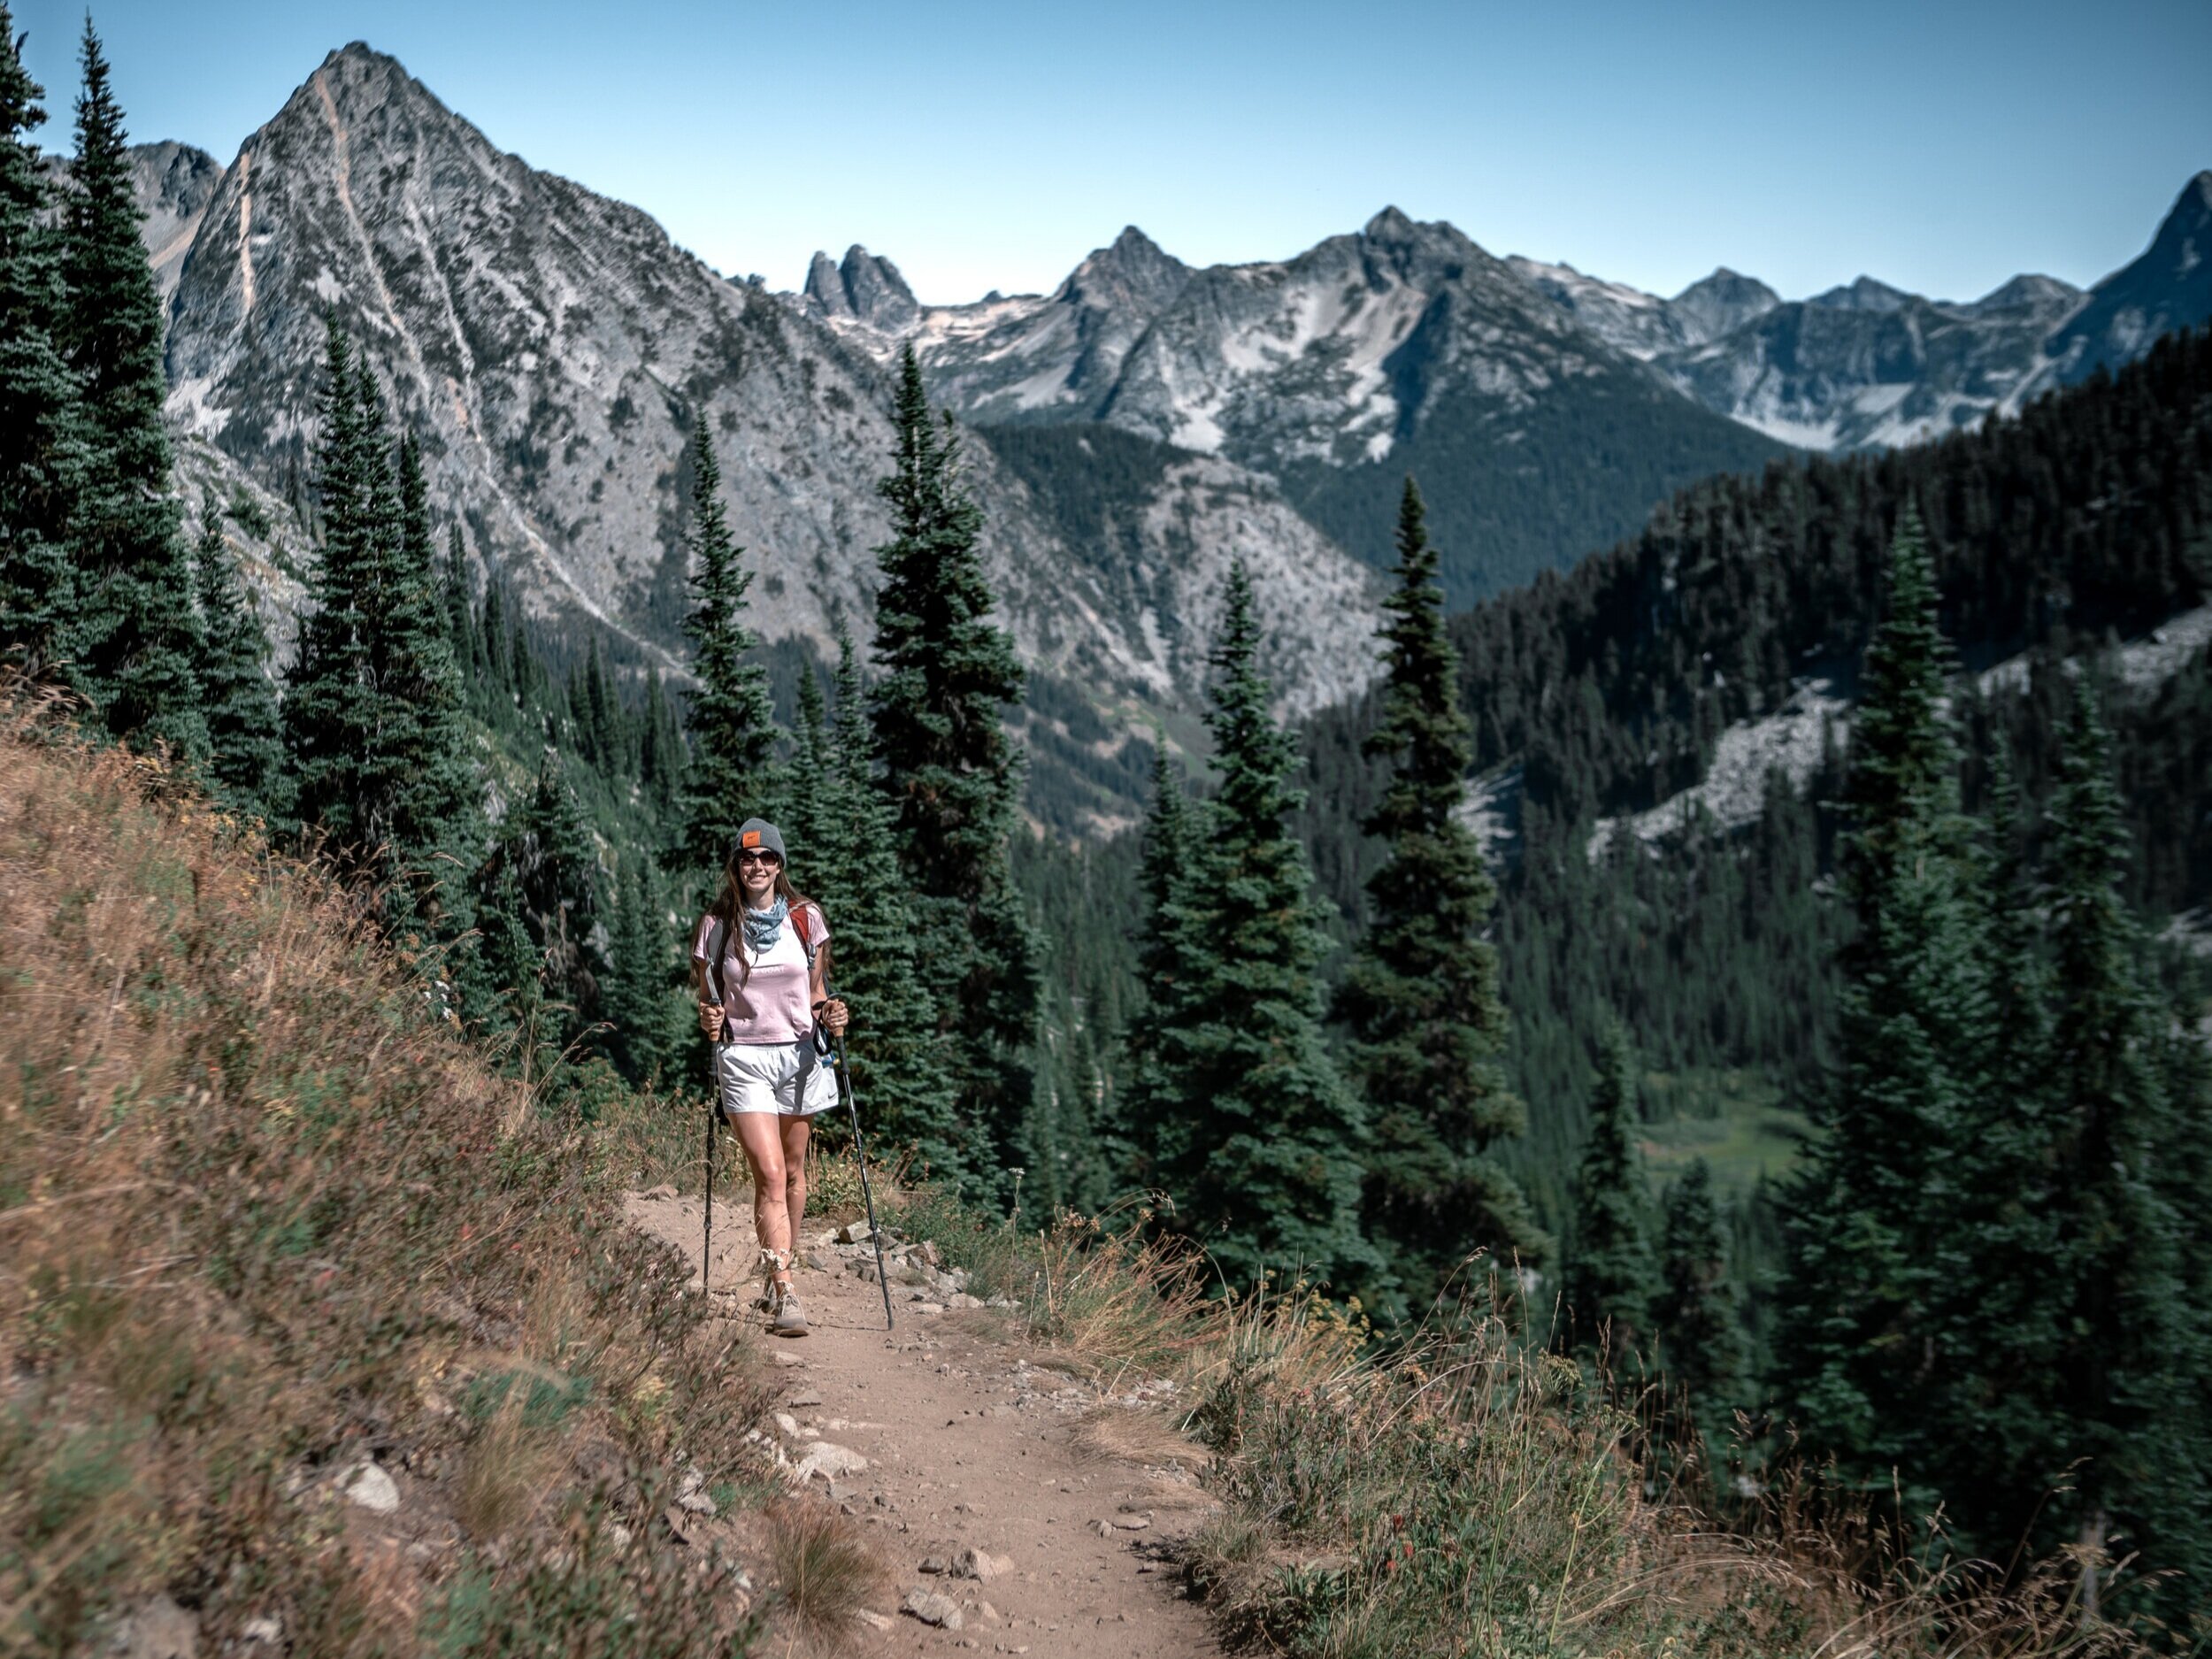
On Maple Pass Loop Trail around 1:30 pm
View after ~1 hr of hiking (starting from the Lake Ann trail), time around 2:30pm
View climbing up to Maple Pass Ridge from the Lake Ann side around 3:00pm
Yoga at the Mazama Ranch House
The whole Mazama area is absolutely breathtaking - and the perfect backdrop for a relaxing yoga session (which will be much needed after a long day of hiking). At the Mazama Ranch House, we brought our mats out onto the lawn and stretched for an hour or two, at times doing self-guided stretching and also following along to some of our favorite YouTube Yogis:
Day 2
Mountain Bike the Methow Valley & Hike Blue Lake Trail
9:30 am Lazy Morning at the Cabin + Brunch
9:30 am Mountain Bike
12:30 pm Return to Cabin, Pack Up, & Quick Snack
1:00 pm Drive to Blue Lake Trail
1:30 pm Hike Blue Lake
3:00 pm Snack, Swim, and Enjoy the Lake at the top
4:00 pm Head back down
5:00 pm Drive back to Mazama
5:30 pm Dinner at the cabin or local restaurant
6:30 pm Game Night / Movie Night
Mountain Bike the Methow Valley
The suspension bridge 2.5 miles out from the rental store where you can enjoy a snack and a beautiful view!
Time Needed: 2-3 hours
Cost:
Half-Day (4 hours; first come, first serve): Adult Bike $25, Kids Bike $15
Full-Day (8 hours; reservations can be made ahead of time for full day rentals): Adults Bike $35, Kids Bike $20
If you are mountain biking on the weekend, I would recommend making a reservation because it seemed much busier. We went on a Thursday morning and there seemed to be plenty of bikes. If you are doing this during a weekday, it probably isn’t necessary to reserve ahead of time.
Location: Rent bikes from Goat’s Beard Mountain Supplies, right next to the Mazama Grocery Store
Details: The Mountain Biking in Mazama was fantastic. Despite very hilly areas all around, the Mazama valley has a lovely expanse of relatively flat and beautiful paths that you can explore right from the bike shop – no need to put the bike on a vehicle.
If you stay at the Mazama Ranch House or close by, you’ll be right next to Goats Beard Mountain Supplies where you can rent a bike for either a full day or a half day. They have a range of bike options to choose from. We got regular mountain bikes and took a trail to the left that was about 2.5 miles right alongside the river.
After about 2.5 miles we reached this beautiful suspension bridge where you can take a few photos and enjoy a snack. From the bridge, you can climb a short hill, and then coast down back to the bike shop making a full loop.
However, if you want more of a challenge, you can also grind up the Cutthroat pass.
Recommendations:
Pick up some snacks or refreshing beverages to enjoy from the Mazama Grocery Store. We brought some delicious Kombucha with us (the lavender berry flavor)!
Be aware that the bike seats are very thin and may not be comfortable for long or strenuous rides. If you do have a bike seat cover that is more comfortable I would suggest bringing that along.
If you want to bike for longer, there are a ton of different trails. The staff at the rental place know the area very well and are more than willing to help you plan out your biking path.
Blue Lake Hike

Blue Lake at around 3pm. While it looks somewhat green in the photo, the lake changes color as you walk around it, going from a green when it first comes into view, to a beautiful aqua further on, and a deep blue when you’re in it (BRRRR).
Time Needed: 3.5 hour. Honestly, we could’ve spent all day up at the lake but the actual hiking time is probably around 2.5 hours
Costs: $5 Parking Fee, deposit payment onsite
Location: Blue Lake Trailhead along North Cascades Highway
Details:
If you go on the weekday, there should be space in the parking area. If you go on the weekend, it will be packed and you may need to park somewhere along the road.
Once on the trail, it is a pretty quick 2.5 miles up to the top with lovely views and a moderate incline (~1,000 feet). At the top, there are a ton of spots around the lake where you can find a place to sit down and relax.
The water is absolutely beautiful. However, it is very cold! I did manage to get all the way in but only for about 10 minutes before I was frozen.
We did see a mountain goat at the top! It was right on the rock where most people were sitting when we initially arrived. While it may look cool in the pictures, it was pretty scary in real life when you see the size and sharpness of its horns! Be prepared for that just in case – we had our bear spray out and ready to go if it charged at us, which, luckily, it didn’t. A fellow hiker told us we should throw rocks near it – but we were a little bit too scared to try that. Instead we were opting for jumping into the water if it got any closer (at that point in time, it was about 10 ft away).
Recommendation:
I would recommend going in the afternoon since that is the hottest time of day and you’ll be most likely to get in the water. The lake is also lit up beautifully in the afternoon – perfect for pictures.
View once you walk around the lake about 0.2 miles. There are plenty of areas along the lake to find your own spot.
The mountain goat we came across. Previously we had actually been sitting up on this rock, but it came up and chased us off.
Took about 10 minutes for me to get all the way in the water - and by that point I was very cold! I recommend just getting in.
Right at the top you’ll see the lake, as you walk further around, the mountains will start coming in to view and the lake will open up more.
Day 3
Float the River, Lunch in Winthrop, & Sunset Picnic
On Day 3, you may need a respite from all the hiking – we definitely did. Enjoy the beautiful Mazama area, venture over to Winthrop, and, if you’re game, make a delicious spread to enjoy sunset in Mazama. The river float is somewhat weather-dependent. During the summer months, most days are around 80 degrees and the area starts warming up by 11am with the hottest time of the day being around 2-3pm.
9:30 am Morning Yoga at the Cabin + Brunch
10:30 am Drive to Winthrop
11:00 am Explore Winthrop & Find A Tasty Place for Lunch
11:30 am Eat Lunch
12:30 pm Head Back to Mazama
1:00 pm Get Ready to float the river (pack snacks, drinks, and maybe a good book)
1:30 pm Float in the river, read your book, and/or enjoy your beverage
5:00 pm Prepare your sunset spread
6:00 pm Enjoy the Sunset & your Spread
7:30 pm Hot Tub
9:30 Stargazing
Lunch In Winthrop
Photo Credit: Stillhowlyntravels
Time Needed: 1.5 hrs
Costs: Lunch / Shopping
Location: Winthrop, Washington
Details:
Winthrop is an adorable little town and, like Mazama, it’s nestled right alongside the river. There are a few shops to peek into with unique items and clothing. However, the biggest attraction here in my mind was the array of delicious-looking restaurants. It feels like a Westernized version of Leavenworth – a ton of bars and saloons that gives a “wild west” feel. We didn’t actually eat here. However, we did have a walk around and all the restaurants looked delicious (we had just eaten).
We did stop for a beer at the Old Schoolhouse Brewery, which had a spectacular view of the river.
Recommendation:
If you would prefer to stay in Winthrop where there are more options for eating out, the River’s Edge Resort looked amazing. There were a ton of little cabins all along the river and, my favorite part, each had its own private hot tub on the private deck. Cabin rates vary by type of cabin and weekday/weekend times but it looked like the range was from about $120 to $200 per night.
Float the River
Time Needed: 2-3 hours; this could be an all-day activity but if you just want to do a fun, cool-off float, I recommend a few hours in the afternoon.
Costs: Free
Location: Find a spot along the Methow river
Details:
The Methow river runs right alongside Mazama. It was pretty low in late August when we arrived there – but it was still super fun to relax in. It’s a wide river with lots of spots to choose from along the river bank. You can park alongside the bridge that runs into town (about 3 minute drive from the Mazama Ranch House) and then walk alongside the river until you find a spot you like.
Recommendation:
Bring a floatie!
You could also walk to the river from the Mazama Ranch House. However, if you have quite a bit of stuff to carry, it’s definitely easier to just drive over and park right alongside the river.
We brought our floaties to sit in! It was perfect to be half submerged in the water.
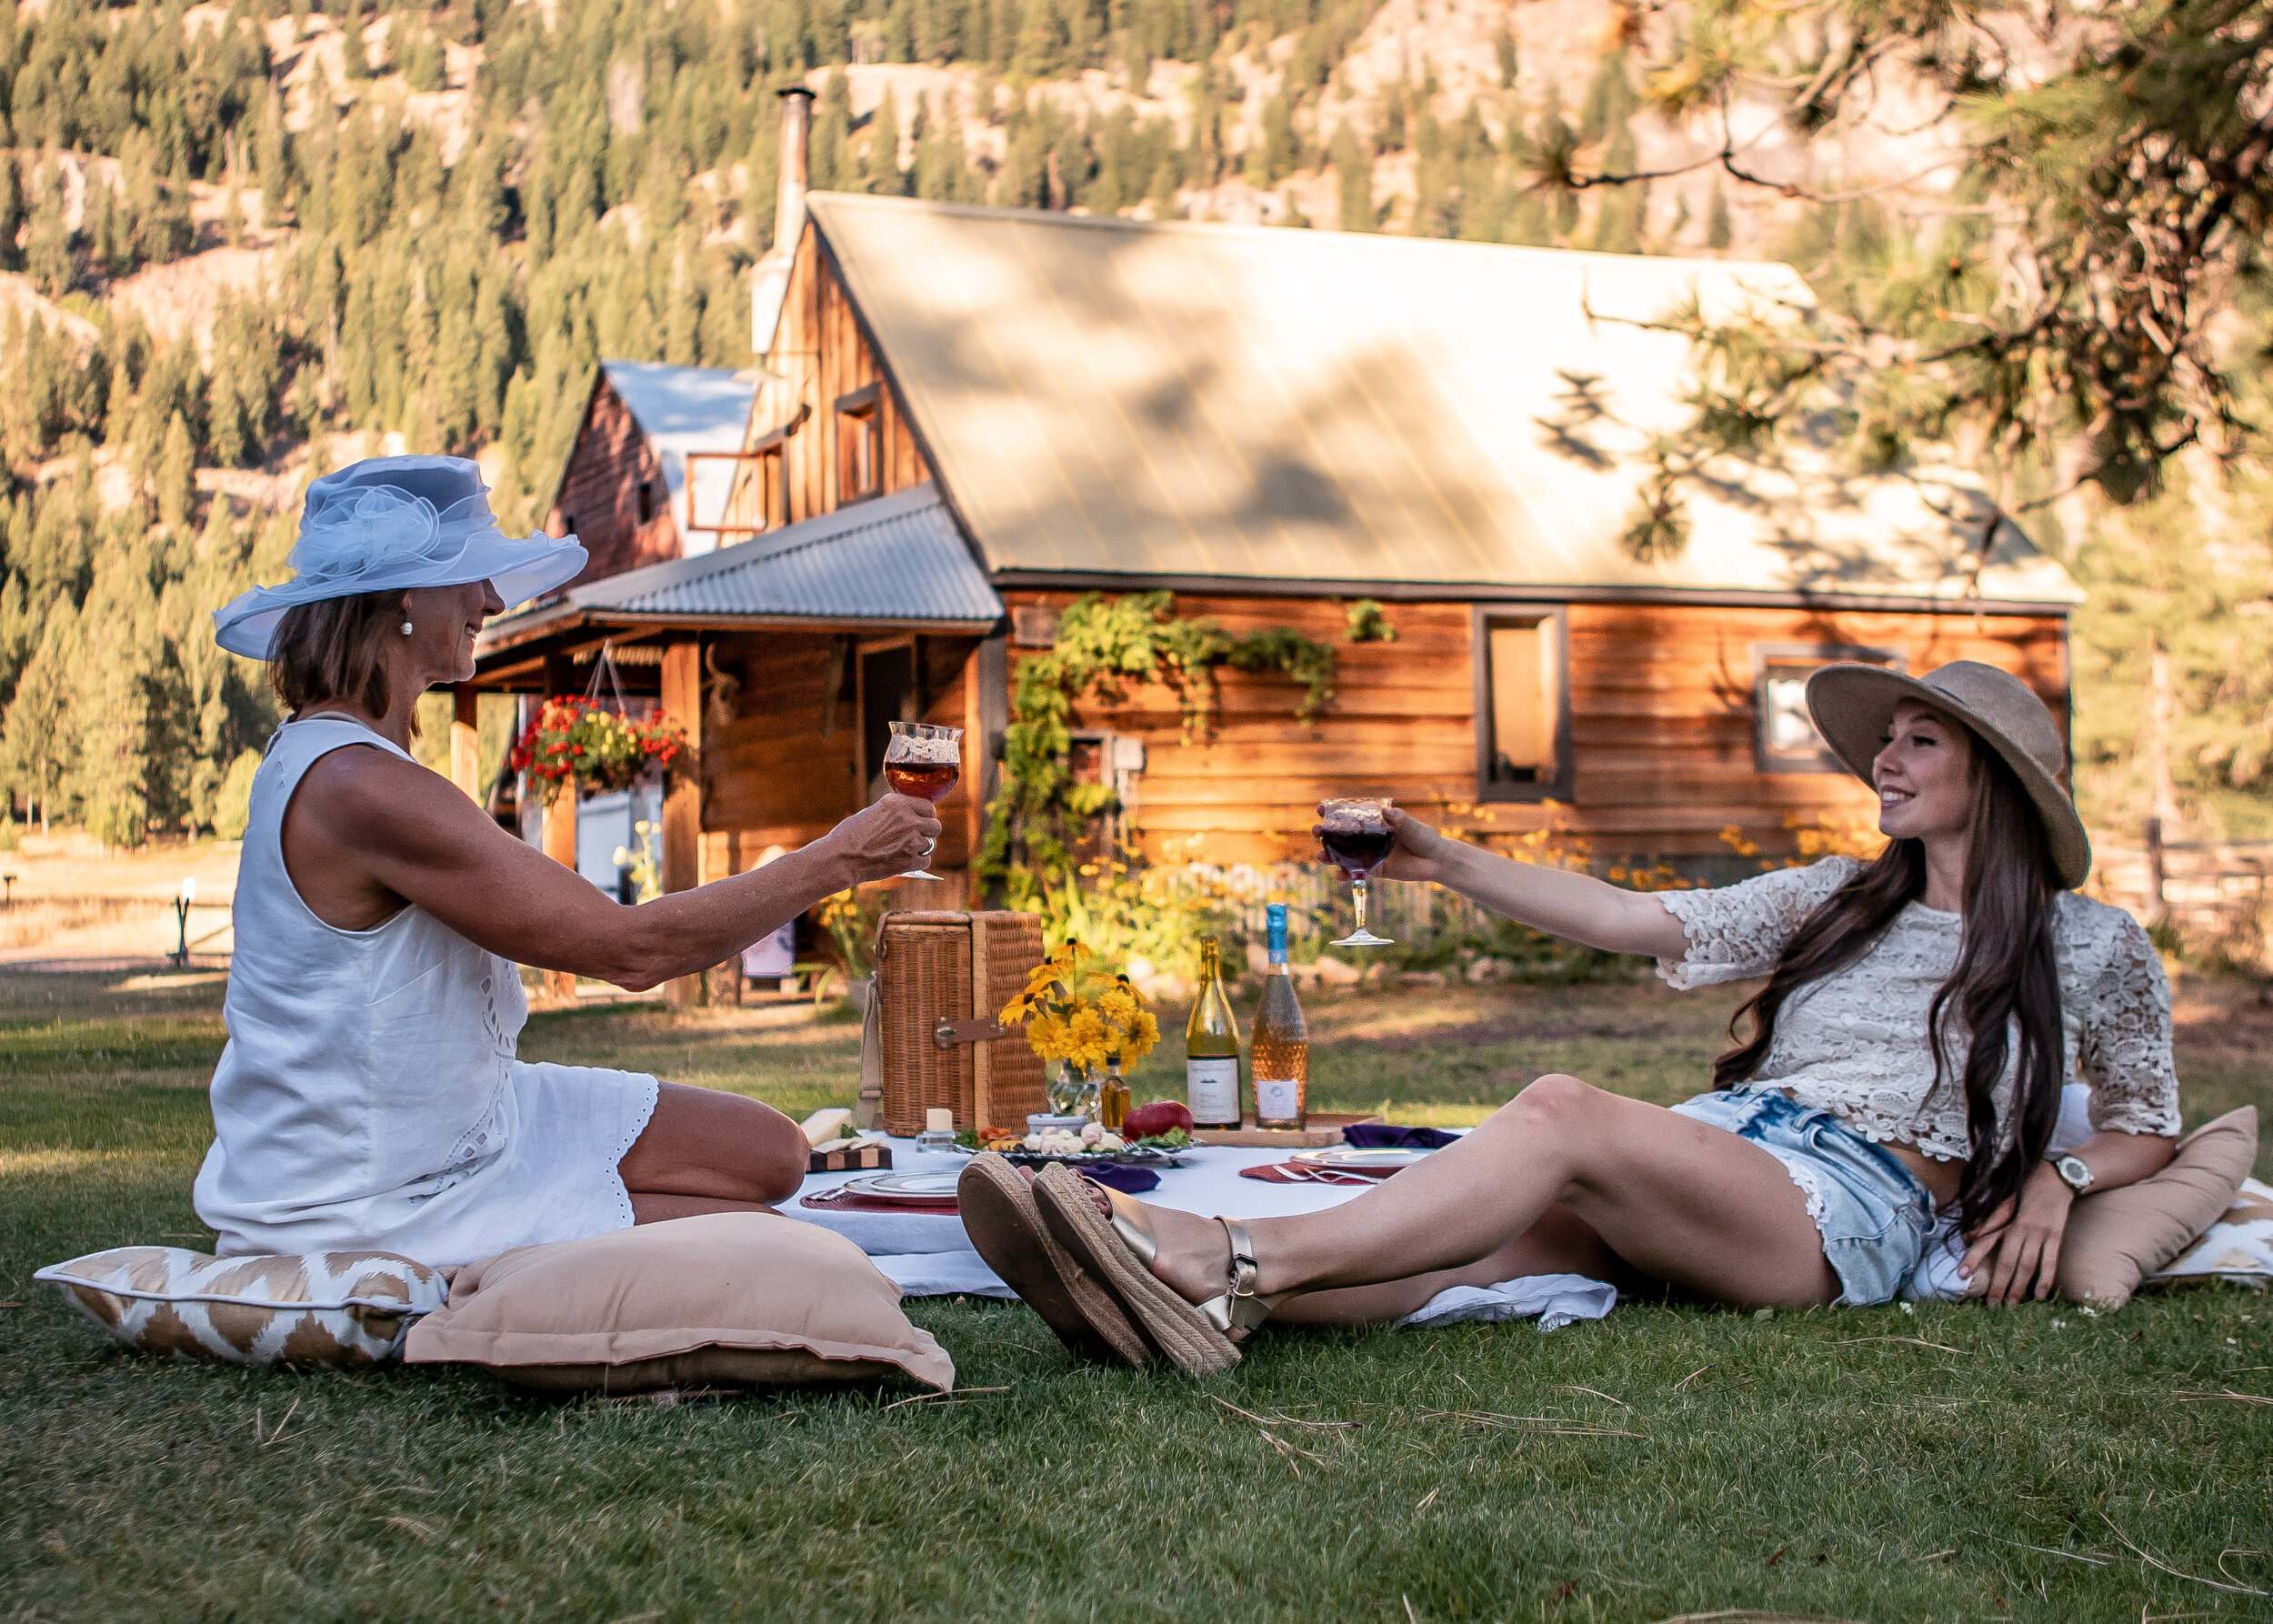
Sunset Picnic
Our lovely picnic spread with the cabin in the back.
Time Needed: 1 hr setup, 1 hr to enjoy the meal
Costs: $15 per person for fresh produce at the local grocery store
Location: Mazama Ranch House
Details: The Mazama Ranch House is the perfect place to enjoy a lovely sunset picnic right outside of the cabin. Below are a few of my favorite options for spreads. We did option 1, a Mediterranean-themed dinner complete with salmon, fresh veggies, hummus, and olive oil, as well as a little cheese & cracker spread on the side.
Recommendations:
Buy fresh, delicious ingredients at the Mazama Grocery Store across the street!
Grab your favorite beverage, such as a wine, juice, or beer to accompany the meal.
Either set up on one of the picnic tables around the cabin, or bring your own board to enjoy your spread in the grass. I love doing spreads and have gotten into the habit of bringing a square board and tablecloth whenever I go on trips so I can set up a spread in the grass and have it be stable (important when you’re drinking wine or other liquids that fall over easily and stain).
Spread Options
(Taken from Shelly WesterHausen’s Platters and Boards Beautiful, Casual Spreads for Every Occasion. Find more ideas here):
Mediterranean Platter (pictured): Perfect for a started at your next gathering or as an easy dinner for two.
Hummus is an ideal building block for a healthy and simple platter since it serves as a nice source for good fats and pairs well with vegetables. We spiced our hummus up by adding a bit of beet juice to give it this beautiful pink color!
For some protein, pair this with Salmon Rolls with goat cheese sprinkled on top.
Select your favorite vegetables. We got tomatoes, beets, cauliflower, and carrots from the Mazama store. All were so fresh and delicious.
Add a little oil, vinegar, basil, and ground pepper on the side to give everything some additional flavor.
Serve it with a simple red win or sangria.
Additional ideas include olives, marinated peppers, pita slices, mixed nuts, red seedless grapes.
Grill Out Platter: Take advantage of the beautiful summer evening and fir up your grill.
Choose your favorite veggies to grill. Husked corn, bell peppers, cherry tomatoes, onion, zucchini, and romaine.
Whisk together olive oil, vinegar, oregano, red pepper flakes, salt, and pepper. Marinate your veggies in this mix in the refrigerator for a few hours.
Preheat a charcoal grill to low heat, using the hand test as a guide. Hold your hand about 4 in above the coals and see how long you can comfortably keep it there. For low heat, 8-10 seconds.
Transfer the veggies from the marinade to a grilling basket and grill them until they begin to brown (time varies so keep an eye on them).
For an easy all-American option, fire up some brats on the grill.
Keep things light and refreshing with a few ice-cold beers.
Stargazing

You can see where the light from the moon (behind the tree on the right) is adding a lot of light to the night sky! Stars are still visible though.
Bring your yoga mats and lie outside! There are a number of different apps that can help you find the constellations and take your stargazing to a whole new level.
The stargazing is best the further it is from a full moon. With a semi-full or full moon the light will get in the way of being able to see all the stars clearly. We had a 3/4 full moon and there was definitely a lot of light coming from the moon – however, it was still a fun experience laying outside on our yoga mats.

Day 4
Hike Goat’s Peak Trail, then head home
8:00 am Wake up & Pack
9:00 am Drive to Goat’s Peak Trail from Mazama
9:45 am Hike Goat’s Peak Trail
10:45 am Enjoy the view from the top!
11:15 am Head back down
12:00 pm Drive Home
Goat’s Peak Trail
Blue Lake at around 3pm. While it looks somewhat green in the photo, the lake changes color as you walk around it, going from a green when it first comes into view, to a beautiful aqua further on, and a deep blue when you’re in it (BRRRR).
Time Needed: 2 hrs for the hike + a snack at the top
Cost: Free
Location: Goat’s Peak Trailhead (look at the map carefully before going)
Details: The trail is shorter but steeper. It’s about 2 miles up with steep inclines about 50% of the hike for a total elevation gain of 1,420 ft. The views at the top are definitely worth it though. There is a beautiful fire lookout and beyond you can see the beautiful mountains.
Recommendations:
Once you reach the gravel road that leads up to Goat’s Peak trail, you’ll have about 11 miles of slower going in your car. While it’s doable (no big potholes), it does take longer, so build that in to your schedule.
Make sure you look at the map ahead of time so you know how to get to the trail-head. It was a little bit longer than we thought it would be and we almost turned around right before getting to the last turn in the road.
Bring your hiking poles to help with the incline!
This hike could be done at any time of the day since it’s pretty short and you’ll be at the very top where the views will be great for both sunrise and sunset. However, because it is a pretty steep trail, I recommend going in the morning so you can enjoy the cooler air as you get to the top.
You hike down a short hill and then right up to the Fire Lookout Beyond. Beautiful panorama of the mountain the whole last 1/3 of the hike.
The view from the other side looking away from the Fire Lookout. Beautiful clean air and no obstructions.

Any questions or suggestions?
I always love hearing from people - reach out if you have any comments or questions. If you do use this itinerary, let me know how it works out. Enjoy!